
Published on September 21, 2024
How to Export Layers to Files in Photoshop (Quick Method)
Need to export layers to files in Photoshop quickly and efficiently? In this step-by-step tutorial, you’ll learn how to use the built-in Export Layers to Files feature in Adobe Photoshop to save each layer as an individual image in just a few clicks.
This method is perfect for designers who want to batch export layers as PNG, JPG, or other formats without manually saving each file. This Photoshop export layers method will help you streamline your workflow and save valuable time. So let’s get started!
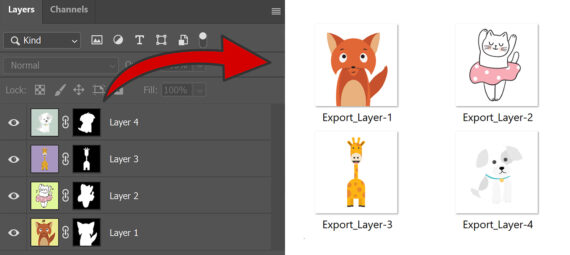
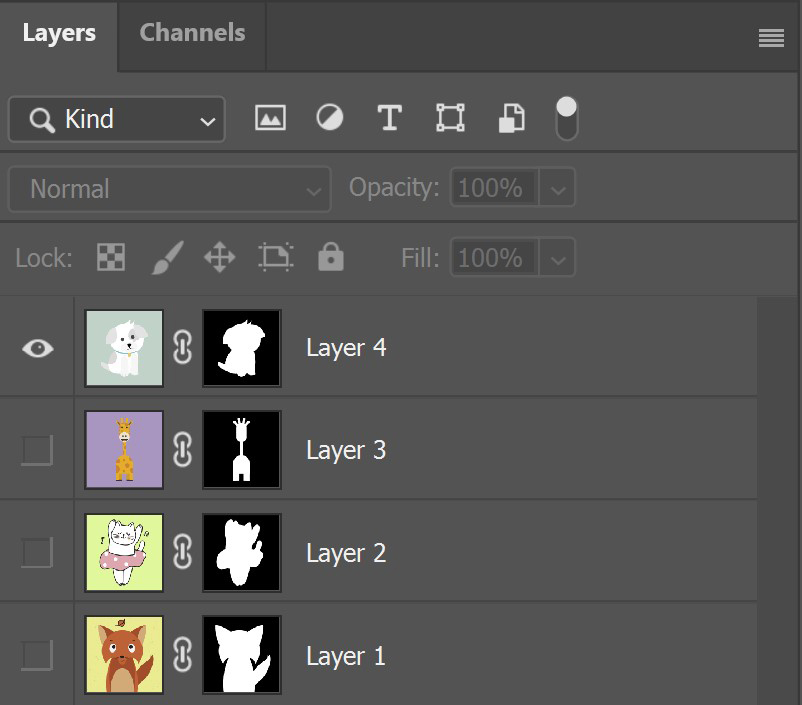
First edit your layers. I removed the background of these images and now I want to export each layer as a file.
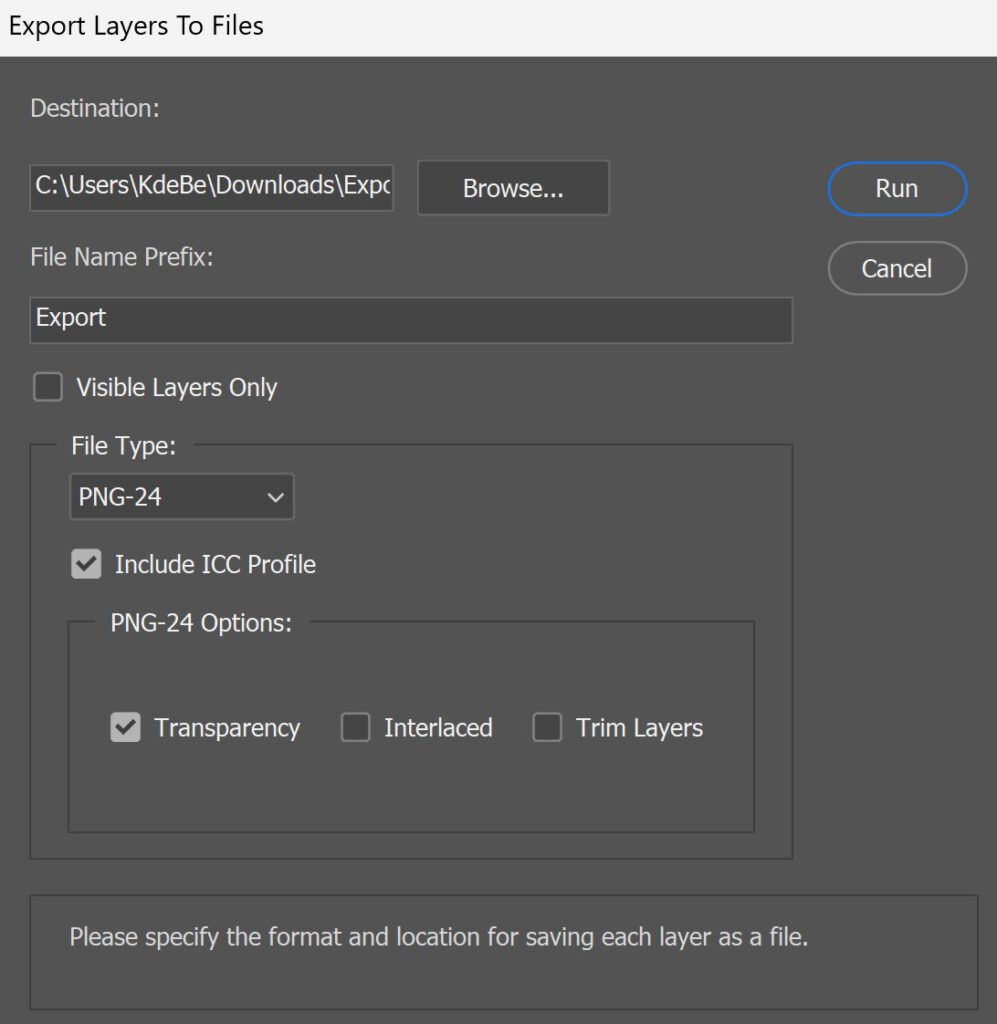
Go to ‘File > Export > Layers to files’.
Select the file destination and a file name prefix. Then select if you want to export all your layers, or only the visible ones.
Choose a file type and select the settings you need. Then select ‘run’ to save your layers as files.
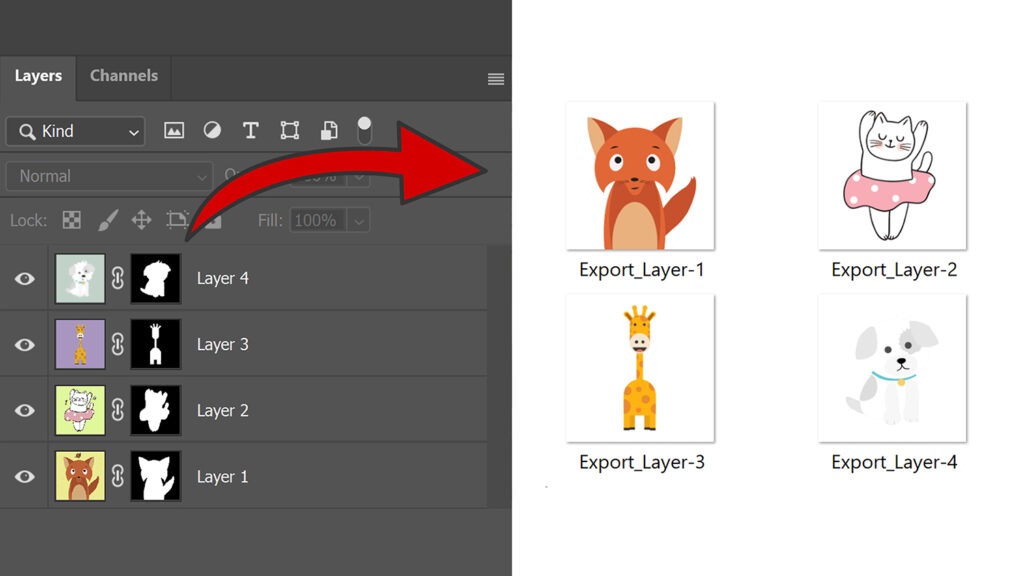
If you open the folder you selected as the destination, you will find your layers there as files!
And that’s how you quickly export your layers to files in Adobe Photoshop.
Learn more about Photoshop
Check out my other blogs and my YouTube channel if you want to learn more about editing in Adobe Photoshop!
Follow me on Facebook if you want to stay updated about new blogs and tutorials!
Photoshop
Basics
Photo editing
Creative editing
Camera Raw
Neural filters
Text effects