

Published on October 19, 2024
Grainy text effect
Want to create a vertical grain text effect in Adobe Photoshop? In this step-by-step tutorial, you’ll learn how to add grainy lines to your text using simple filters and techniques. This Photoshop text effect is perfect for posters, social media graphics, and modern designs that need a textured look.
Rather watch the video with instructions? Click here to open the YouTube video or scroll down to the end of this page.
Vertical grain text
First create a new document. My file is 1920 x 1080 pixels.
Use the horizontal type tool to type your text. Then select both the text layer and the background layer. Right click on the selected layers and select ‘convert to smart object‘.
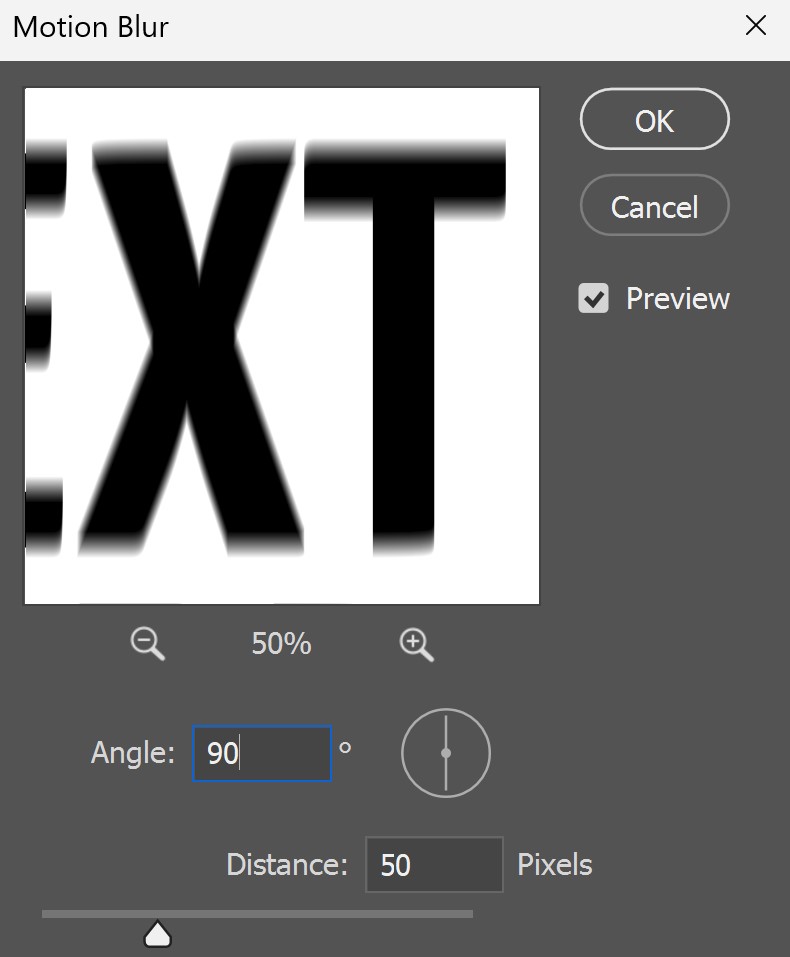
Then go to ‘Filter > Blur > Motion blur‘. You can find the settings I used in the image below.
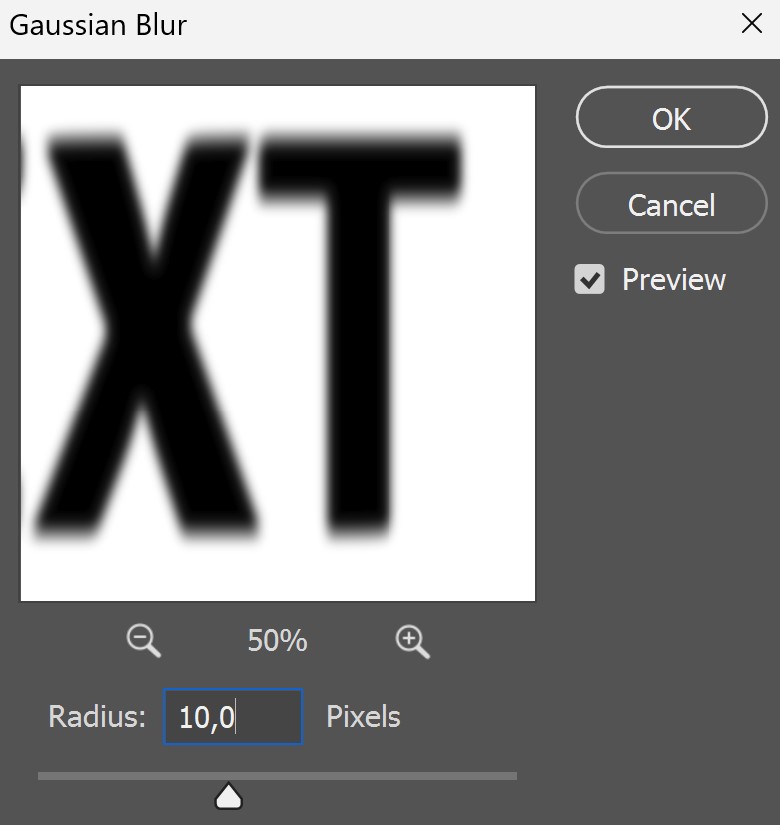
Go to ‘Filter > Blur > Gaussian blur‘. Again you can find the settings I used in the image below.
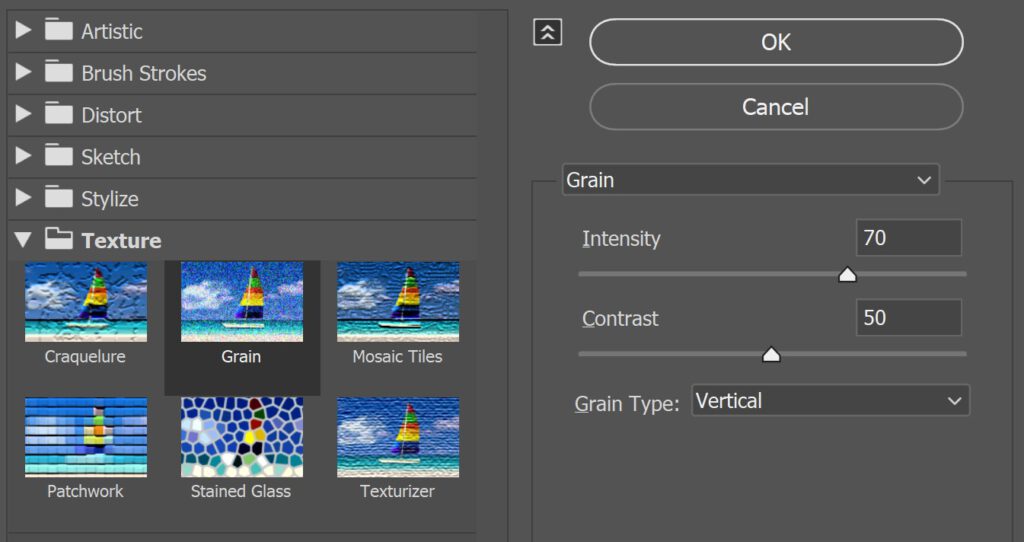
To add the grain, navigate to ‘Filter > Filter gallery‘.
Select grain (under texture). Make the grain type vertical and adjust the intensity and contrast to your liking.
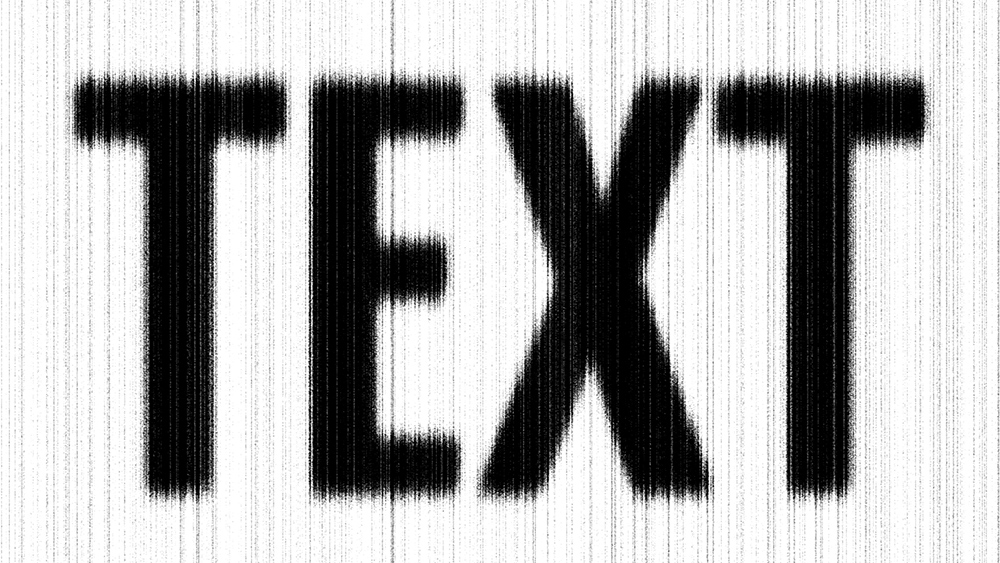
And that’s how you add vertical grainy lines to your text in Adobe Photoshop!
Learn more about editing in Photoshop
Check out my other blogs and my YouTube channel if you want to learn more about editing in Adobe Photoshop!
Follow me on Facebook if you want to stay updated about new blogs and tutorials!
Photoshop
Basics
Photo editing
Creative editing
Camera Raw
Neural filters
Text effects