Published on March 17, 2023
Create an outline around your subject
In this blog I’ll show you how to add a outline / stroke to your subject in Adobe Photoshop.
Rather watch the video with instructions? Then click here or scroll down to the end of this page.
You can download the photo I used here.
Step 1: Select and mask subject
Open the photo you want to edit. Then press CTRL+J to duplicate the background layer.
Navigate to ‘Select > Subject‘. Photoshop will then select the subject for you. If you want to use another method/tool to select your subject, that’s fine too!
When the subject is selected, create a mask. The subject is now masked.
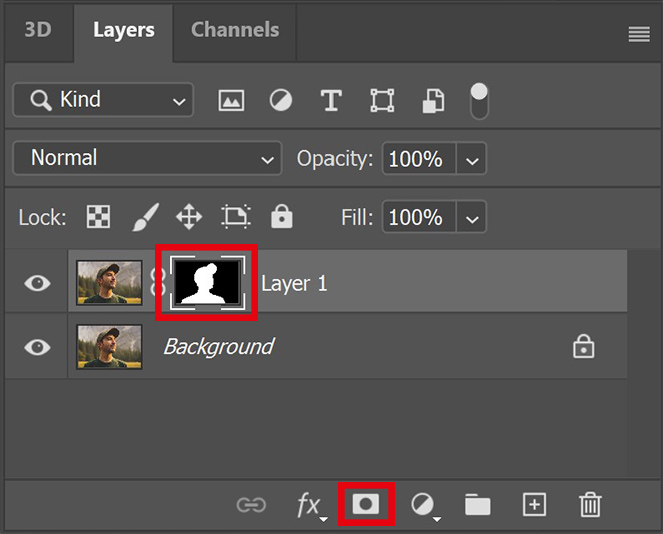
Step 2: Add outline to subject
Click on the fx icon below your layers and select ‘stroke‘.
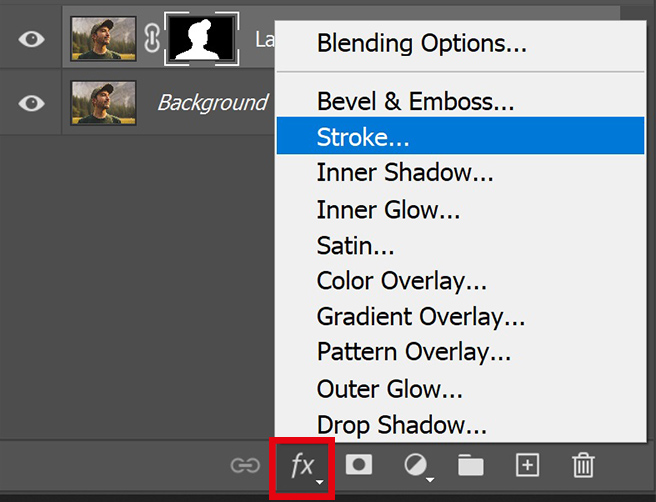
You can find the settings I used in the image below. Adjust the stroke size to change the thickness of the outline. I make the stroke white, but you can also use a different color. Click on the color box to pick a color.
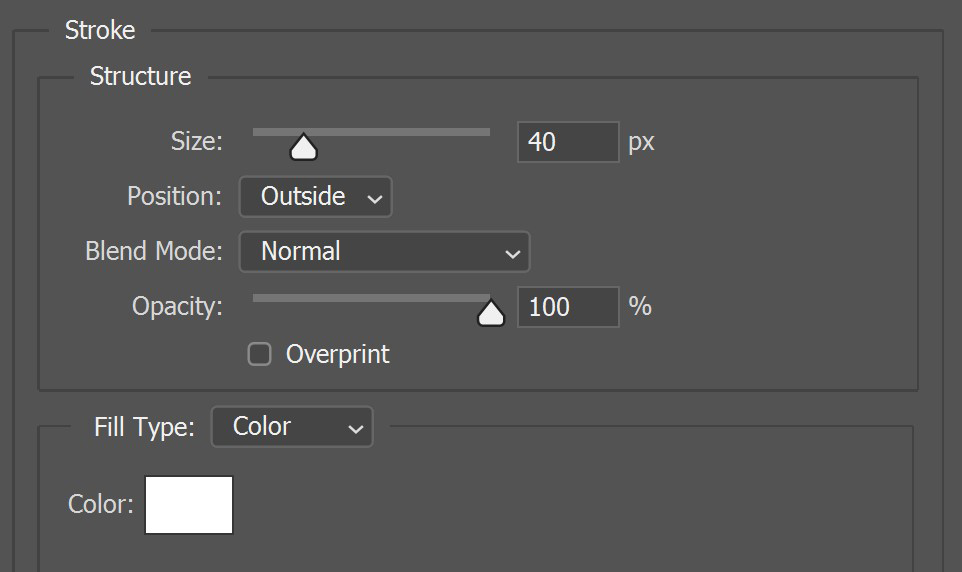
As you can see in the image below, the stroke is pretty rough and jagged right now. In the next step I’ll show you how to fix that.

Step 3: Smoothen outline
Click on the layer mask and select ‘select and mask‘.
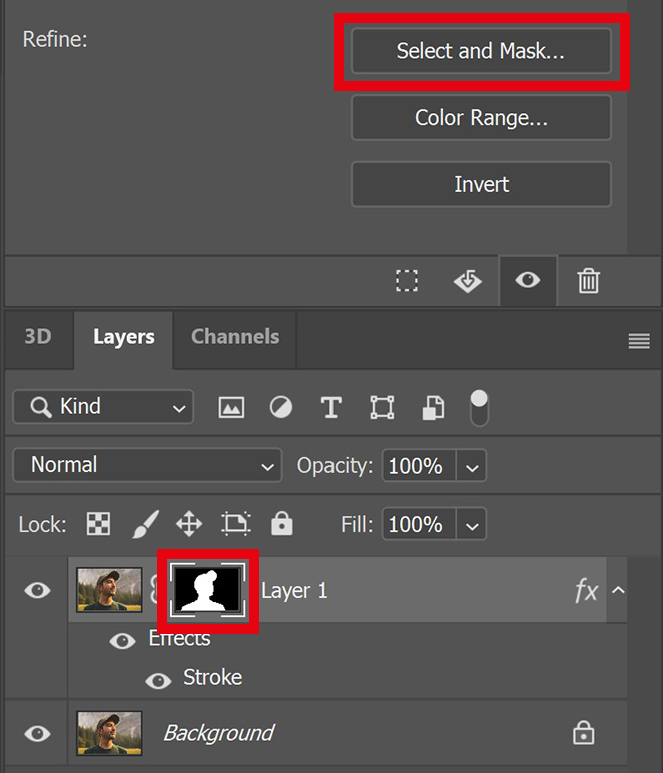
I increase the smoothness (smooth slider) and I select ‘decontaminate colors‘. This will make the selection smoother, and therefore the outline will be smoother too.
You can also use the quick selection tool to select or deselect certain areas. I want to deselect the eyelashes. Press and hold ALT to subtract.
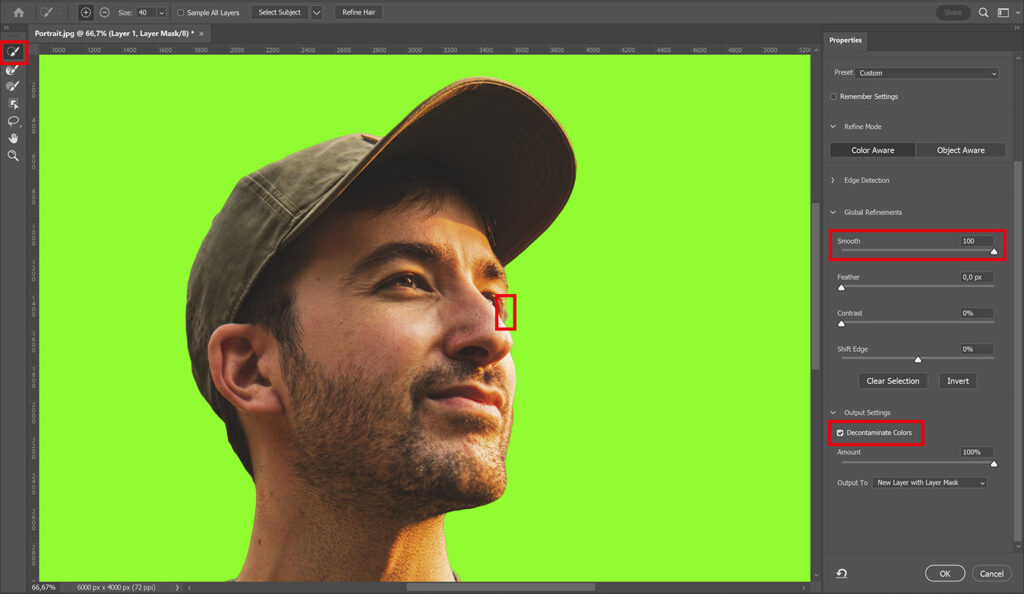
Click OK. You will see that the outline is much smoother now. To adjust the outline, double click on the ‘stroke’ layer.
And that’s how you outline your subject in Adobe Photoshop!

Learn more about Photoshop
Check out my other blogs or take a look at my YouTube channel if you want to learn more about Adobe Photoshop!
Follow me on Facebook to stay updated about new blogs and tutorials! You can find the video with instructions below.
Photoshop
Basics
Photo editing
Creative editing
Camera Raw
Neural filters
Text effects

