Published on January 29, 2022
Bended street effect in Photoshop
In this blog I’ll show you how to create a bended street effect in Adobe Photoshop.
Rather watch the video tutorial of this process? Click here or scroll down to the end of this page.
To download the image I used, click here.
Step 1: Selection
Open the image you want to edit. Then select the rectangular marquee tool and select the bottom part of your image. This is the area that will get bended.
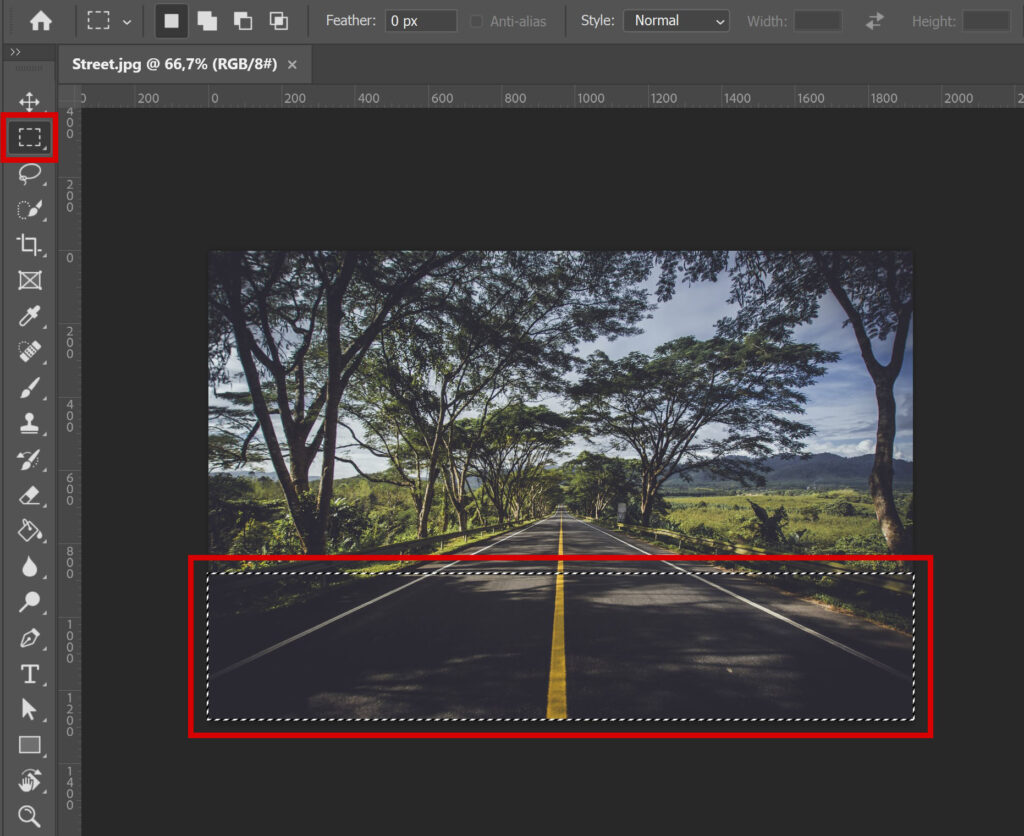
Press CTRL+J. You now have a new layer that only shows the bottom part (the area you just selected).

Step 2: Bended street
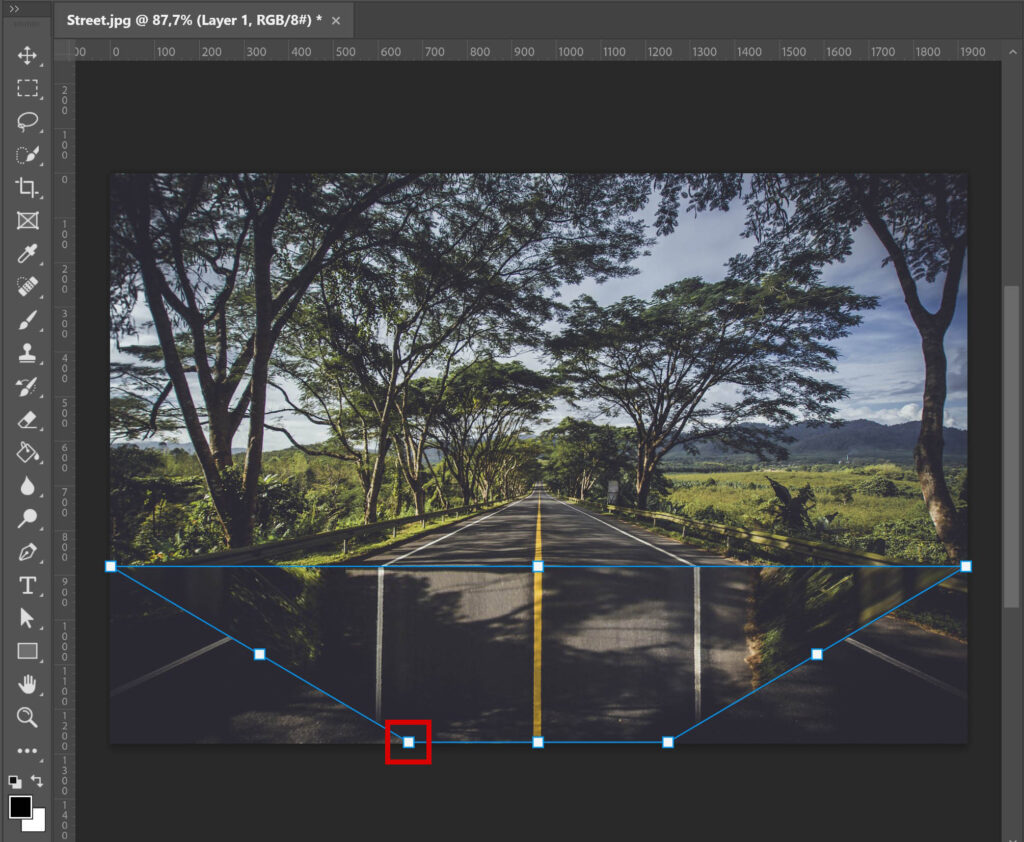
Select this new layer. Then navigate to ‘Edit > Transform > Perspective‘. Drag the bottom left corner towards the middle, until the lines on the street go straight down. Click the ✓ icon when you’re done.
Step 3: Crop image
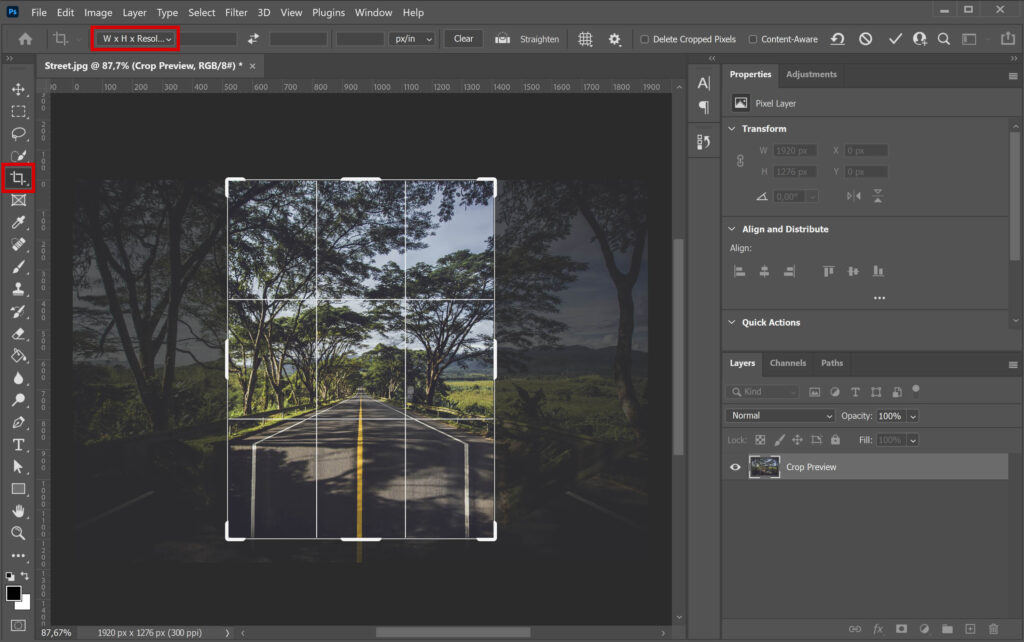
As you can see, the bottom corners of the image look strange after changing the perspective. To get rid of these areas, we’re going to crop this image.
Select the crop tool. Pick the ratio you want/need or select ‘W x H x Resolution’ to create a different ratio. Crop the image so you lose the deformed areas.
Step 4: Gradient overlay
Make sure the foreground color is black. You need this to create the gradient.
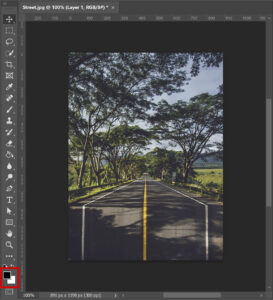
Double click on Layer 1 (or click on the ‘fx’ icon at the bottom of your layer panel and select ‘blending options’) to open the layer style window.
Select ‘gradient overlay‘. You can find the settings I used in the image below. The gradient I used is the ‘Foreground to transparent‘ gradient, you can find this in the basics folder.
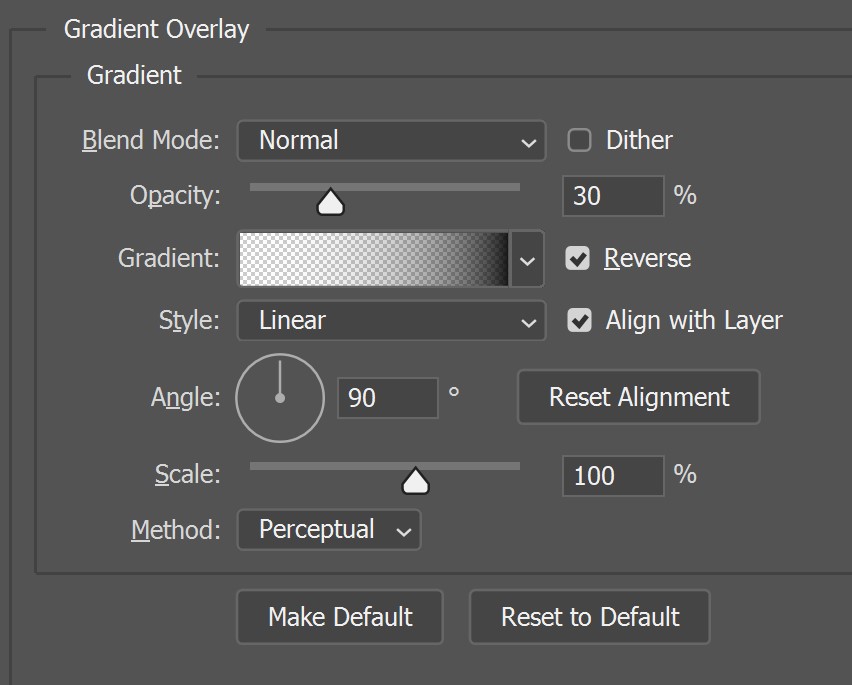
By adding this gradient overlay, you create a shadow where the street ‘bends’.
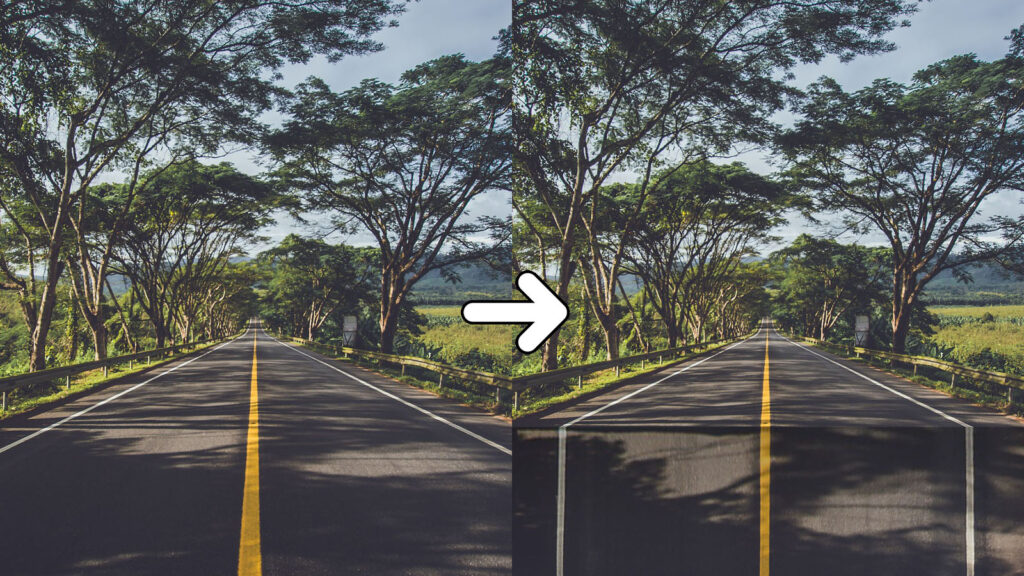
And that’s how you create a bended street in Adobe Photoshop! You can find the result below.
Want to learn more about Adobe Photoshop? Check out my other blogs or take a look at my YouTube channel.
Follow me on Facebook to stay updated! You can find the video tutorial below.
Photoshop
Basics
Photo editing
Creative editing
Camera Raw
Neural filters
Text effects

