
Published on January 23, 2022
Blur background in shape
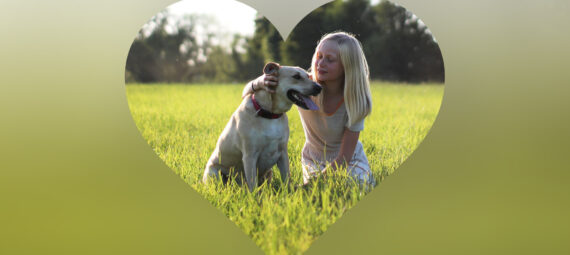
In this blog I’ll show you how to create a blurry background in any shape using Adobe Photoshop!
If you’d rather watch the video tutorial of this process, click here or scroll down to the end of this page.
Download the images I used:
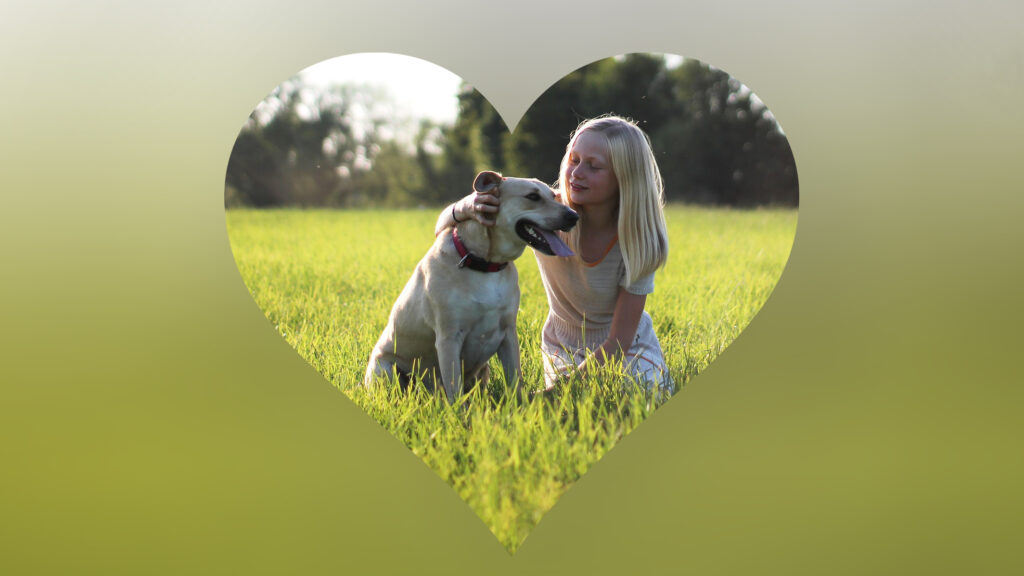
Girl with dog
Heart
Step 1: Prepare your image
Open the image you want to edit. Press CTRL+J to duplicate the background layer.
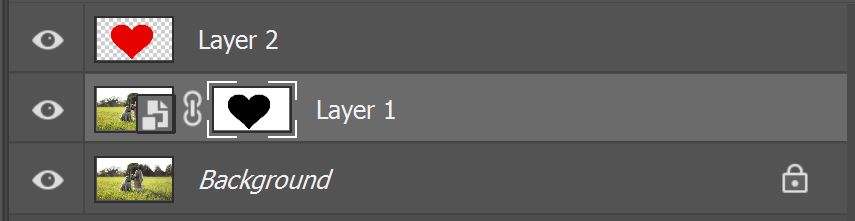
Right click on the layer copy and convert to smart object. Your layer panel should look similar to the one below. You can tell Layer 1 is a smart object because there’s an icon in the thumbnail.

Then open an image of a shape. You can use any shape you like, but it should be a PNG file with a transparent background. Want to learn how to convert a JPEG file into a PNG? Click here for the tutorial.
Select the move tool and drag the shape to the file you’re working on.
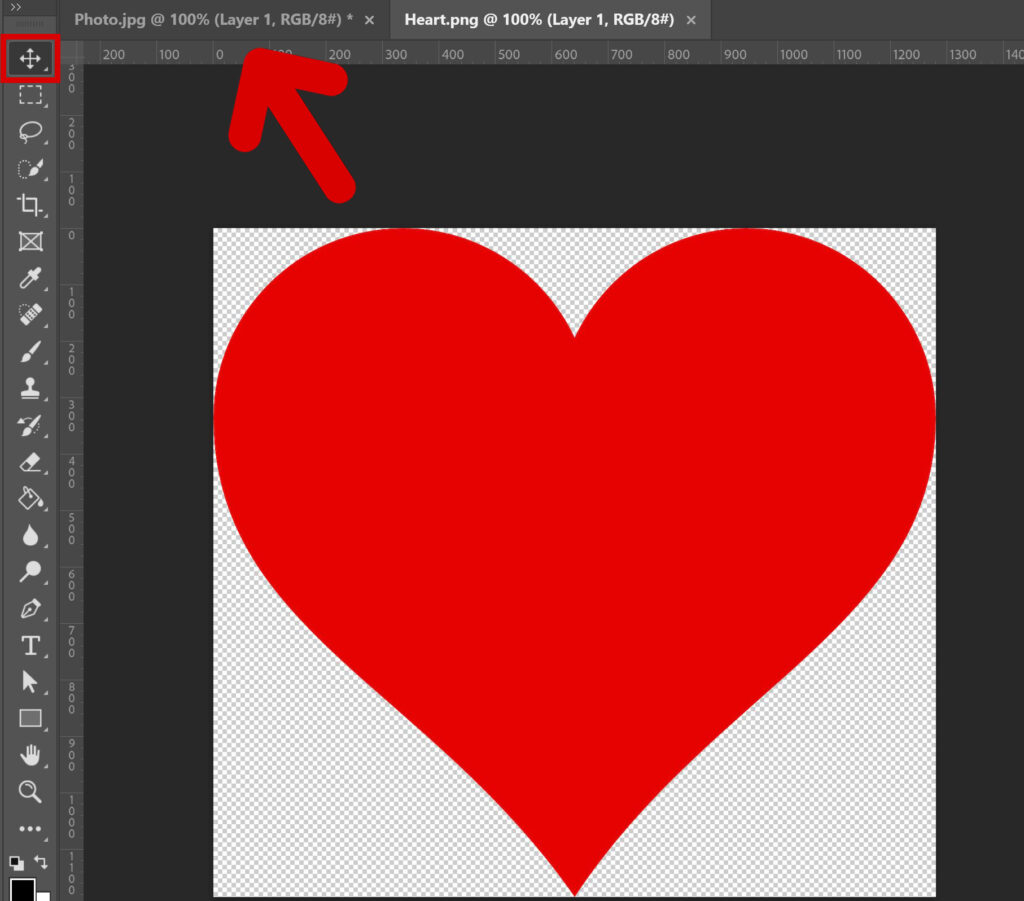
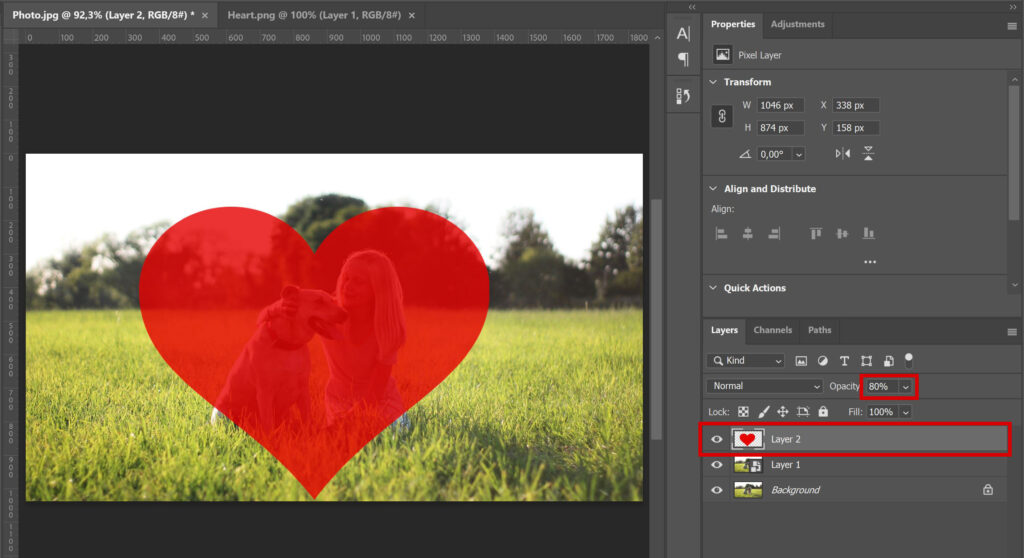
Place the shape over the image you’re working on. With the move tool selected, press CTRL+T to free transform. You can now resize your shape and pick the correct placement.
Lower the opacity of the shape layer a little bit. You can now see your image through it, which makes it easier to pick the correct placement.
Place the shape over the area that you don’t want to get blurry. Everything outside of your shape will be blurred.
Step 2: Layer mask
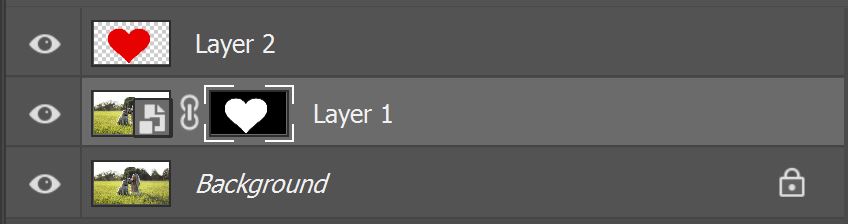
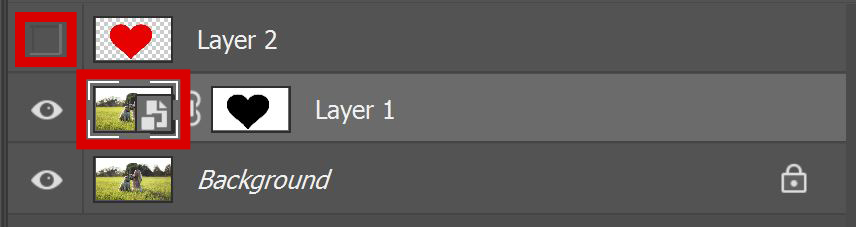
Hold your CTRL key and click on the thumbnail of your shape layer. You can see that the outline of your shape is now selected.

Now select Layer 1 and add a layer mask. The layer mask now has the shape in it.
If you keep the layer mask like this, the inside of your shape will be blurred. I want the outside of the shape to be blurred though. To change that, select the layer mask and navigate to ‘image > adjustments > invert‘ or press CTRL+I.
If you look at your layer mask now, the inside of the shape is black and the outside is white. The white areas will get blurred and the black areas won’t.
Make the shape layer invisible by clicking on the eye icon. Select Layer 1 by clicking on the thumbnail (make sure you select the thumbnail as shown in the image below and not the layer mask).
Step 3: Blur background
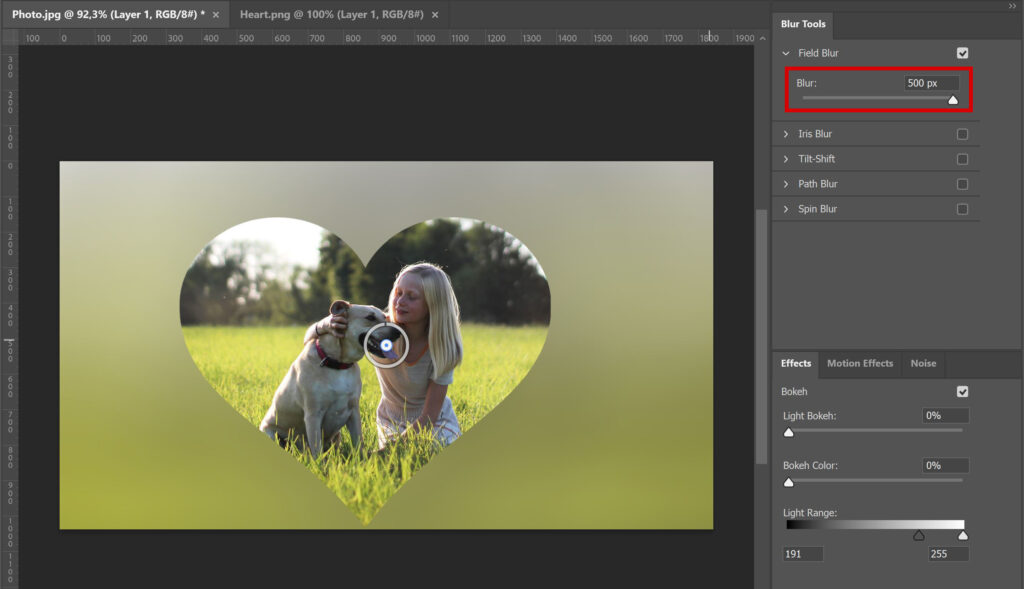
Navigate to ‘Filter > Blur gallery > Field blur‘. Increase the blur to an amount that you like, then press OK to apply the adjustments.
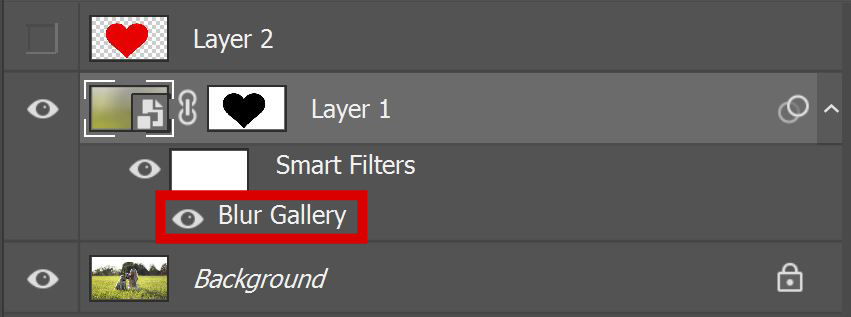
Because you converted Layer 1 to a smart object, you can adjust the amount of blur at any time. To do that, double click on ‘blur gallery’ in your layer panel.
And that’s how you blur a background in a shape or form using Adobe Photoshop!
Want to learn more about Adobe Photoshop? Check out my other blogs or take a look at my YouTube channel.
Follow me on Facebook to stay updated! You can find the video tutorial below!
Photoshop
Basics
Photo editing
Creative editing
Camera Raw
Neural filters
Text effects