
Published on July 13, 2024
How to Create a Gradient from a Photo in Photoshop (Step-by-Step Tutorial)
Want to create a gradient from a photo in Photoshop? In this step-by-step tutorial, you’ll learn how to extract colors from an image and turn them into a smooth, reusable gradient using Adobe Photoshop.
By using the Extract from Image feature, you can quickly sample colors and generate a custom gradient that matches your photo perfectly.
Rather watch the video with instructions? Click here to open the YouTube video or scroll down to the end of this page.
If you want, you can download the photo I used here.
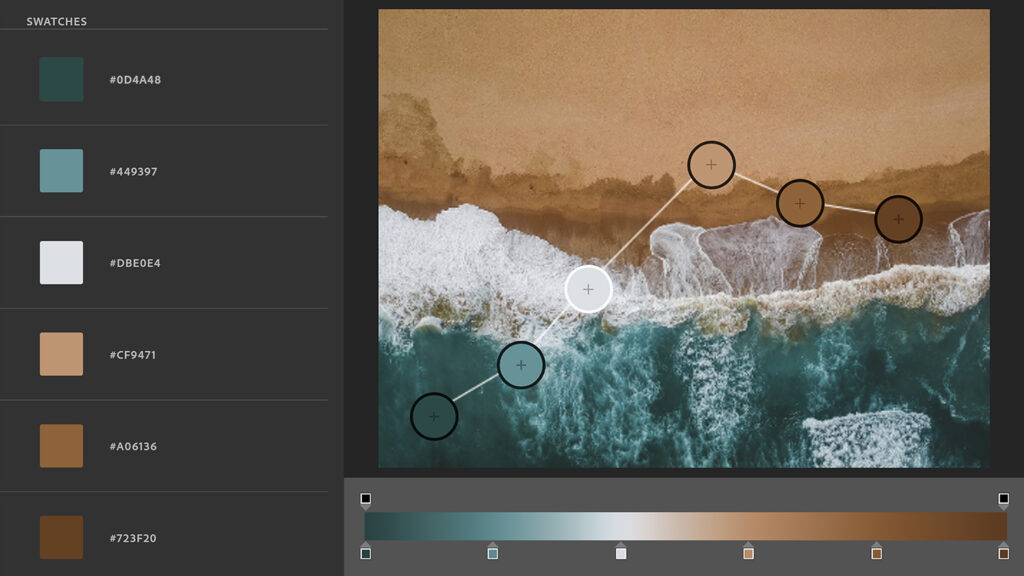
Step 1: Take color swatches
First open the file with the photo you want to use to create your gradient.
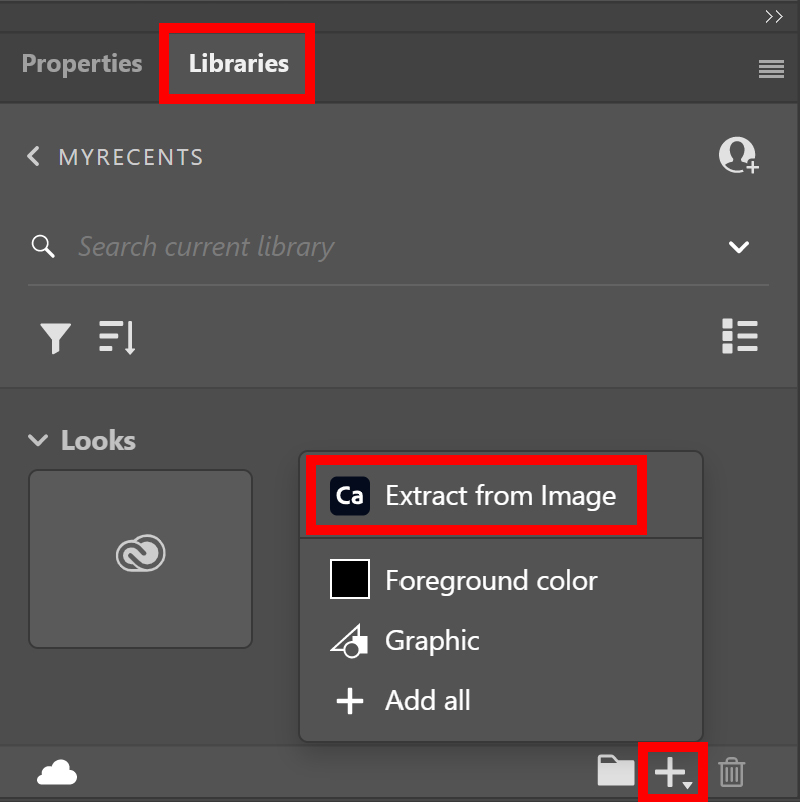
Then go to ‘window‘ in the top menu bar and select ‘libraries‘. Click on the + icon and select ‘extract from image‘.
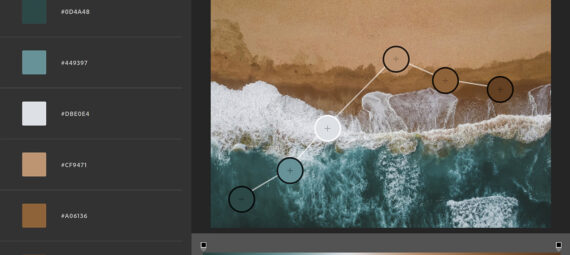
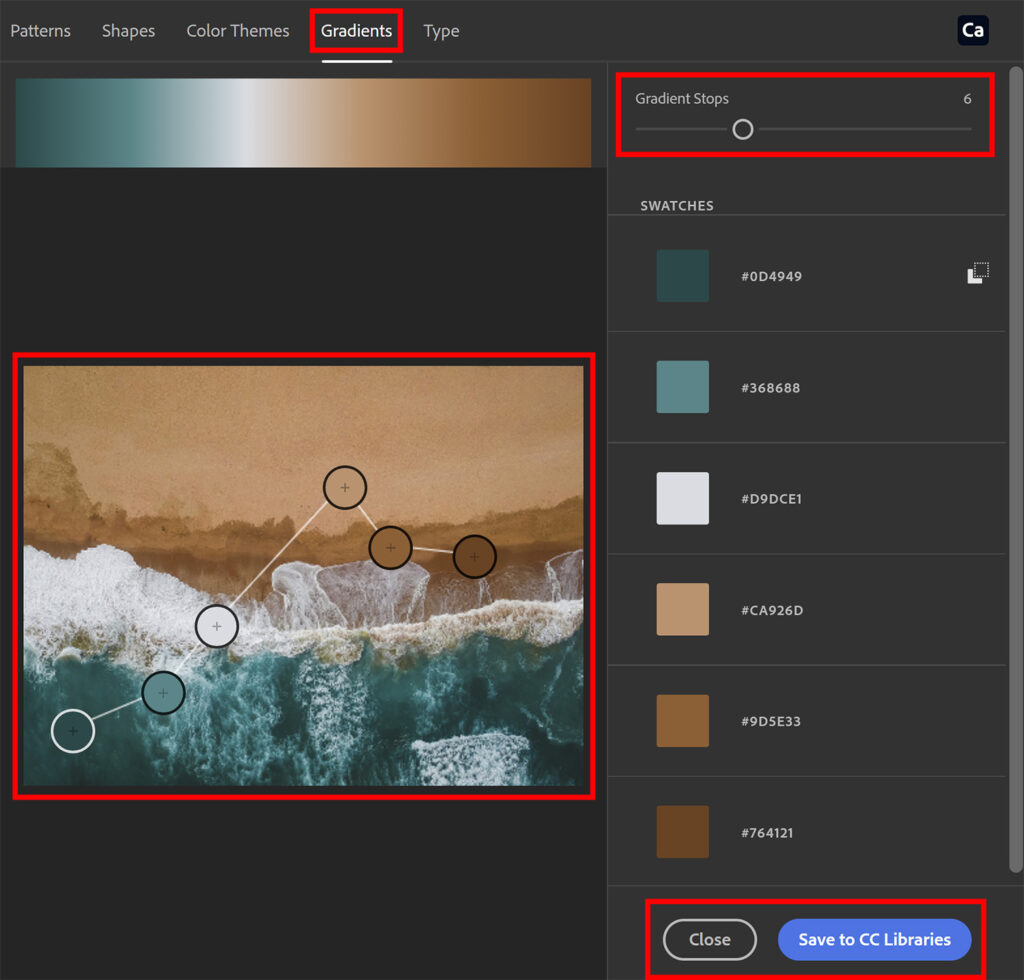
Select ‘gradients‘. Then select how many gradient stops you want to use.
You can now take color swatches by moving the color pickers inside of the photo.
When you’re happy with the gradient, select ‘Save to CC Libraries‘. You can then close this window.
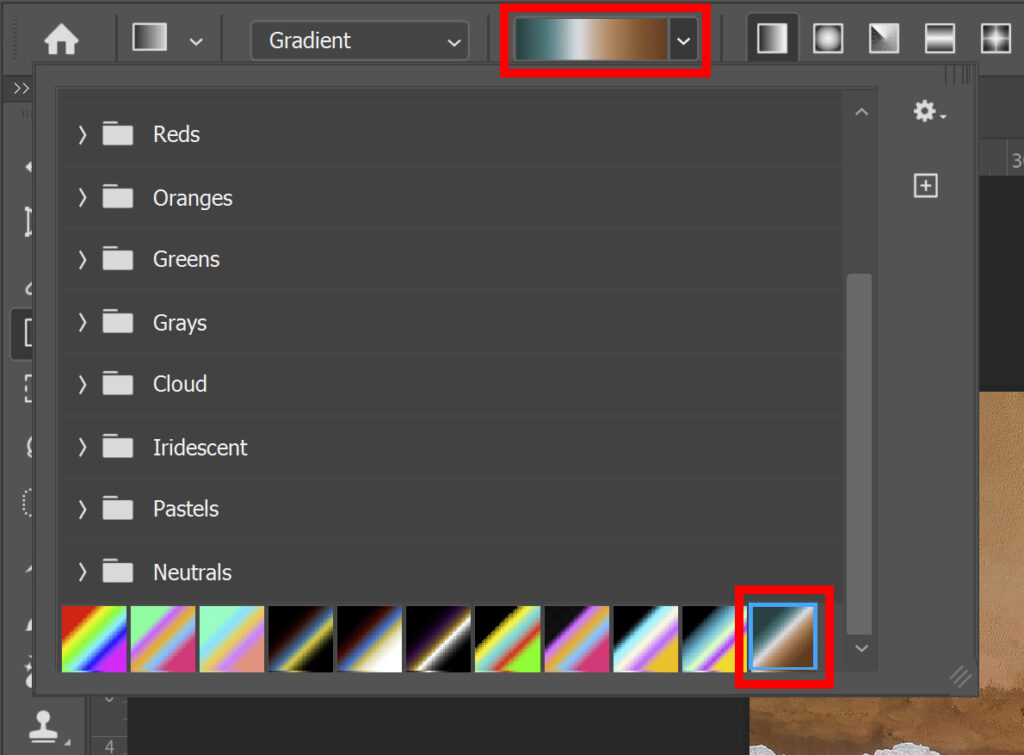
Step 2: Use the gradient
The gradient is now saved under ‘libraries’.
Right click on the gradient and select ‘create gradient preset‘.
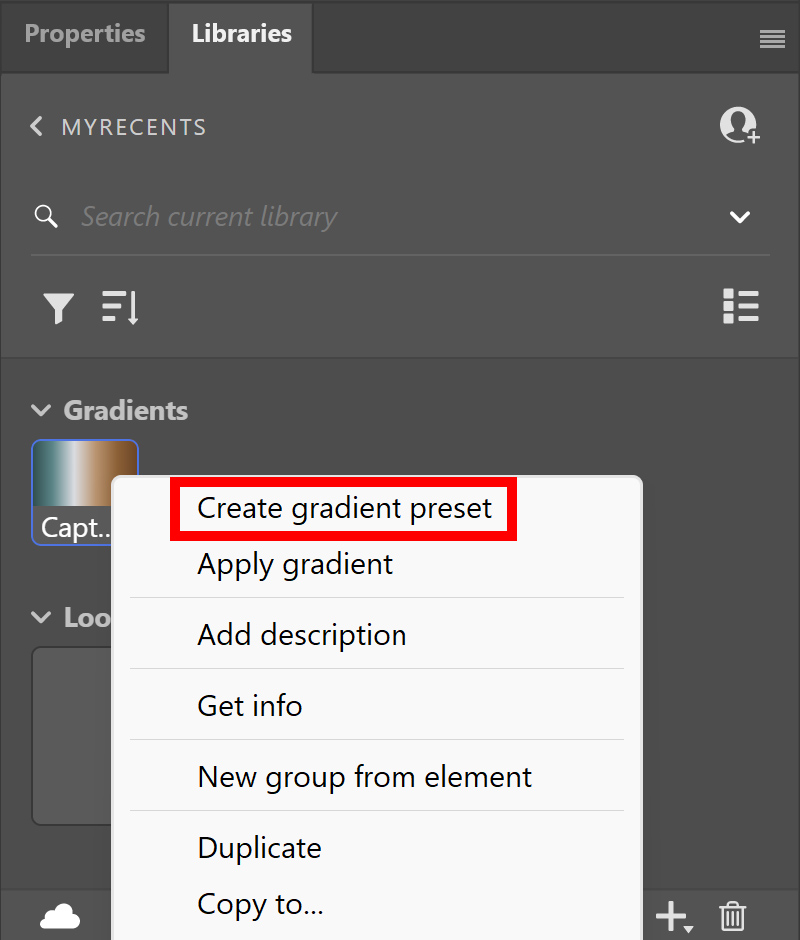
The gradient you just made is now saved as a preset and ready to use in your next project!
And that’s how you take color swatches from a photo or image to create a gradient in Adobe Photoshop!
Learn more about editing in Photoshop
Check out my other blogs and my YouTube channel if you want to learn more about editing in Adobe Photoshop!
Follow me on Facebook if you want to stay updated about new blogs and tutorials!
Photoshop
Basics
Photo editing
Creative editing
Camera Raw
Neural filters
Text effects