
Published on January 18, 2023
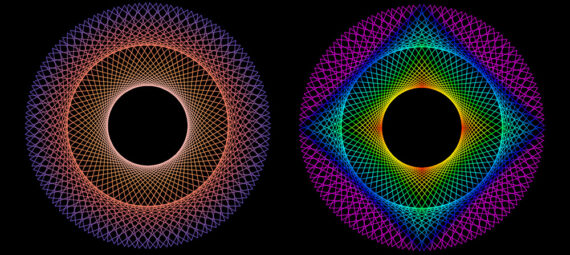
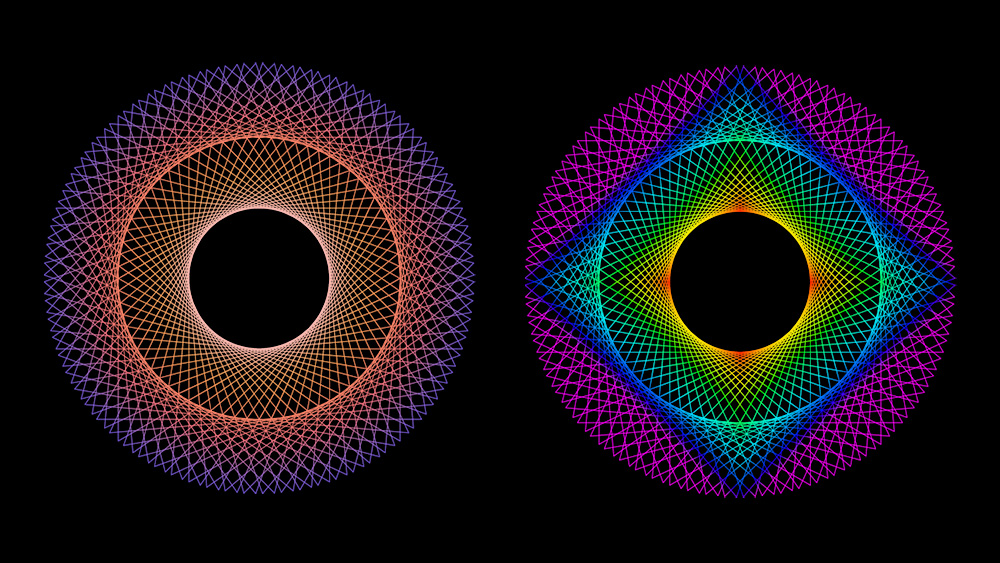
Gradient spirograph from triangle
In this blog I’ll show you how to create a gradient spirograph effect with the triangle tool in Adobe Photoshop.
If you’d rather watch the video with instructions you can find it here (or scroll down to the end of this page).
Step 1: Preparations
Create a new file. It doesn’t matter what size the file is (my file is 2000×2000 pixels). Also pick a background color while creating the new file. I make the background black.
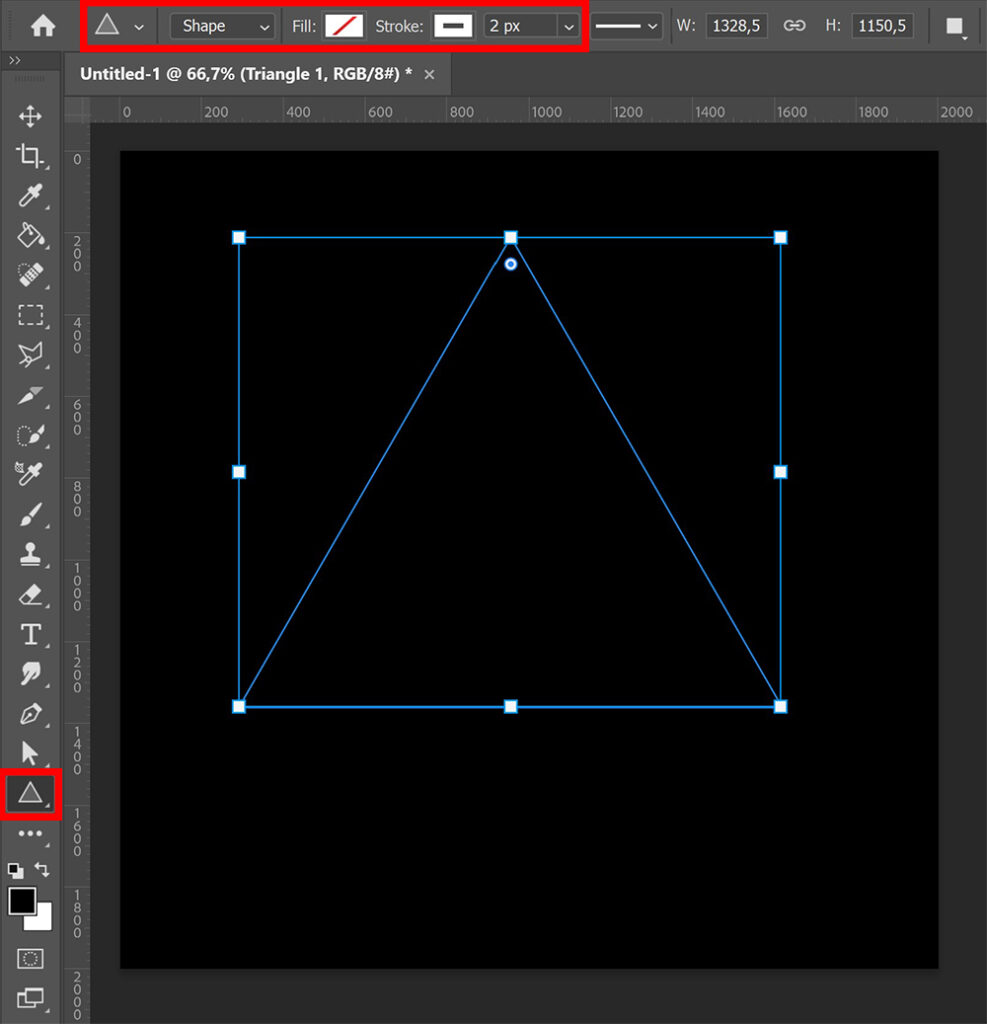
Then select the triangle tool. Use the following settings:
- Select ‘shape‘
- Pick ‘no color‘ for the fill
- Pick a stroke color. We’ll cover this with the gradient, so it doesn’t matter what color you pick (as long as it’s different from the background color).
- Make the stroke width 2px (if your file is smaller or larger than mine, you might have to use a different amount, it should be a thin line).
Press and hold SHIFT while creating the triangle to make it symmetrical.
Then select the move tool and press CTRL+T to activate free transform. Place the triangle in the middle and click on the ✓ icon (or press your ENTER key).
Step 2: Create spirograph
Press CTRL+J to duplicate the triangle layer. Then adjust the rotation of the copy with 5°.
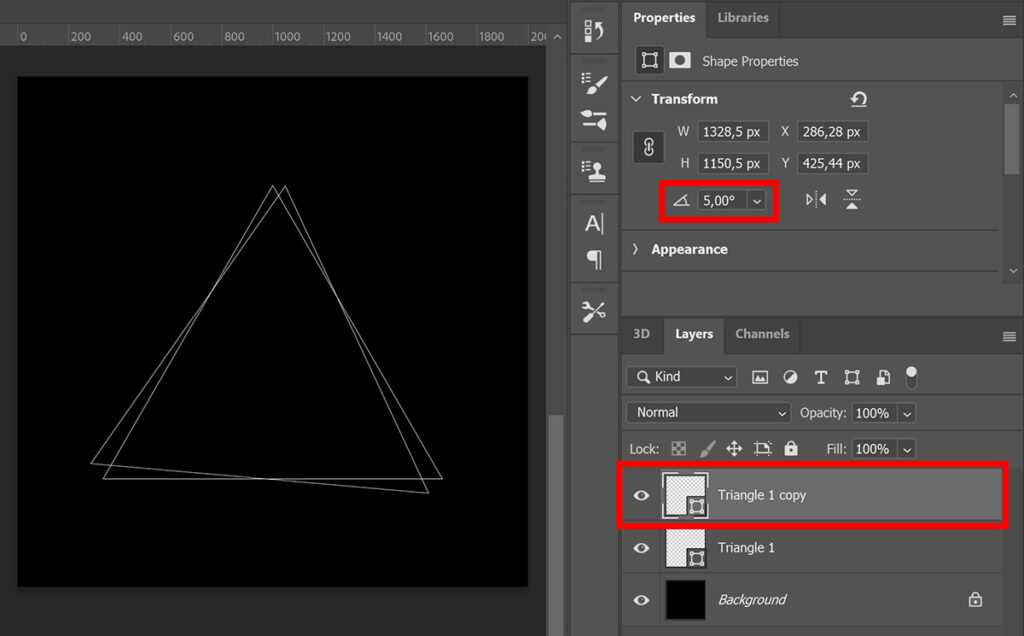
If you press CTRL+ALT+SHIFT+T, this will repeat the last action (rotating the shape) in a new layer.
Keep pressing CTRL+ALT+SHIFT+T until the spirograph is finished. You will have a lot of layer copies now (I have 71 in total).
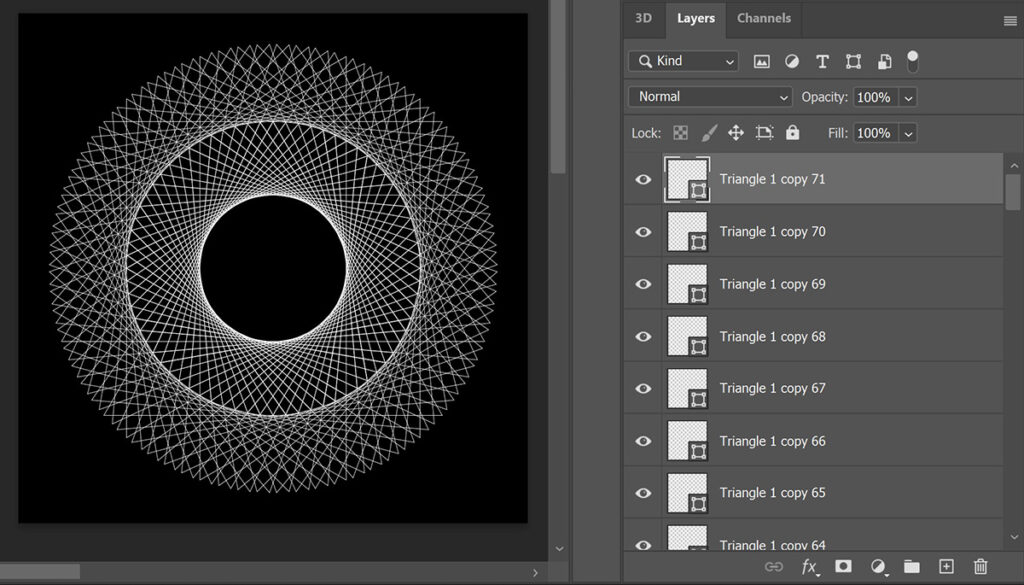
Select all the triangle layers. Right click on one of the selected layers and select ‘rasterize layers‘.
Right click on the selected layers again and now select ‘merge layers‘. You now have just one layer with the spirograph.
If you want to adjust the size or position of the spirograph, press CTRL+T to activate free transform.
Step 3: Add gradient effect
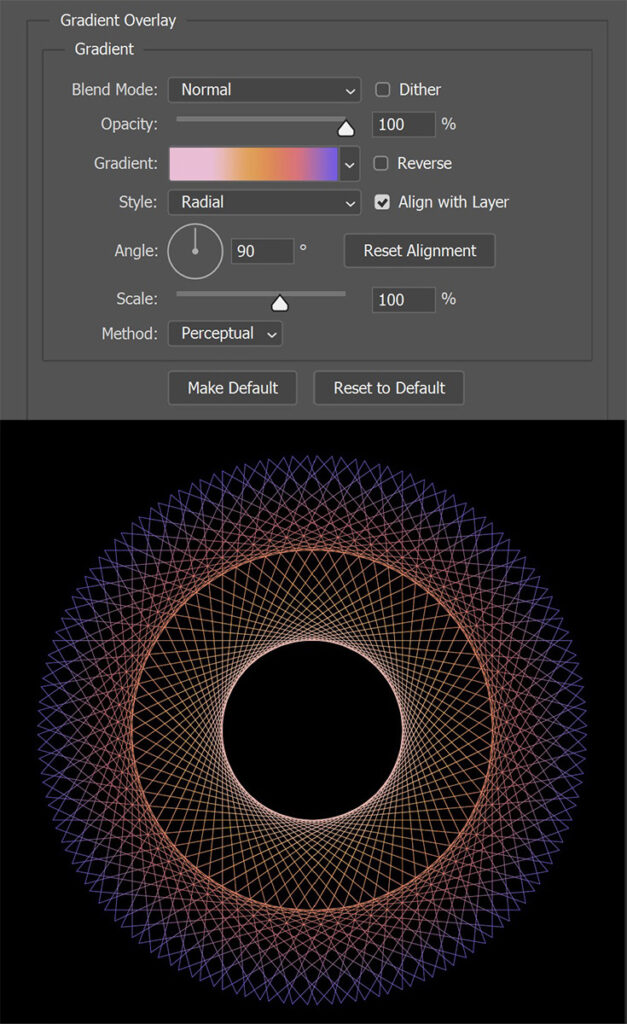
Select the spirograph layer. Then click on the fx icon below your layers and select ‘gradient overlay‘.
You can find the settings I used in the image below. Click on the gradient to change it. You can pick one of the presets or you can create your own gradient.
Also check out the styles to see which one you like best. For this spirograph, I prefer the radial or diamond gradient.
And that’s how you create this gradient spirograph effect with the triangle tool in Adobe Photoshop!
I now showed you one method to create a gradient spirograph, but there’s another method to create spirographs! I’ll tell you more about that in this blog.
Learn more about Photoshop
If you want to learn more about editing in Adobe Photoshop, check out my other blogs or take a look at my YouTube channel.
Follow me on Facebook to stay updated about new blogs and tutorials! You can find the video with instructions below.
Photoshop
Basics
Photo editing
Creative editing
Camera Raw
Neural filters
Text effects