Published on May 7, 2023
Create a shell with the ellipse tool
In this blog I’ll show you how to create a cool shell shape with the ellipse tool in Adobe Photoshop!
Rather watch the video with instructions? Then click here or scroll down to the end of this page.
Step 1: Preparations
First create a new file with a size of 2000 x 2000 pixels (resolution 300). I chose a black background, but you can also use a different background color.
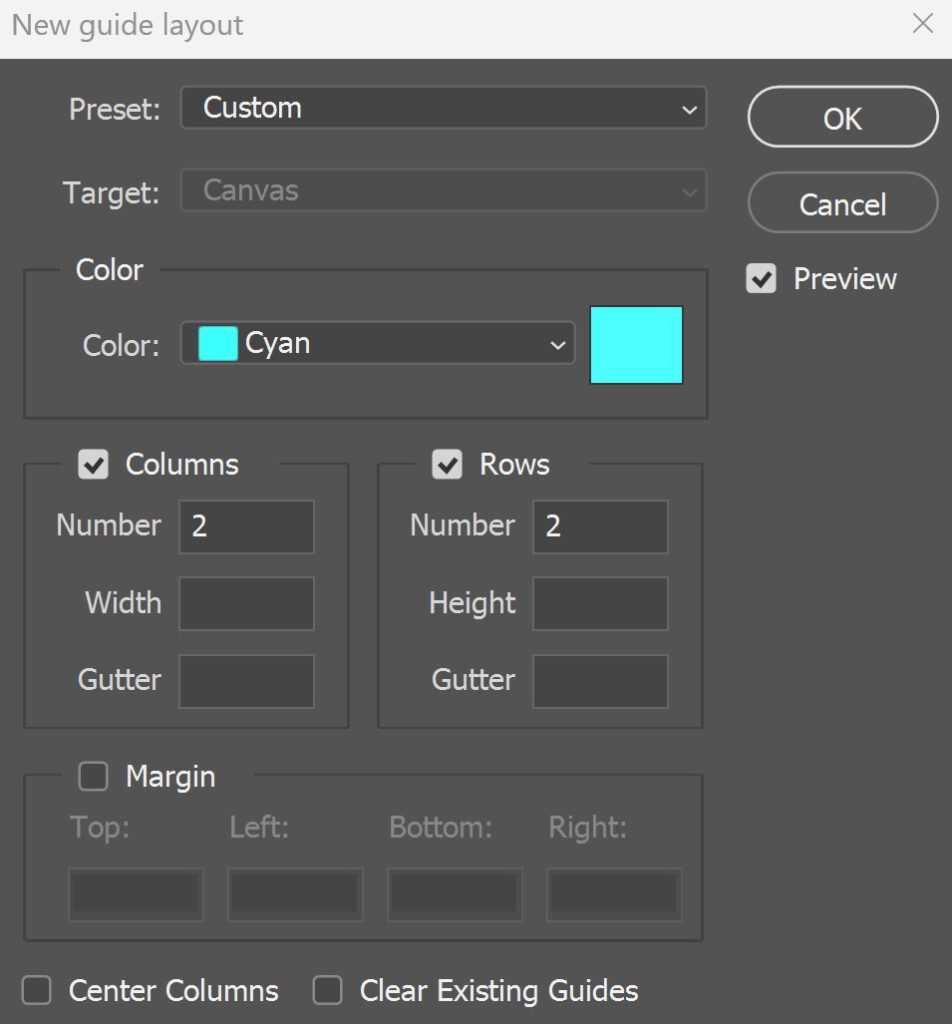
Then navigate to ‘View > Guides > New guide layout‘. Create 2 columns and 2 rows.
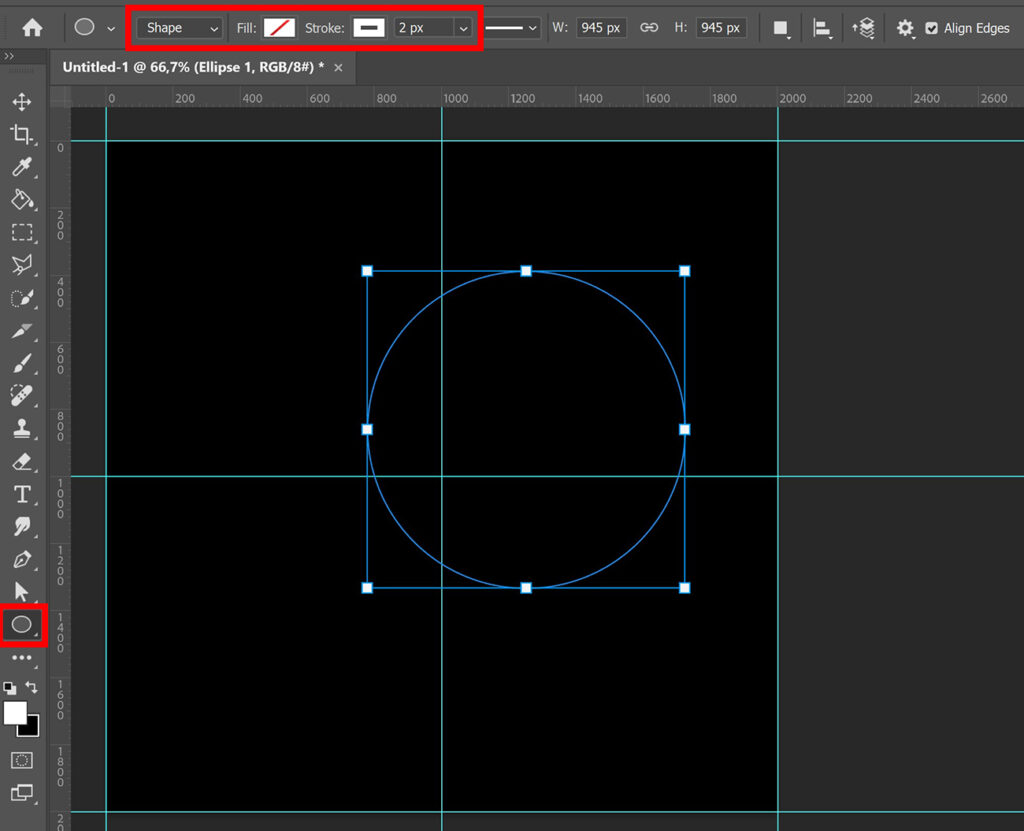
Then select the ellipse tool. Use these settings:
- Select ‘shape’
- Fill: No color
- Stroke: Pick a color (this will be the color of the shell)
- Stroke width: 2px
Then create your shape. Press and hold SHIFT while creating the shape to make a perfectly round circle.
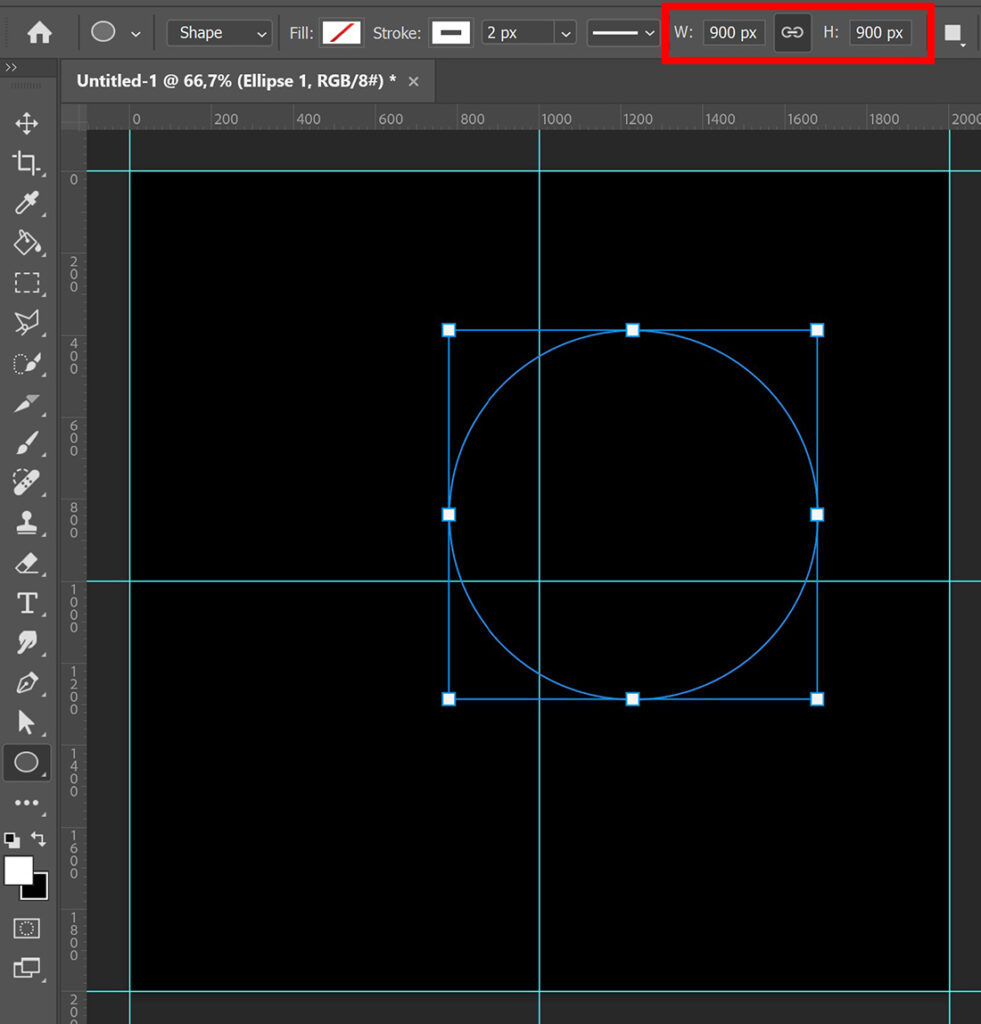
Connect the width and the height (with the chain icon). Make the width 900px. Because you connected the width and the height, the height should be 900px too now.
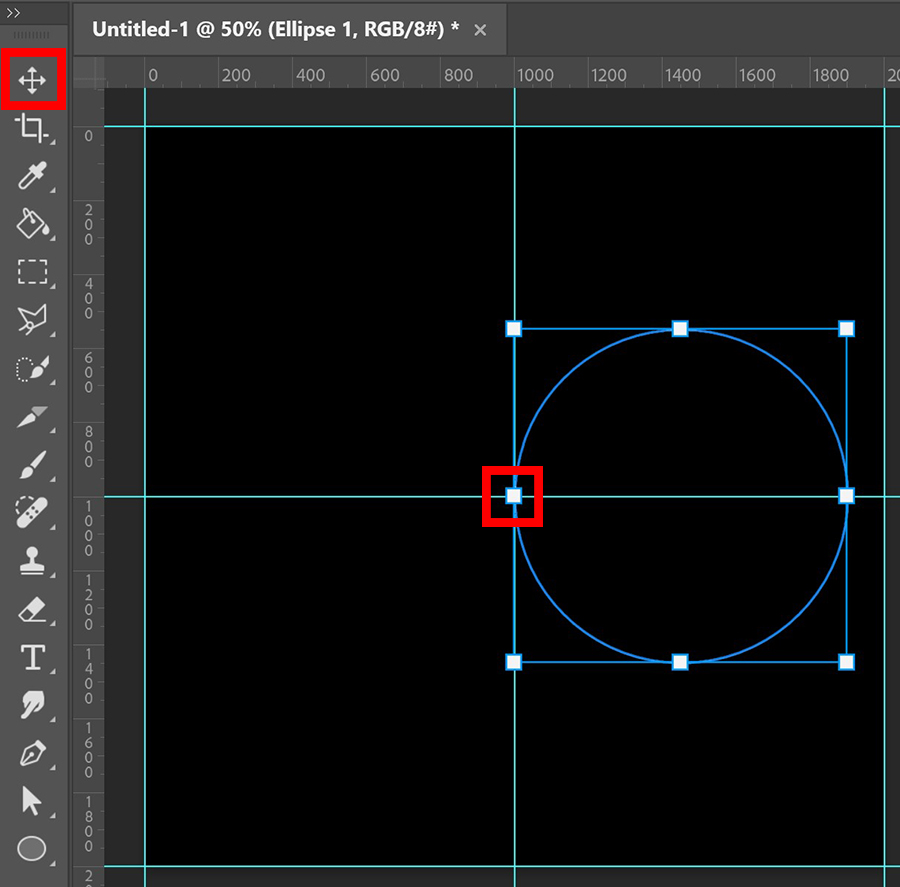
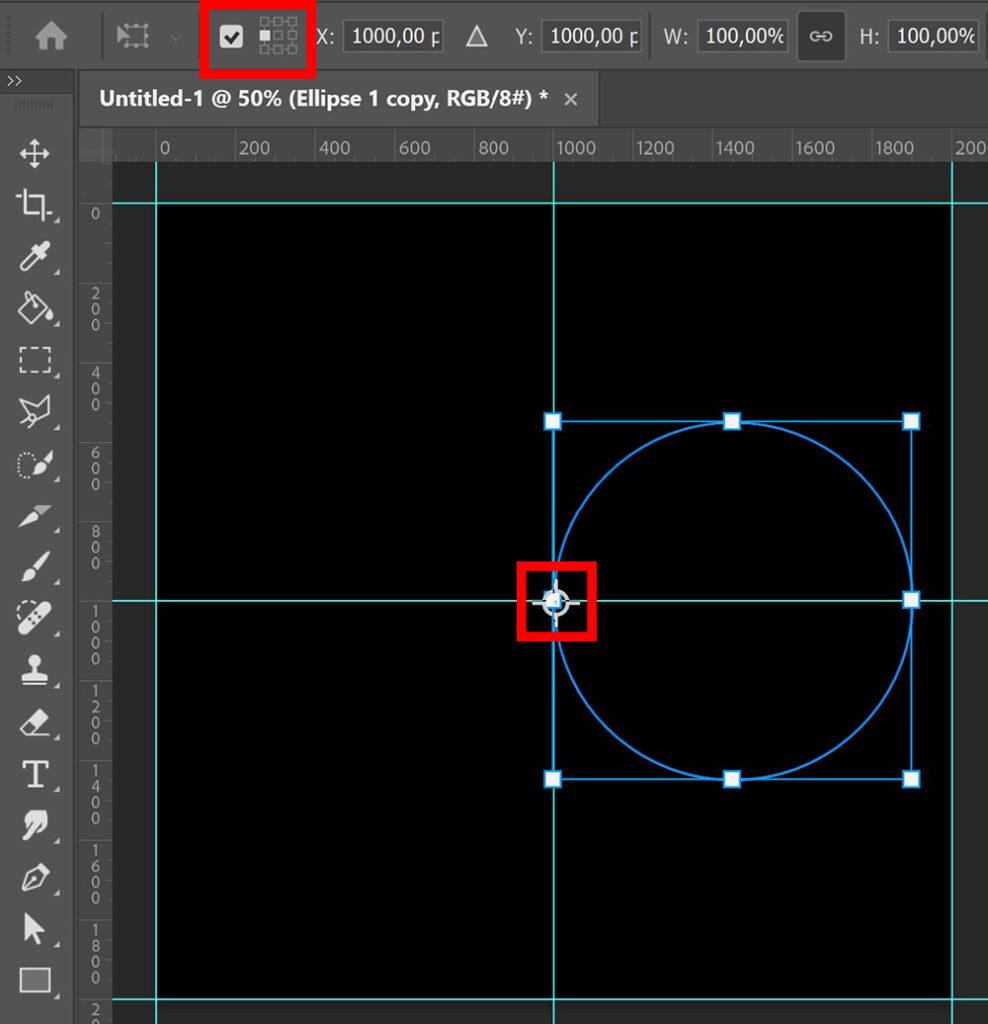
Select the move tool and press CTRL+T to activate free transform. Place the circle on the right side of the center. The middle left anchor point of your circle should be in the center, where the two guidelines cross each other (see image below).
Click on the ✓ icon when you’re done moving the circle.
Step 2: Create shell
Press CTRL+J to duplicate the shape layer.
Now press CTRL+T again and select ‘toggle reference point‘. Place the reference point in the center (where the guidelines cross each other).
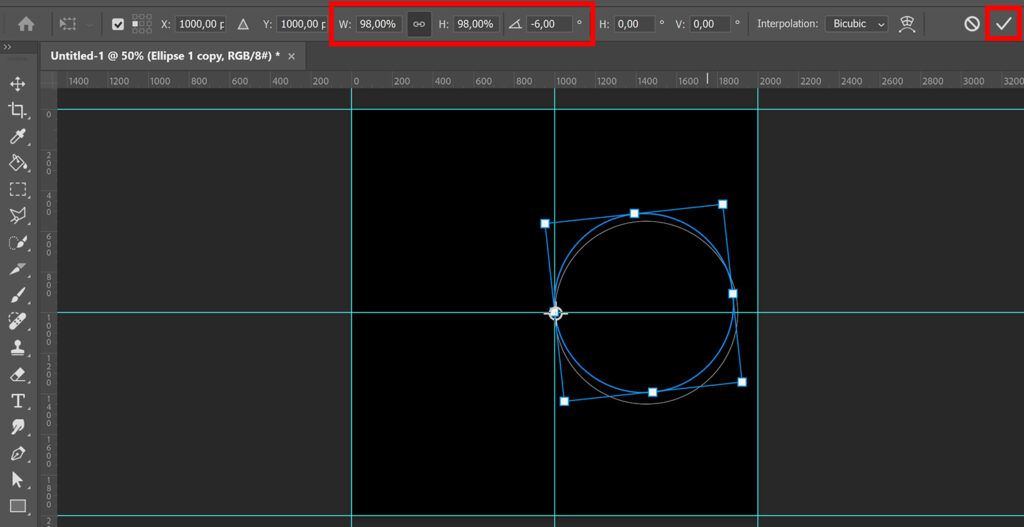
Again connect the width and height (with the chain icon). Lower the width to 98%. The height should be 98% too now.
Then rotate the shape -6° and click on the ✓ icon.
Press CTRL+ALT+SHIFT+T to repeat the last action (resizing and rotating the shape) in a new layer.
Keep pressing CTRL+ALT+SHIFT+T until the shell is finished. I ended up with 150 layer copies.
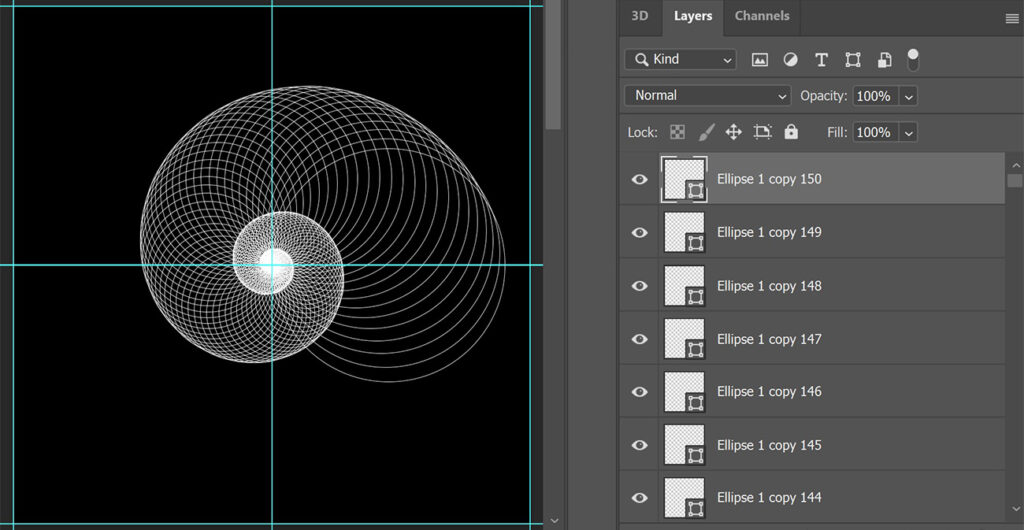
Select all the ellipse layers. Then navigate to ‘Layer > Group layers‘ or press CTRL+G. All the ellipse layers are now in this group.
If you want to move and/or resize the shell, select the group and the move tool. Press CTRL+T, you can now move and resize the shell.
And that’s how you create this shell in Adobe Photoshop!

Want to learn more about Photoshop?
Check out my other blogs or my YouTube channel if you want to learn more about editing in Adobe Photoshop!
Follow me on Facebook to stay updated about new blogs and tutorials! You can find the tutorial video below.
Photoshop
Basics
Photo editing
Creative editing
Camera Raw
Neural filters
Text effects

