
Published on September 27, 2025
Straighten photo without cropping in Camera Raw
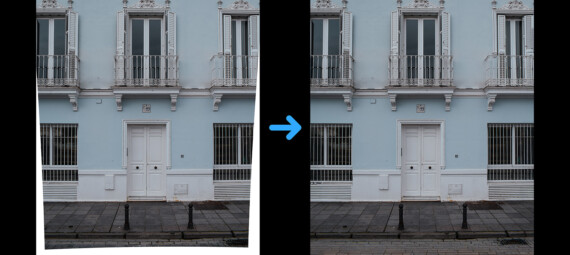
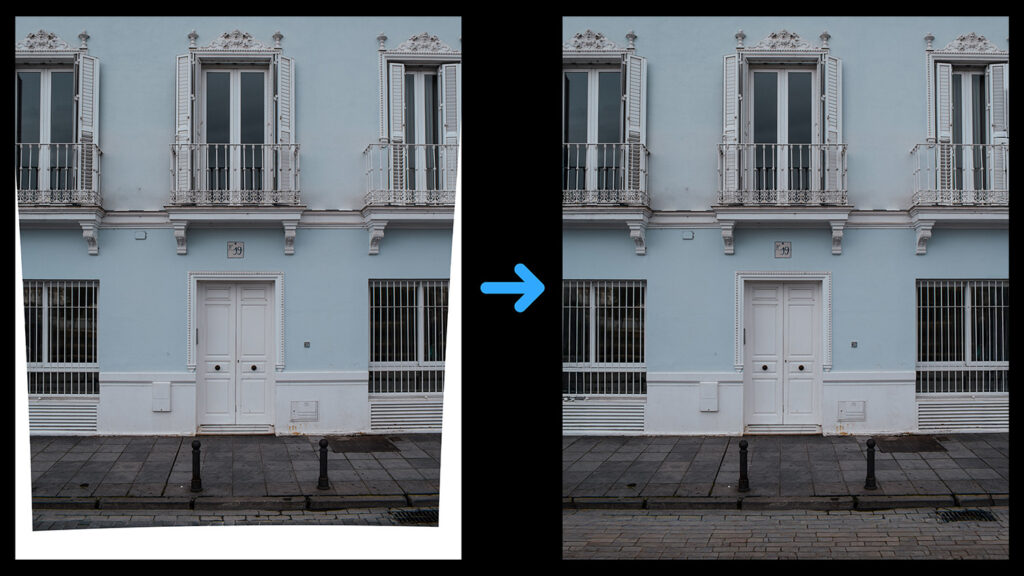
In this blog I will show you how to straighten a photo without cropping it. To do this, I use Camera Raw in Adobe Photoshop.
Rather watch the video with instructions? Click here to watch the tutorial on YouTube or scroll down to the end of this page.
Step 1: Straighten photo
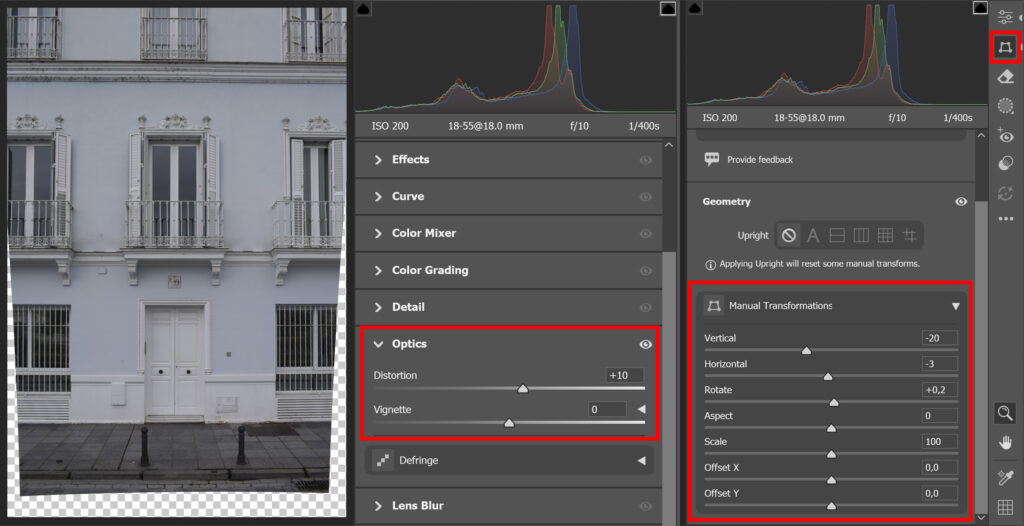
Open the photo you want to edit in Adobe Photoshop. Then open Camera Raw (Filter > Camera Raw Filter).
You can now straighten your photo. I adjusted the distortion and I made manual adjustments in the geometry panel. As you can see, there is a transparent area around my photo now.
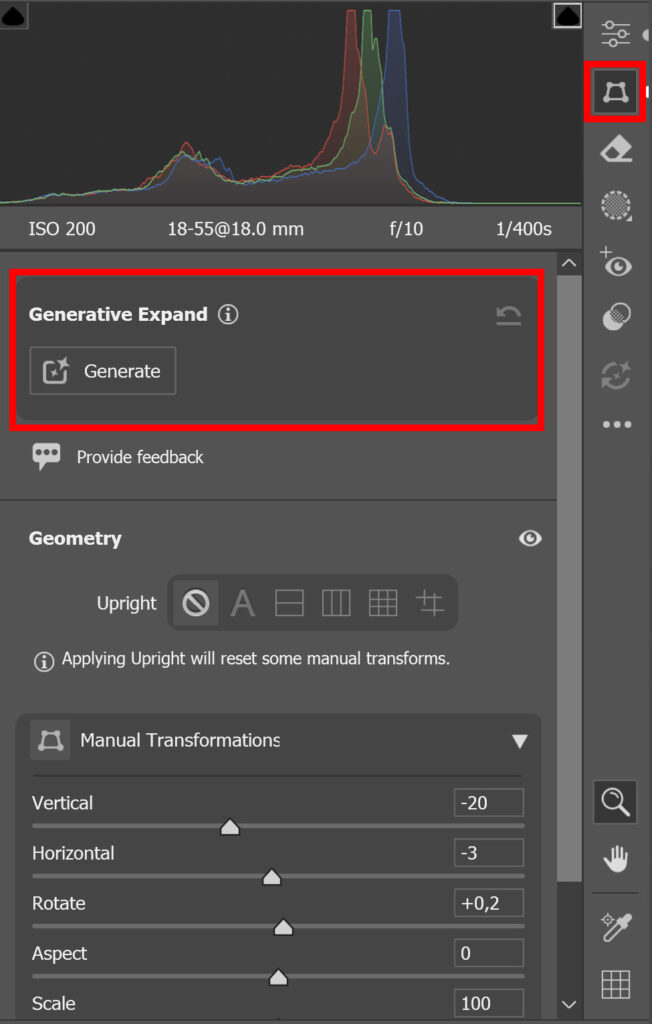
Step 2: Generative Expand
Instead of cropping the photo to remove the transparent area, we will fill it. To do this, we will use the Generative Expand feature.
You can find Generative Expand in the geometry panel.
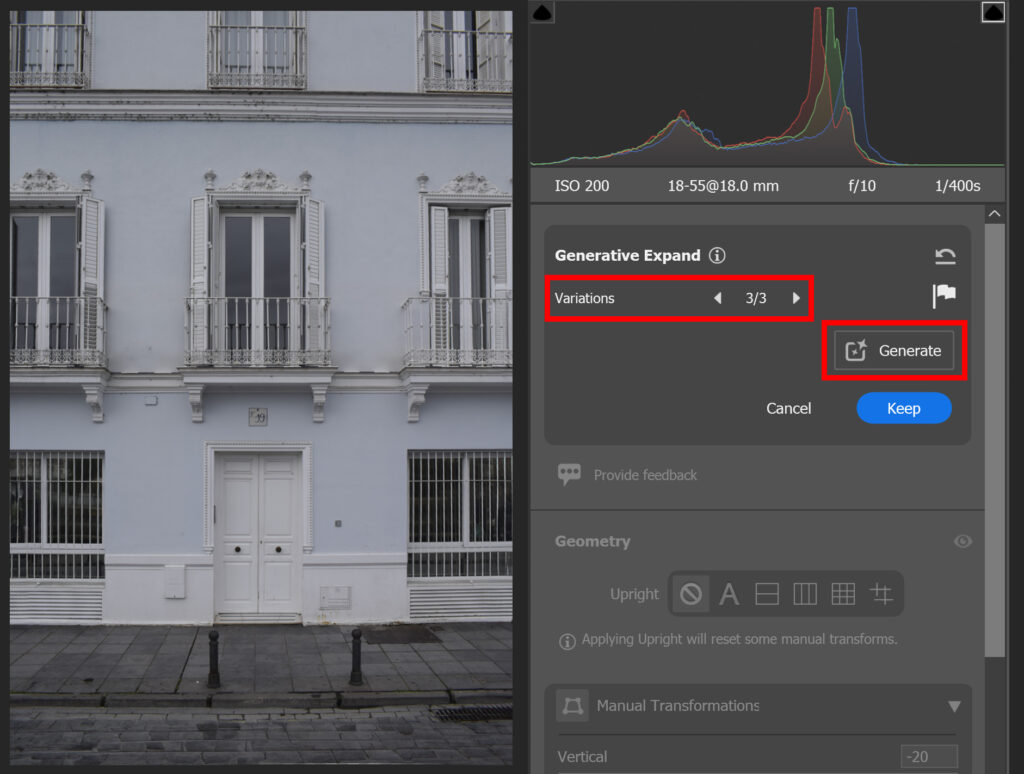
You get 3 different variations. If you don’t like any of the variations, you can just generate again. You can repeat this until you’re happy with the result.
And that’s how you straighten a photo without cropping it in Camera Raw.
Learn more about Photoshop
You can check out my other blogs and my YouTube channel if you want to learn more about editing in Adobe Photoshop!
Follow me on Facebook if you want to stay updated about new blogs and tutorials!
Photoshop
Basics
Photo editing
Creative editing
Camera Raw
Neural filters
Text effects