Published on July 23, 2022
Place text in perspective in a corner
In this blog I’ll show you a fast and easy method to place your text in perspective in a corner using Adobe Photoshop.
Rather watch the video with instructions? Then click here or scroll down to the end of this page.
Click here if you want to download the image I used.
Step 1: Create text
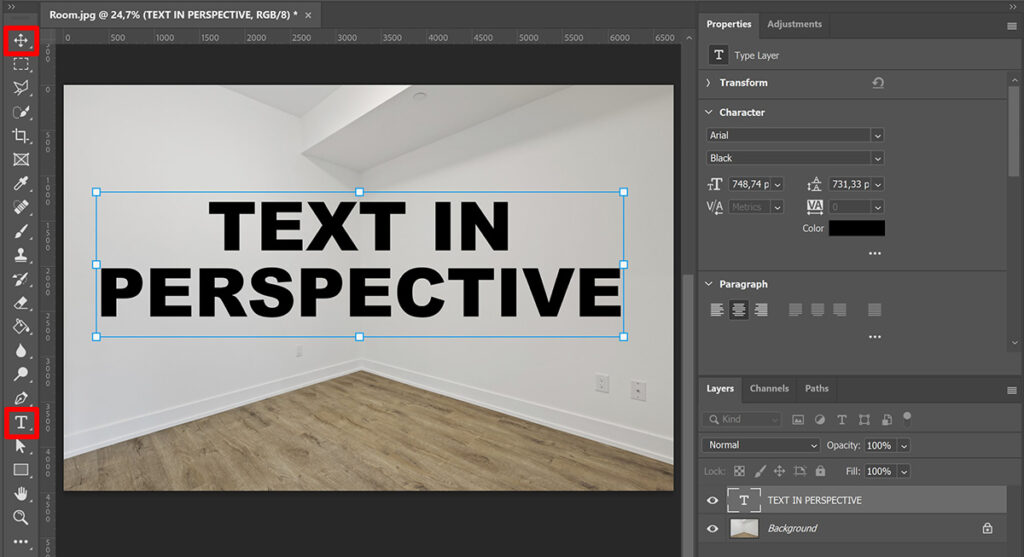
Open an image of a wall with a corner. Then select the horizontal type tool and pick a font and text color. Type your text.
Then select the move tool and press CTRL+T to activate free transform. Resize your text and place it on the wall.
Step 2: Text in perspective
Right click on the text layer and select ‘convert to smart object‘. Then navigate to ‘Edit > Perspective warp‘.
With layout selected, select your text on both sides of the wall. First do one side (stop where the corner of the wall is).
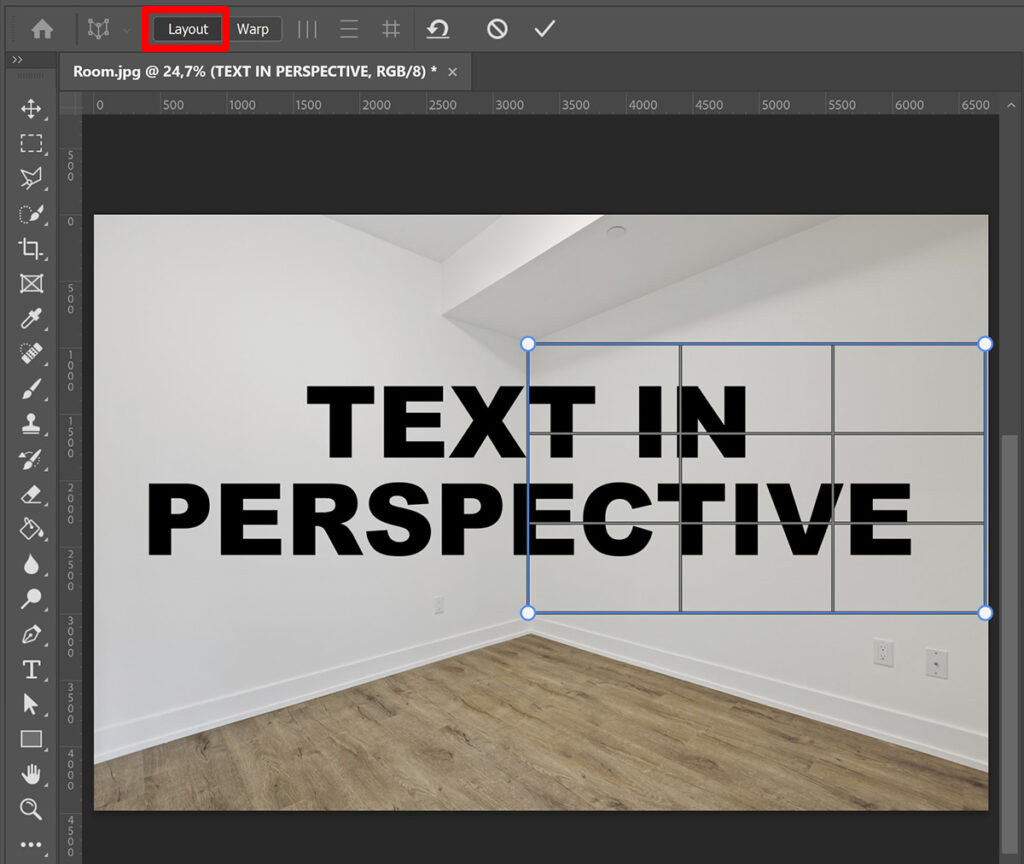
Then also select the other side of the text and connect them in the corner. It should now look similar to the selection in the image below.
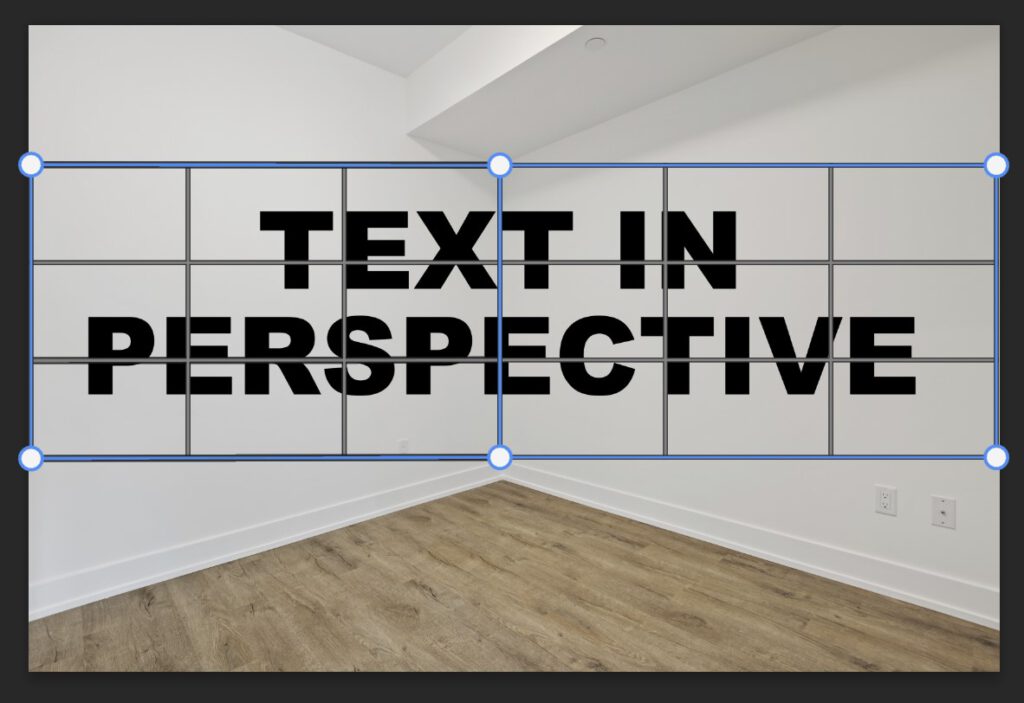
Then select warp. You can now move the points in the corners of the selection to warp your text. Follow the lines of the wall to get the correct perspective. If you move one point, another point might move too. Keep an eye on that and check all the points to see if the perspective is correct.
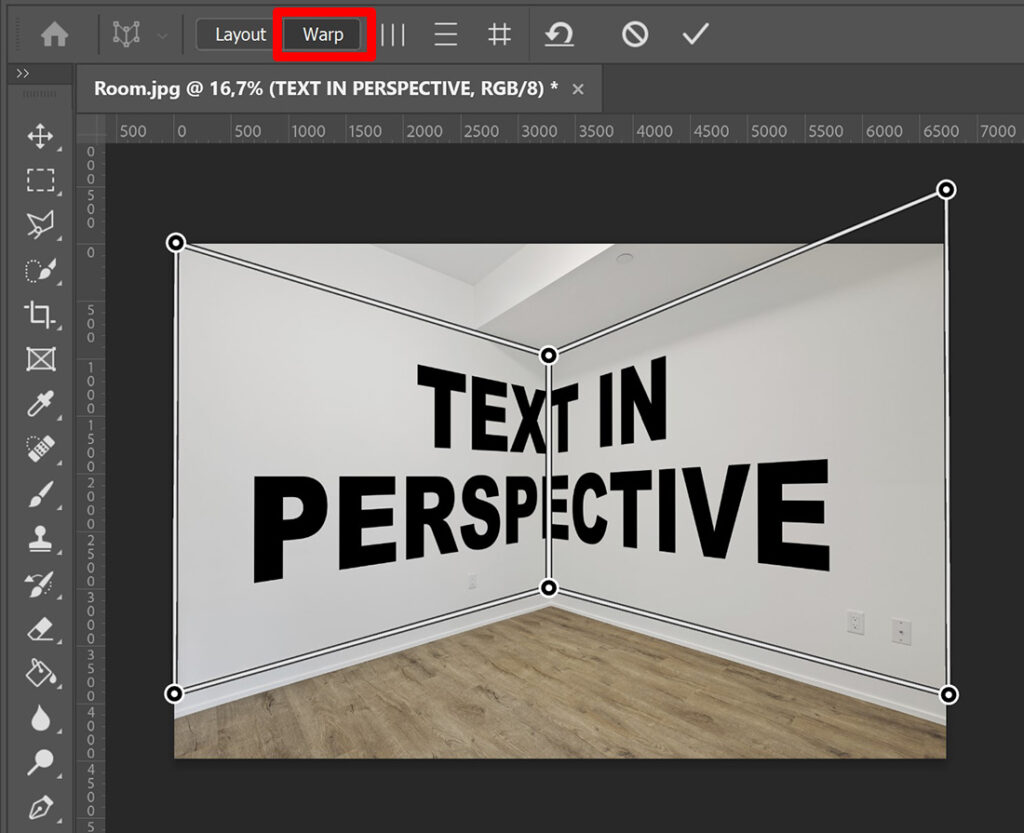
Press enter or click on the ✓ when you’re done. If you’re not happy with the perspective, double click on the ‘perspective warp’ layer. You can now adjust the perspective.
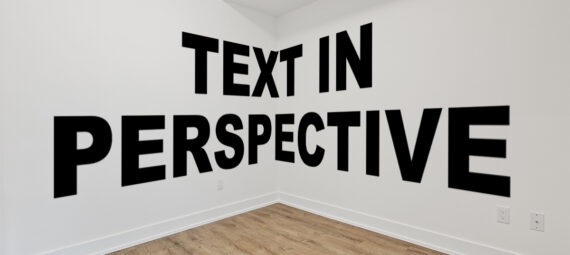
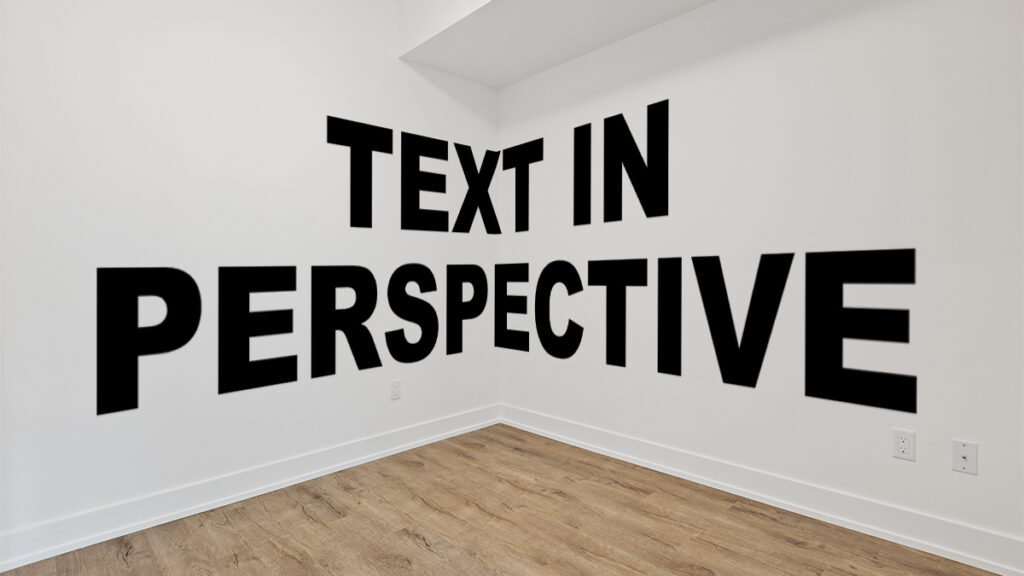
And that’s how you place text in perspective in a corner using Adobe Photoshop. You can see the result below!
Want to learn more about editing in Adobe Photoshop? Check out my other blogs or take a look at my YouTube channel.
Follow me on Facebook to stay updated! You can find the video tutorial below.
Photoshop
Basics
Photo editing
Creative editing
Camera Raw
Neural filters
Text effects

