

Published on March 24, 2023
Type text inside shape
In this blog I’ll show you how to type your text inside of a shape in Adobe Photoshop.
Rather watch the tutorial? Click here to watch the video or scroll down to the end of this page.
I’m using a heart shape for this example, but you can use any shape you want. You can download the file with the heart shape here.
Step 1: Create work path
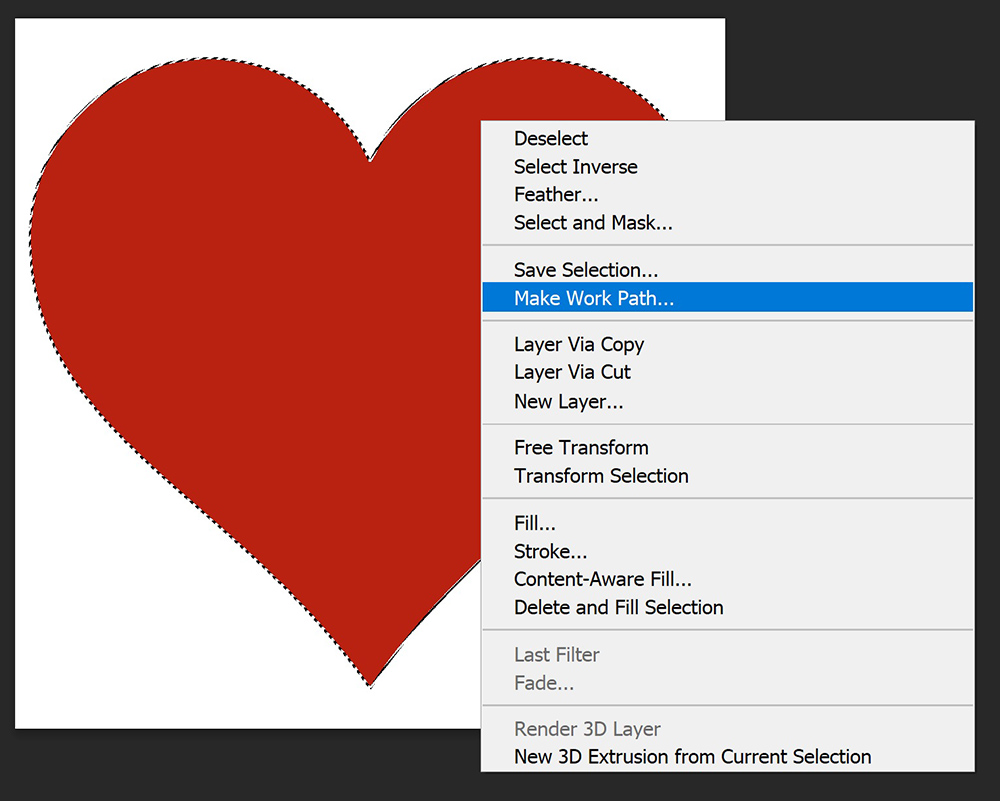
Open the file with the shape you want to use. Then select the shape. I’m using the quick selection tool to do that, but you can also use another tool.
Right click on the selected shape. Make sure the selection tool is still selected when you do this, otherwise you might not get the correct options. Then select ‘make work path‘.
You can leave the tolerance at 1,0 pixels.
You can then make the shape layer invisible (click on the eye icon). If it’s your background layer, you may have to unlock it first (click on the lock icon).
You now have the work path with a transparent background.
Step 2: Text inside shape
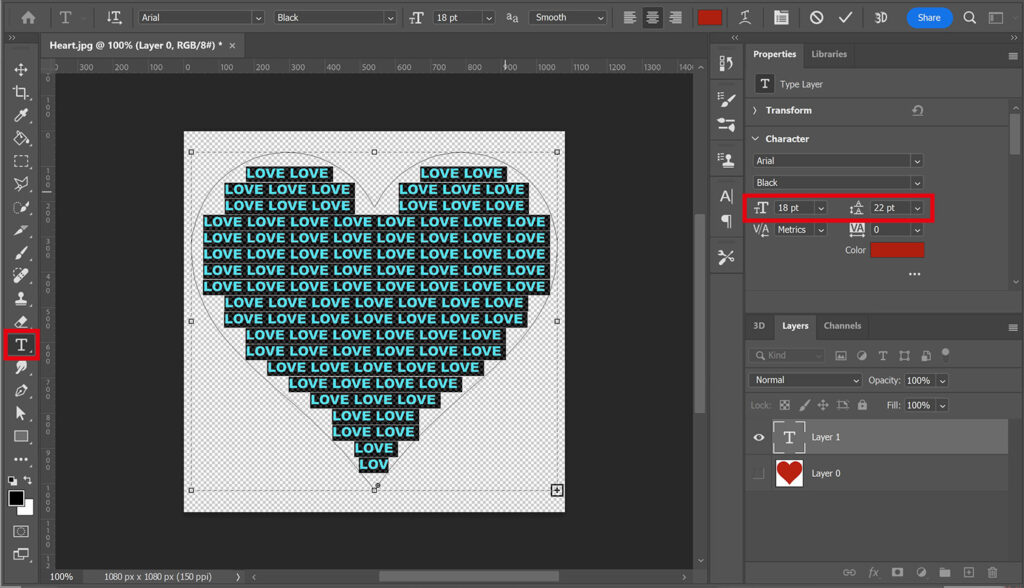
Select the horizontal type tool. Then pick a font and a text color. Click inside of the shape (the work path) to type your text.
Fill the entire shape with text. You can quickly do this by copying (CTRL+C) and pasting (CTRL+V) the text.
Then press CTRL+A to select the entire text. Adjust the font size and leading to make your text fit inside of the shape.
Tip: Click on the number next to the font size or leading icon to select it. Then use the arrow up and down keys to adjust the amount. This way it’s very easy to find the correct settings.
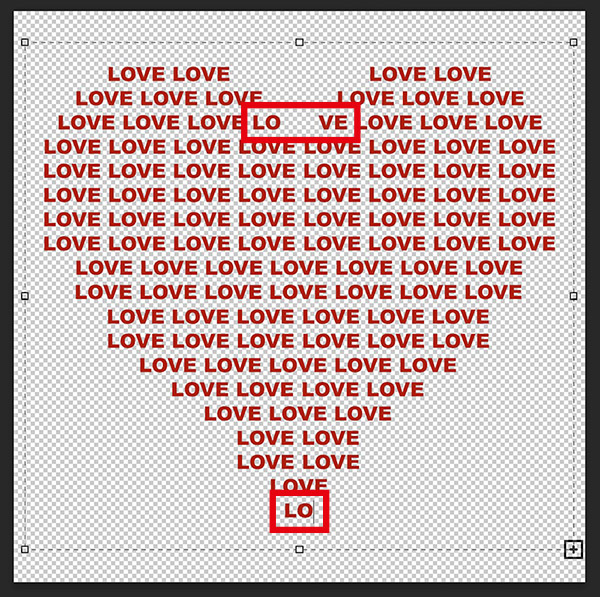
You can also adjust the text itself to make it fit your shape. If you look at the image above, you’ll see that the text ends with the word ‘LOV’. I change that to ‘LO’ to make the point of the heart sharper.
Then I also adjust the third line by adding a ‘LO’ on the left side and a ‘VE on the right. Just select that word or sentence with the horizontal type tool and adjust it.
Click on the ✓ icon when you’re done with the text.
Step 3: Add background
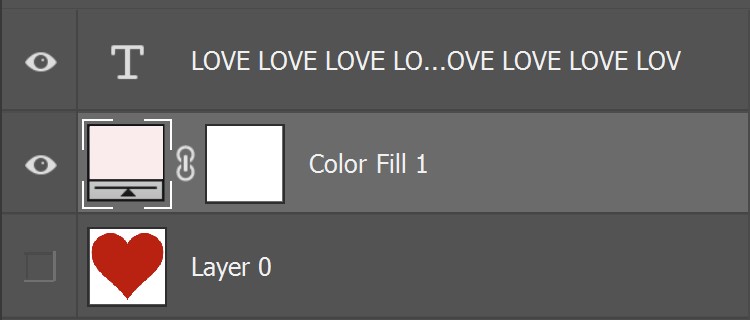
The background is transparent now. To add a background, create a solid color layer.
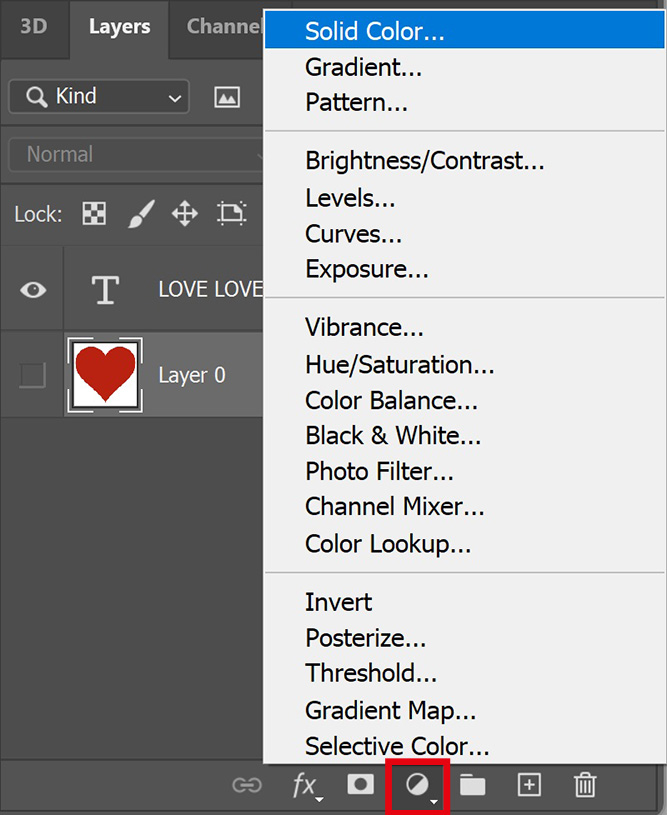
Pick a background color. Then place the color fill layer below the text layer.
And that’s how you type your text inside of a shape in Adobe Photoshop!

Learn more about Photoshop
Want to learn more about editing in Adobe Photoshop? Check out my other blogs or take a look at my YouTube channel.
Follow me on Facebook to stay updated about new blogs and tutorials! You can find the YouTube tutorial below.
Photoshop
Basics
Photo editing
Creative editing
Camera Raw
Neural filters
Text effects