

Published on November 6, 2022
Create a text shadow
In this blog I’ll show you how to create a shadow between text lines in Adobe Photoshop.
Rather watch the video with instructions? Click here or scroll down to the end of this page.
Step 1: Create file and text
Create a new file. My file size is 1600×900 px, but you can use any file size you want. While creating the file, also pick a background color. This effect looks best with a black or very dark background.
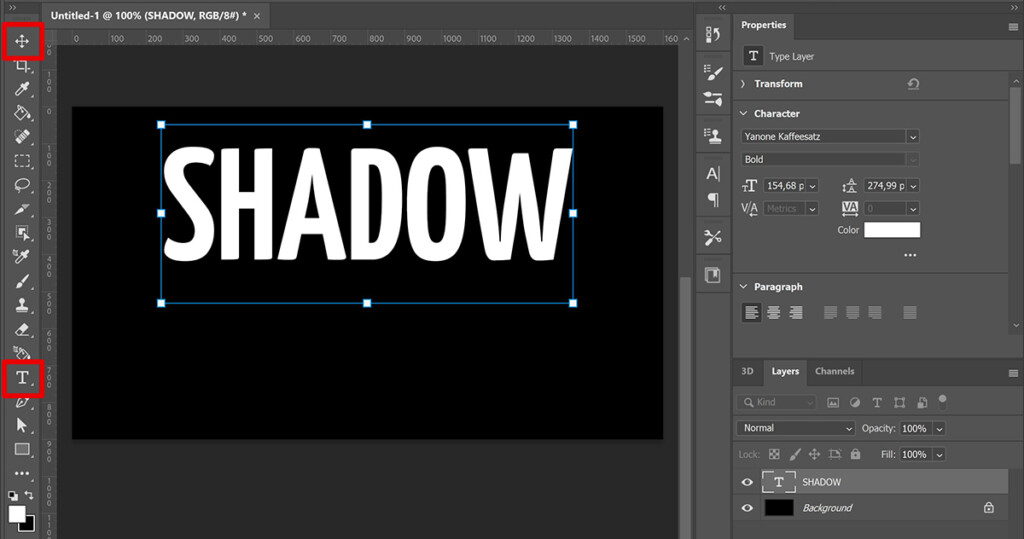
Then select the horizontal type tool. Pick a font and text color and type the first line of your text.
After you did that, select the move tool and press CTRL+T to activate free transform. You can now resize the text and pick the right position. Leave enough space below your text for the second line.
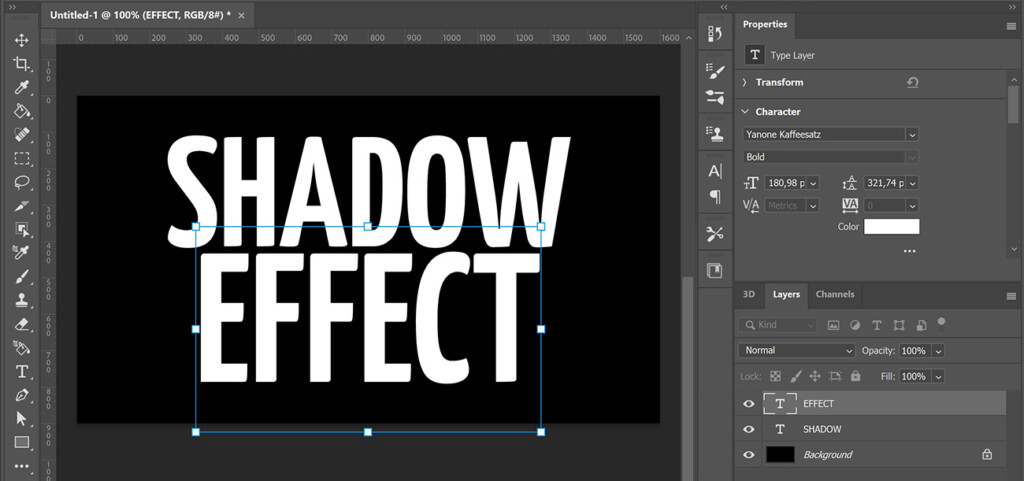
Press CTRL+J to duplicate the text layer. Use the move tool to drag this new text below the other text.
Then select the horizontal type tool and adjust the text. If you want to adjust the size or position of the second text line, select the move tool and press CTRL+T again. Place the second text line very close below the first line (you can use your arrow keys to do this).
To adjust the size and/or position of both text lines, select both text layers. Press CTRL+T, you can now adjust both text lines.
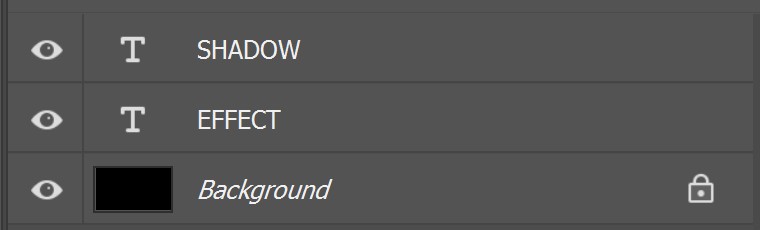
The layer with the first text line should be the top layer and the second text line should be below it. So in this case, the shadow layer must be the top layer and the effect layer should be below it.
Step 2: Text shadow
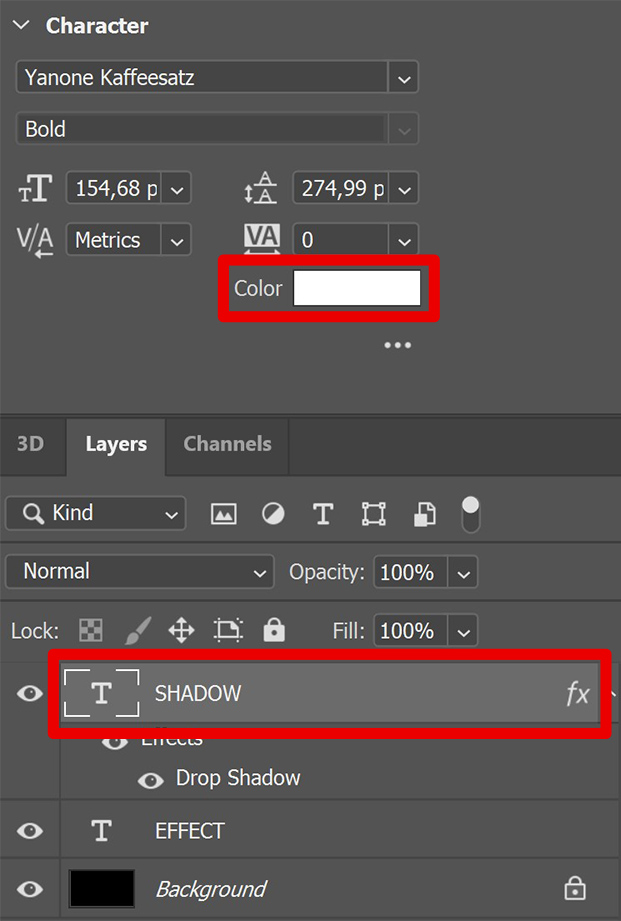
Select your top text layer. Then click on the fx icon below your layer panel and select ‘drop shadow‘.
The color of the shadow should be the same as your background color. The angle should be 90°.
Then adjust the opacity, distance, spread and size. The settings you need to use depend on your file size. If you look at your text, you can already see the shadow. So try out some different settings to create a good shadow.
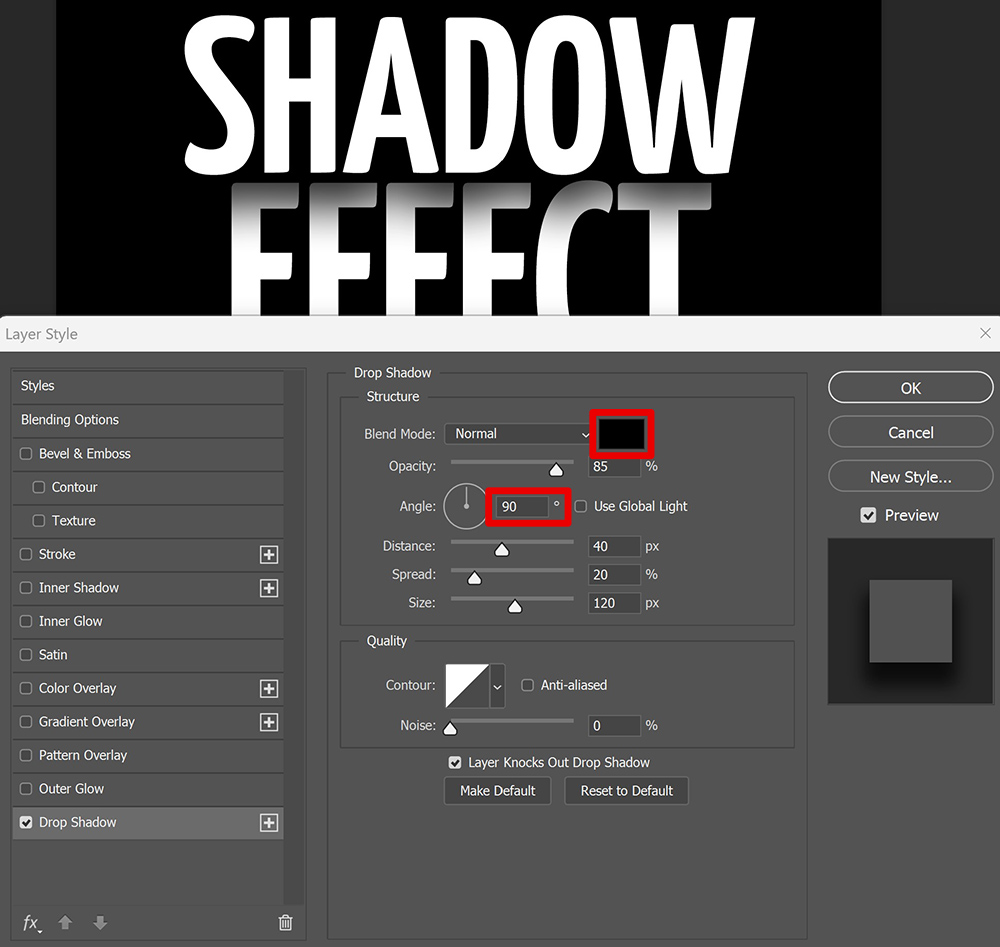
Click OK. If you want to adjust the shadow, double click on the drop shadow layer.
Want to adjust the text color? Select the text layer and click on the color box. Do the same thing for the other text layer. You can also give both text layers a different color if you like that effect.
And that’s how you create this text shadow in Adobe Photoshop! If you want to create this effect with more than two text lines, just create a drop shadow for the other text layers too.

Want to learn more about editing in Adobe Photoshop? Check out my other blogs or take a look at my YouTube channel.
Follow me on Facebook to stay updated! You can find the video with instructions below.
Photoshop
Basics
Photo editing
Creative editing
Camera Raw
Neural filters
Text effects