

Published on February 12, 2023
Text with rough edges in Photoshop
In this blog I will show you a simple method to create text with rough edges in Adobe Photoshop!
Rather watch the video with instructions? Then click here or scroll down to the end of this page.
Step 1: Create file and text
Create a new file. My file is 1920 x 1080 pixels (resolution 150 pixels). You can also use a different size, but the effect might look different then.
Then create a solid color layer.
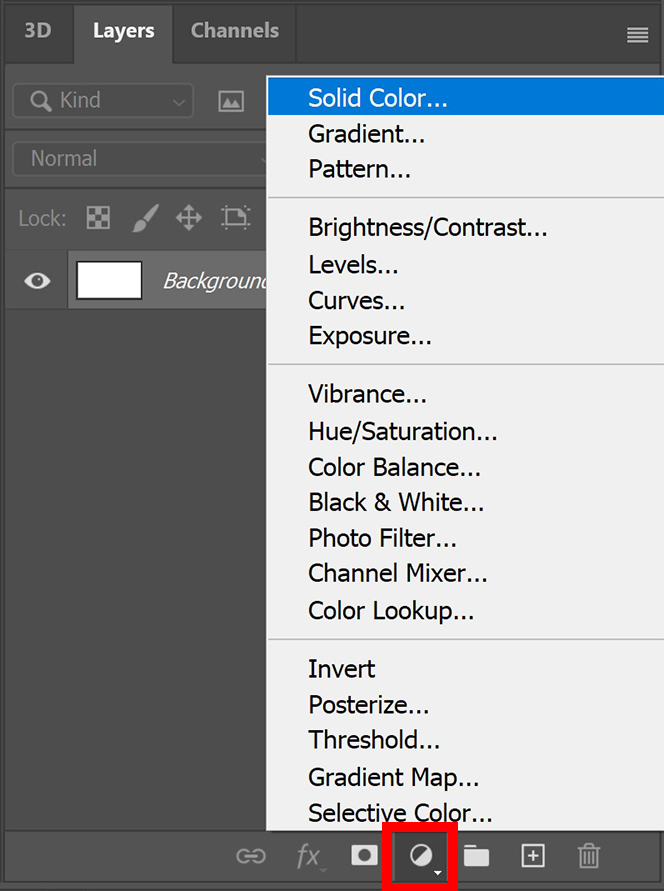
Pick a background color and click OK.
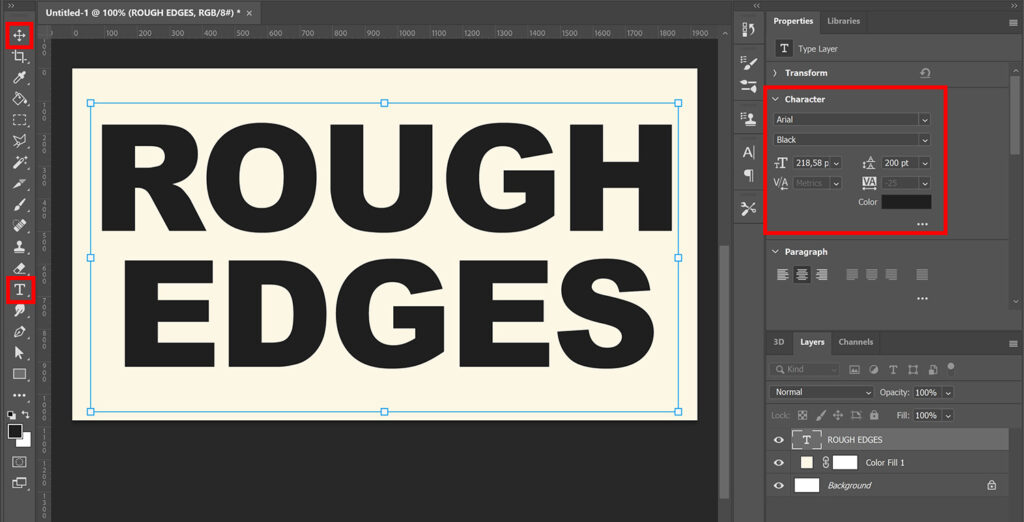
Then select the horizontal type tool. Pick a font and text color and type your text.
Select the move tool and press CTRL+T to activate free transform. You can now resize and move the text. You won’t be able to adjust the size and position of the text after the next step. So make sure that’s all good.
Step 2: Text with rough edges
Select both the color fill layer and the text layer. Right click on one of the selected layers and select ‘convert to smart object‘.
The text and colored background are now one layer. We won’t do anything with the original background layer that’s still there.

Make sure the layer with the text is selected. Then navigate to ‘Filter > Filter Gallery‘.
Select ‘spatter‘ under brush strokes. Adjust the spray radius and the smoothness until you’re happy with the effect. You can make the edges very rough, but you can also keep it subtle. Try out some different settings to see what that does to your text!
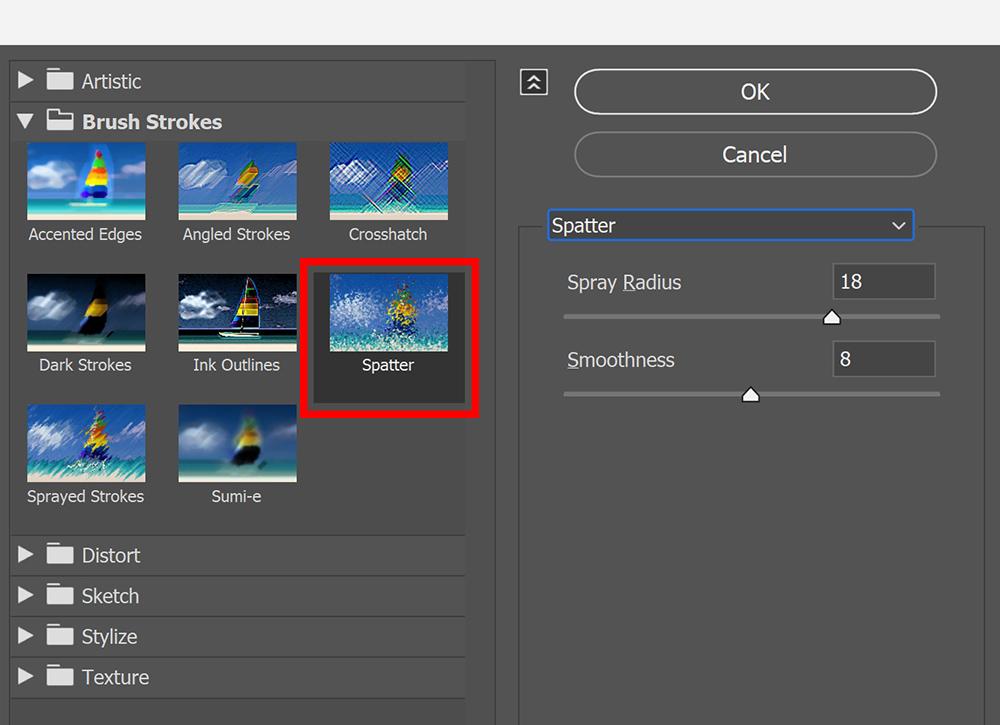
When you’re happy with the effect, click OK. If you want to adjust the spatter effect, double click on the ‘filter gallery’ layer. The window shown in the image above will then open again.
And that’s how you create a text with rough edges in Adobe Photoshop!

Learn more about editing in Photoshop
If you want to learn more about editing in Adobe Photoshop, check out my other blogs or take a look at my YouTube channel.
Follow me on Facebook to stay updated about new blogs and tutorials! You can find the YouTube video with instructions below.
Photoshop
Basics
Photo editing
Creative editing
Camera Raw
Neural filters
Text effects