

Published on July 30, 2022
Vertical text portrait with outline (stroke)
In this blog I’ll show you how to place a photo inside of a text with an outline to create a vertical text portrait in Adobe Photoshop.
Rather watch the video with instructions? Click here of scroll down to the end of this page.
Click here to download the photo I used.
Step 1: Cut out subject
Open the photo you want to use. Use the quick selection tool to select your subject.
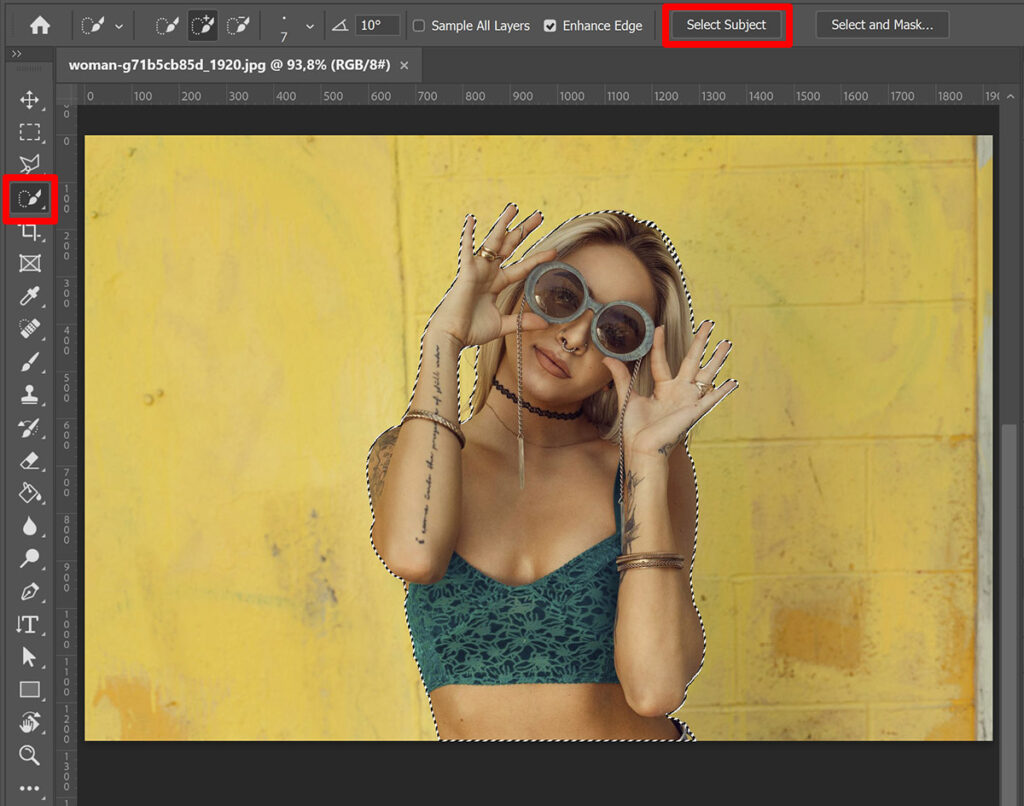
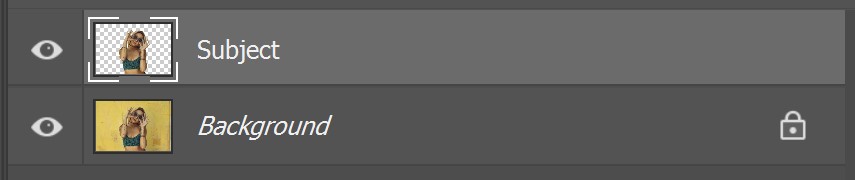
When you’ve selected your subject, press CTRL+J to duplicate the selected area. You now have a new layer with your subject and a transparent background. I rename this layer ‘subject’.
Step 2: Create background
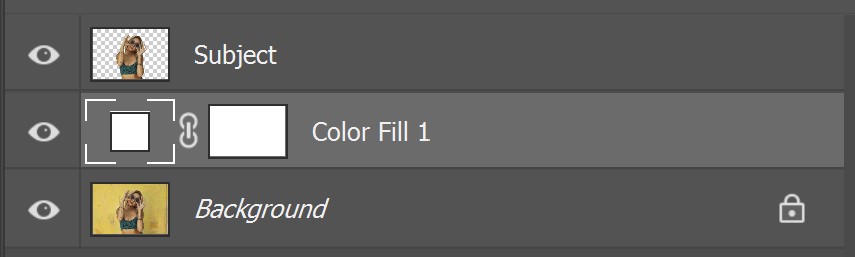
Add a solid color layer. Pick a color for your background, I make my background white.
Then place the color fill layer below the subject layer. The background is now behind your subject.
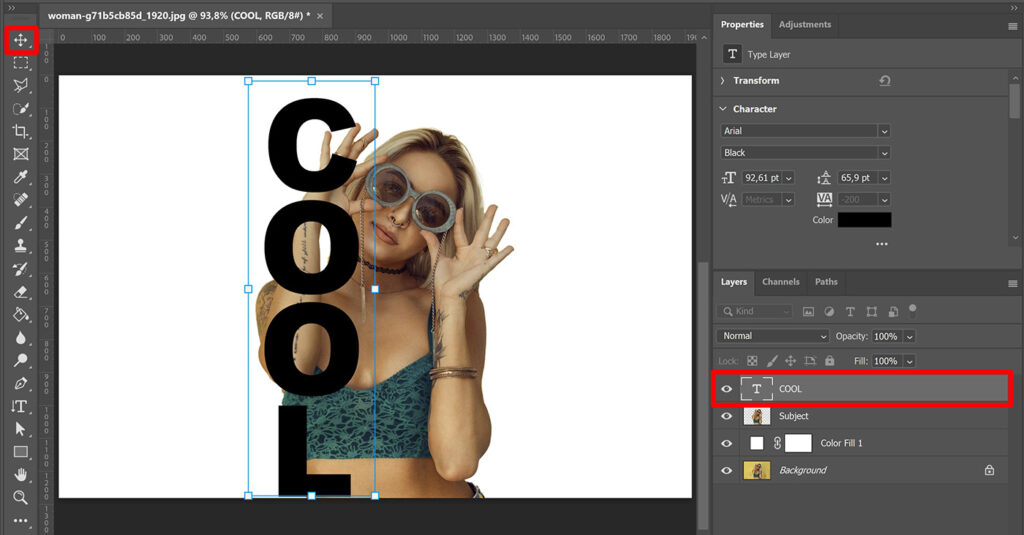
Step 3: Create text
Select the vertical type tool. Pick a font you like. This effect looks best when you use a bold font. Then type your text. It doesn’t matter what color you use for this, because we’ll place the photo inside of this text.
Then press CTRL+A to select the text. Adjust the tracking until your letters are almost touching eachother.
Tip: Click on the number next to the tracking icon and use the arrow up and down keys to adjust the tracking.
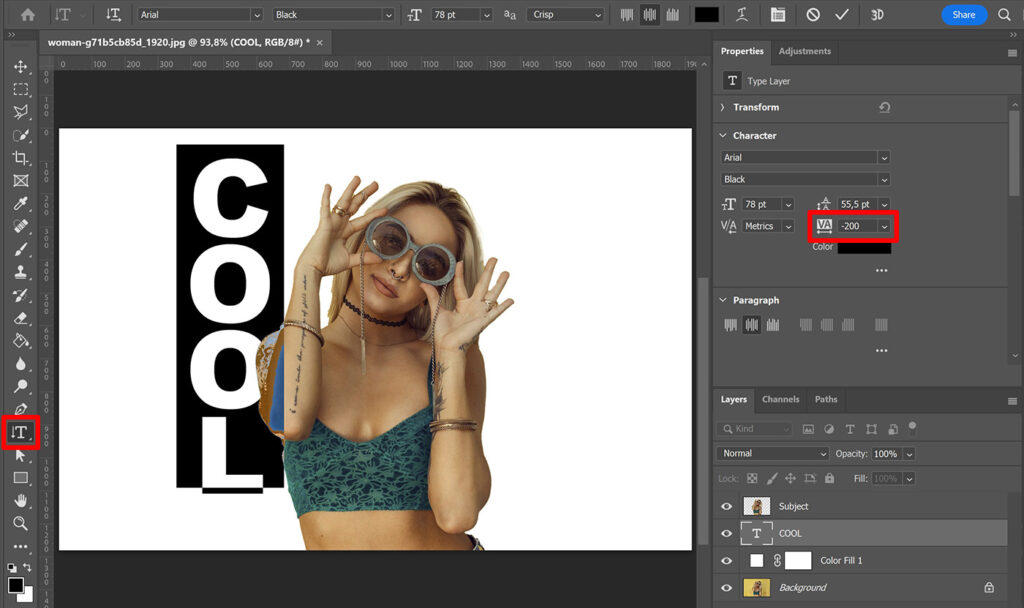
Place the text layer above the subject layer. Select the move tool and press CTRL+T to activate free transform. You can now resize the text and place it over one side of the subject.
You can still change the size and placement of the text later, so it doesn’t have to be perfect.
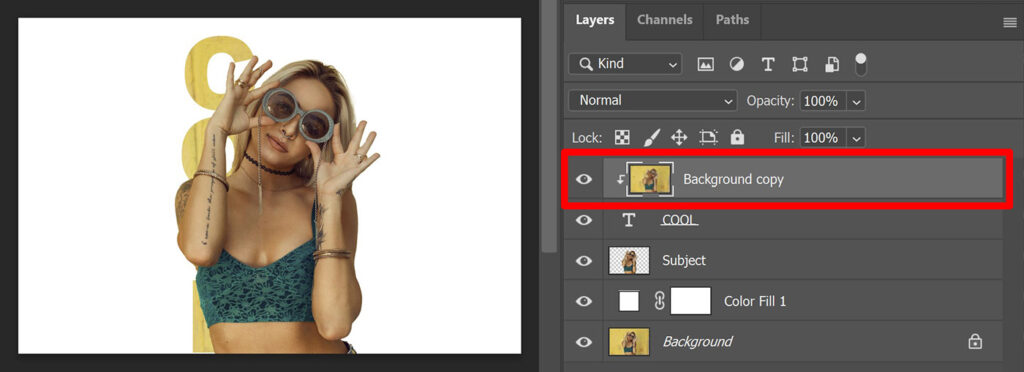
Step 4: Text portrait
Select the background layer and press CTRL+J to duplicate it. Place the copy above your text layer.
Then navigate to ‘Layer > Create clipping mask‘ or press ALT+CTRL+G to create a clipping mask. The photo is now inside of the text.
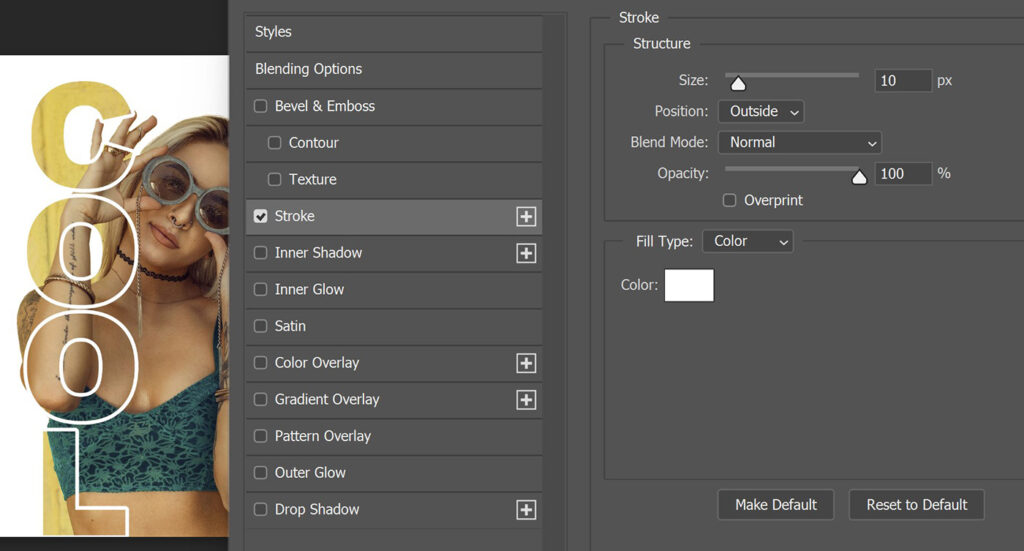
Select your text layer. Click on the fx icon (you can find this icon at the bottom of the layer panel) and select stroke to create an outline for the text.
You can find the settings I used in the image below. Adjust the size to change the thickness of the outline. The outline needs to have the same color as your background.
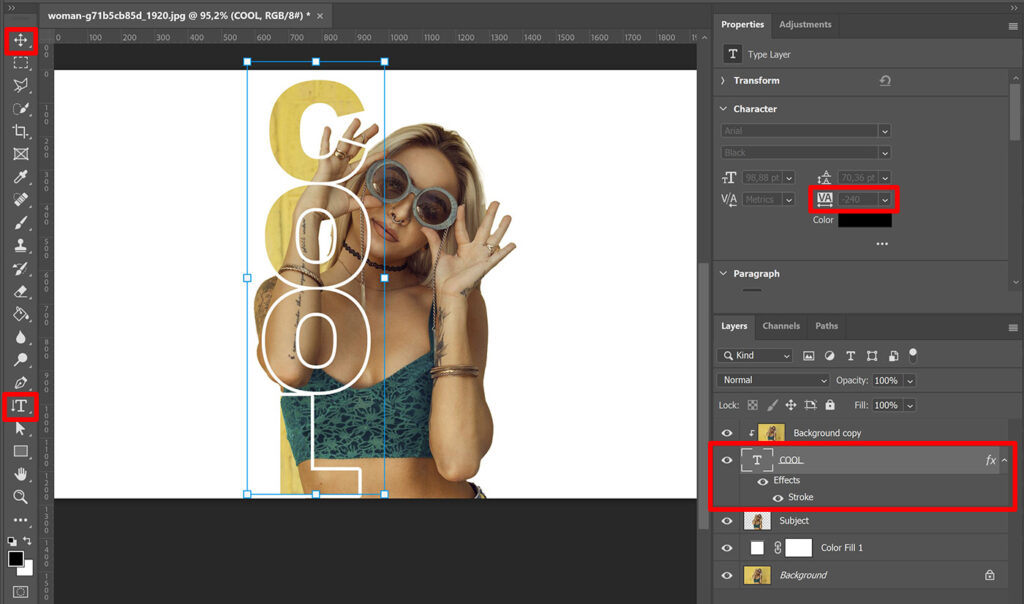
Step 5: Finish vertical text portrait
As you can see in the image above, a small part of the subject is still visible on the left side of the text. I want to remove that side of the subject. I want to use my text to separate the left side of the subject from the right side. To do that, I want all the letters to touch eachother.
After adding the outline, my letters aren’t touching eachother. To fix that, select the vertical type tool again and select the text. Press CTRL+A to select your text and again adjust the tracking until all the letters touch eachother (see step 3).
Then select the text layer, select the move tool and press CTRL+T. You can now adjust the size of the text and pick the correct placement.
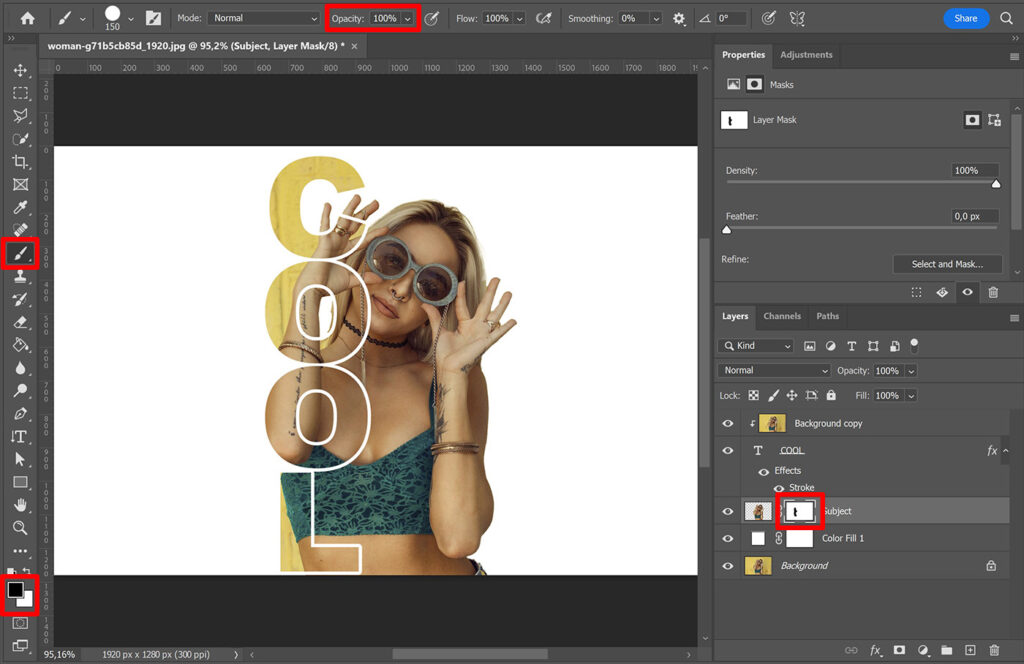
Then select the subject layer and add a mask. Select the brush tool (opacity 100%) and make the foreground color black.
With the layer mask selected, brush over the areas of the subject that you want to remove. I’m removing the parts of the subject that are sticking out on the left side of my text.
If you brushed something out that didn’t needed to be removed, make the foreground color white and brush over it again. It will then become visible again.
And that’s how you create a vertical text portrait in Adobe Photoshop! You can see the result below.

Do you want to learn more about editing in Adobe Photoshop? Then check out my other blogs or take a look at my YouTube channel.
Follow me on Facebook to stay updated! You can find the tutorial below.
Photoshop
Basics
Photo editing
Creative editing
Camera Raw
Neural filters
Text effects