
Published on October 28, 2022
Create sun rays
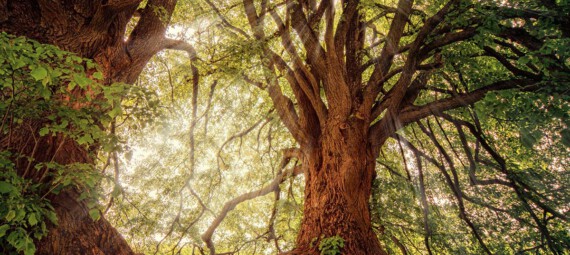
In this blog I’ll show you how to quickly create sun rays (sunbeams) in Adobe Photoshop!
Rather watch the video with instructions? Click here or scroll down to the end of this page.
You can download the image I used here.
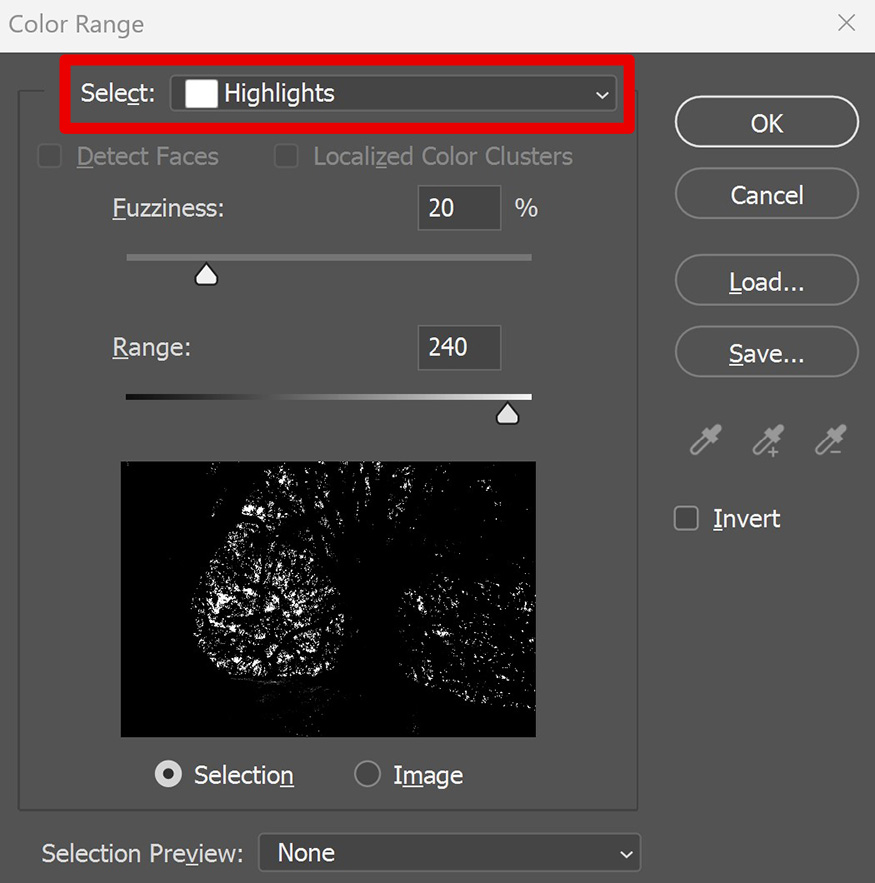
Step 1: Select highlights
Open the file you want to edit. Then navigate to ‘Select > Color range‘.
Select ‘highlights‘. Adjust the fuzziness and range until only the highlights between your trees are selected. You can see an example below.
Click OK. The highlights are now selected. Press CTRL+J to duplicate the selected area. You now have a new layer (layer 1) with only the highlights.
Right click on this new layer and select ‘convert to smart object‘.

Step 2: Create sun rays
Navigate to ‘Filter > Blur > Radial blur‘. You can find the settings I used in the image below, copy these settings. Place the blur center on the spot you want your sun rays to come from.
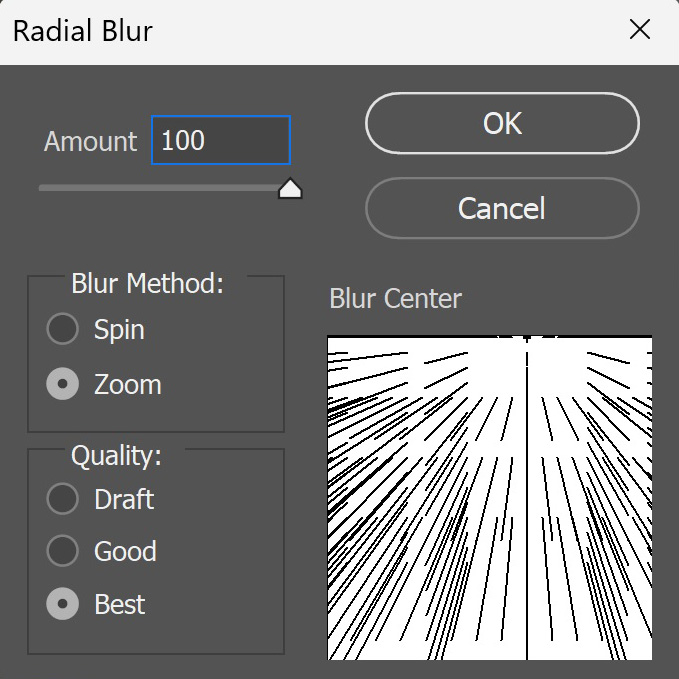
Because you converted this layer to a smart object, you can still adjust the radial blur after applying the settings. So if the blur center isn’t in the right spot, double click on the ‘radial blur’ layer to adjust it. Continue this until the blur center is in the right place.
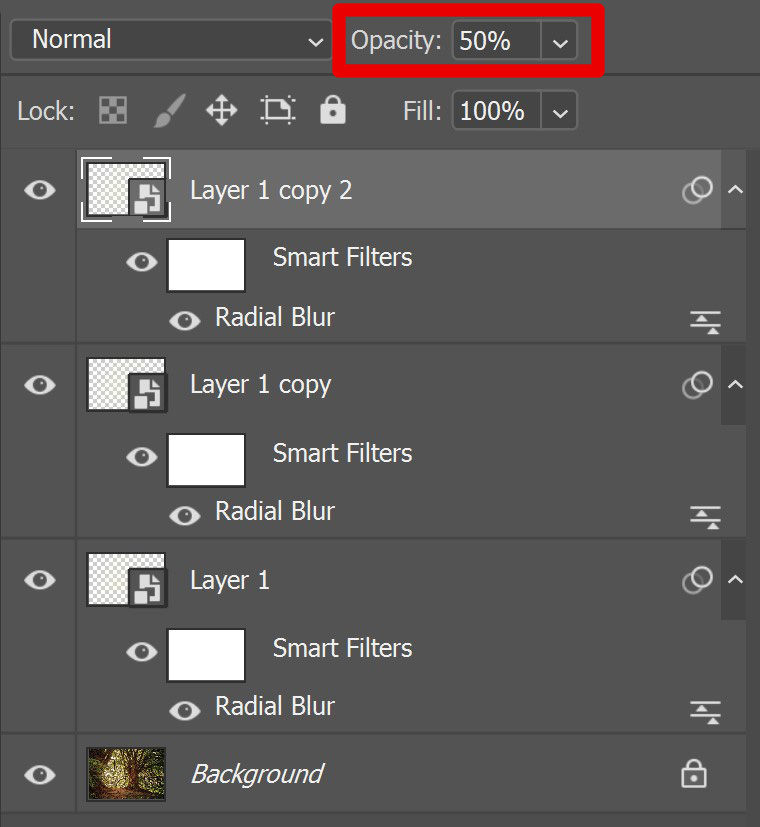
The sun rays are very subtle now. To make them brighter, press CTRL+J to duplicate the layer with the sun rays. You can duplicate it once, but you can also duplicate it multiple times to make it even brighter.
If this makes the sun rays too bright, lower the opacity of (one of) the layers.
Step 3: Layer mask (optional)
I’ll now show you how to make the ends of the sunbeams a bit more subtle, so the transition is smoother. If you’re happy with how your sunbeams look after step 2, you can skip this step.
Select all the layers with the sun rays. Press CTRL+E to merge those layers. You can’t adjust the radial blur after doing this, so make sure everything is looking good before merging the layers.
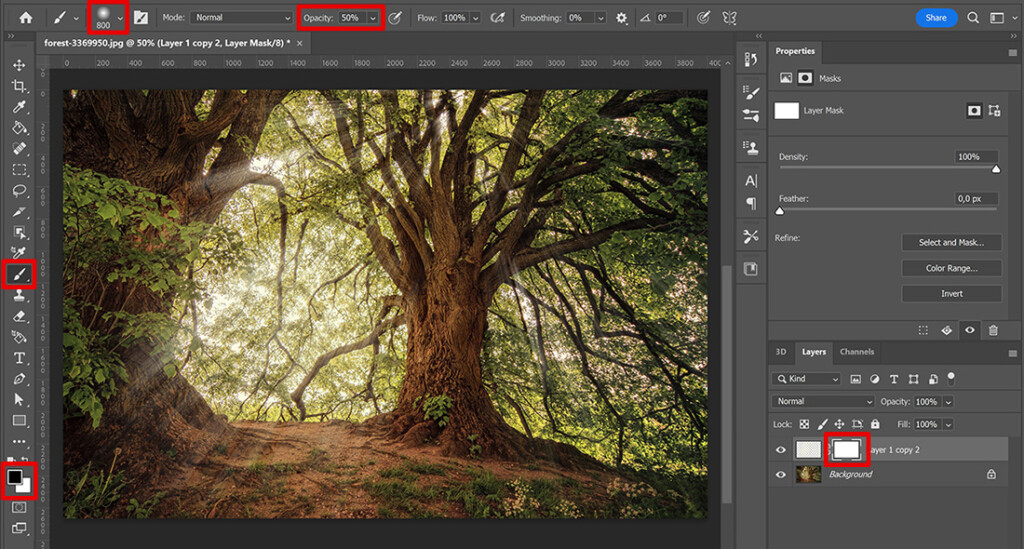
Add a layer mask to the layer with the sun rays. Then select the brush tool. I use a soft round brush, opacity 50%. Make the foreground color black and brush over the ends of the sun rays. This will make the ends of the sun rays less bright.
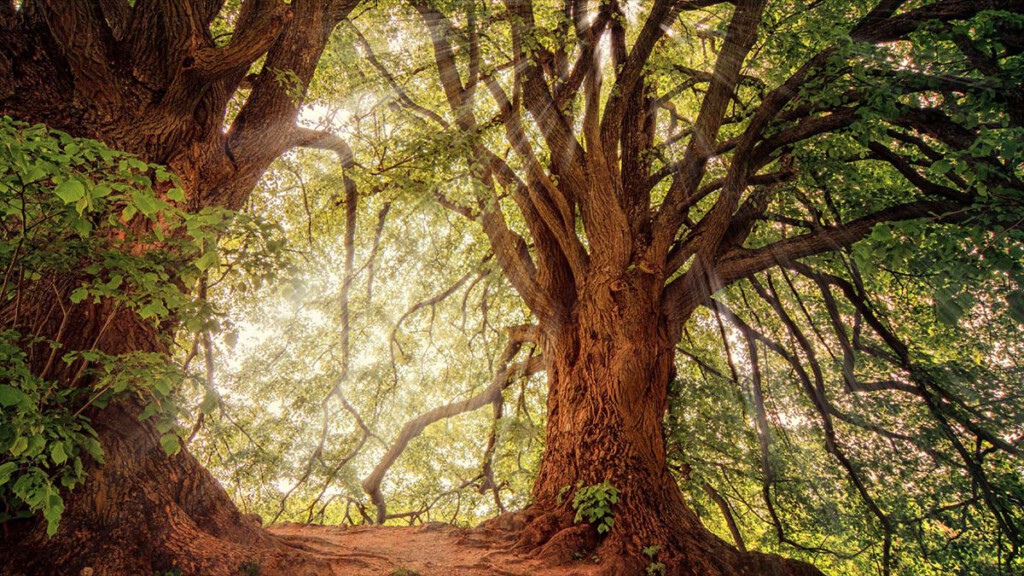
And that’s how you create sun rays in Adobe Photoshop! You can see the result below.
Want to learn more about editing in Adobe Photoshop? Check out my other blogs or take a look at my YouTube channel.
Follow me on Facebook to stay updated! You can find the video with instructions below.
Photoshop
Basics
Photo editing
Creative editing
Camera Raw
Neural filters
Text effects