
Published on November 12, 2022
Add clouds to your sky
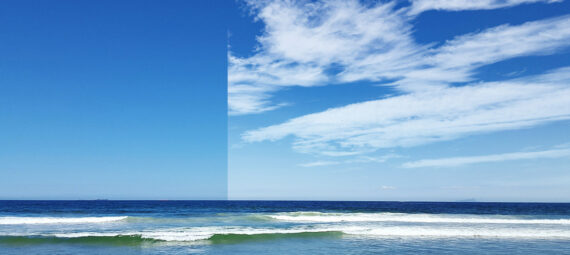
In this blog I’ll show you a trick to add the clouds from one photo to the sky of another photo in Adobe Photoshop.
Rather watch the video with instructions? Then click here or scroll down to the end of this page.
You can download the photos I used here:
Beach
Sky
Step 1: Add new sky
Open the photo you want to edit and the photo with the clouds you want to use.
First open the photo with the clouds you want to use. Select the move tool and drag this photo towards the other file. Place the photo over the photo you’re editing.
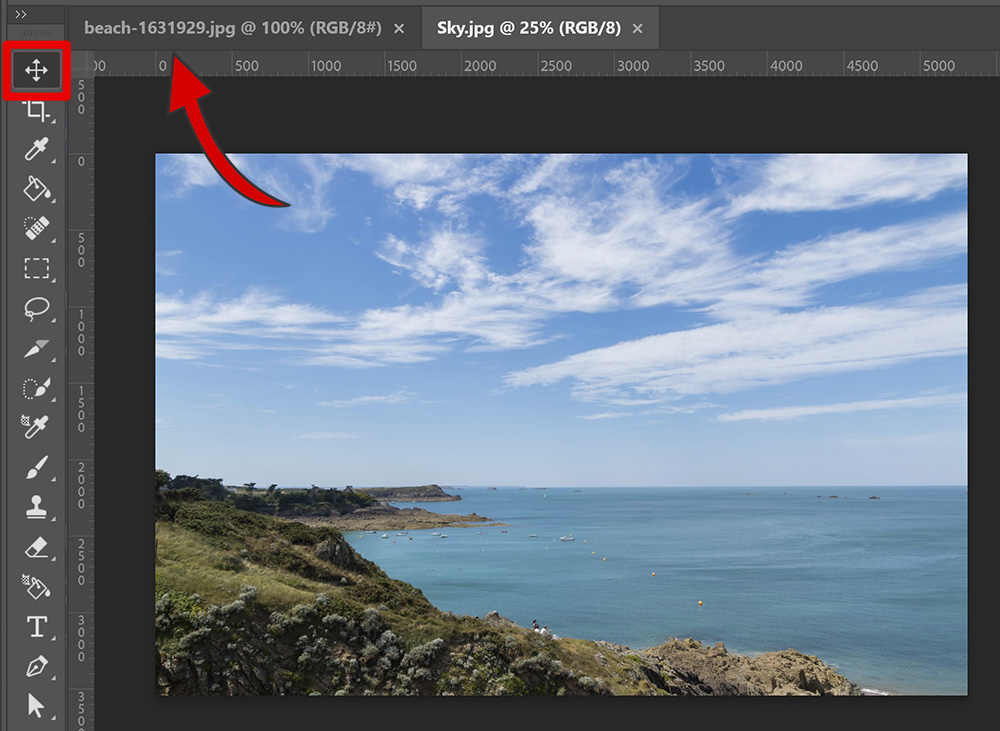
You now have a new layer (layer 1) with the sky. I name this layer ‘sky’.
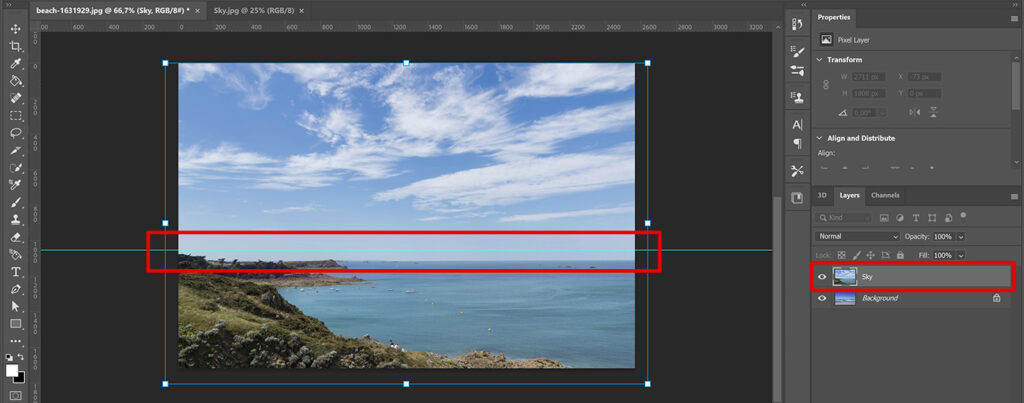
The new sky is now covering your original photo, so you can’t see where the sky of the original photo ends. Make the sky layer invisible and create a guideline to see where the original sky ends. Then make the sky layer visible again.
Select the sky layer and press CTRL+T to activate free transform. Then resize the sky layer. The photo I’m using also has land in the foreground. If that’s the case, make sure the foreground doesn’t cover the original sky (you can use the guideline to see that).
Step 2: Add clouds
You can now blend the new sky with the original sky. Change the blend mode of the sky layer to ‘screen‘.
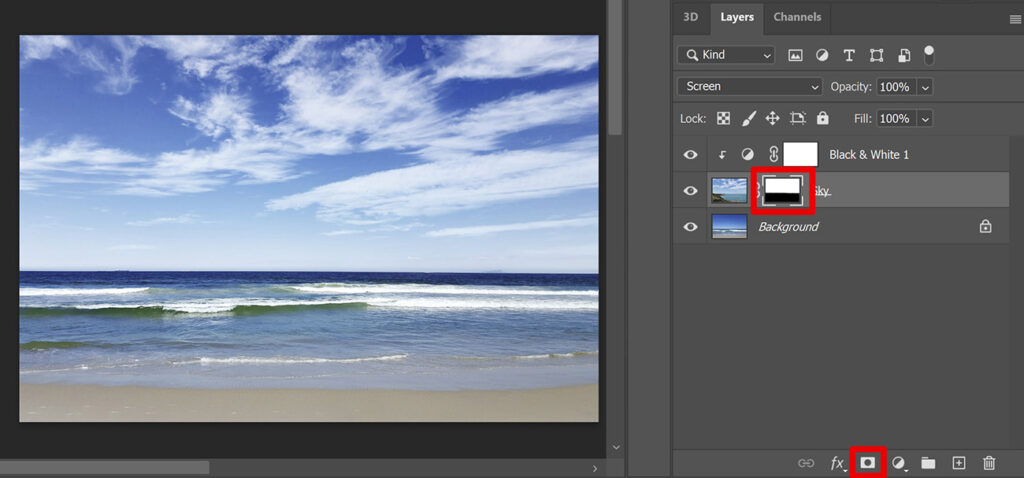
Then create a ‘black & white‘ adjustment layer.
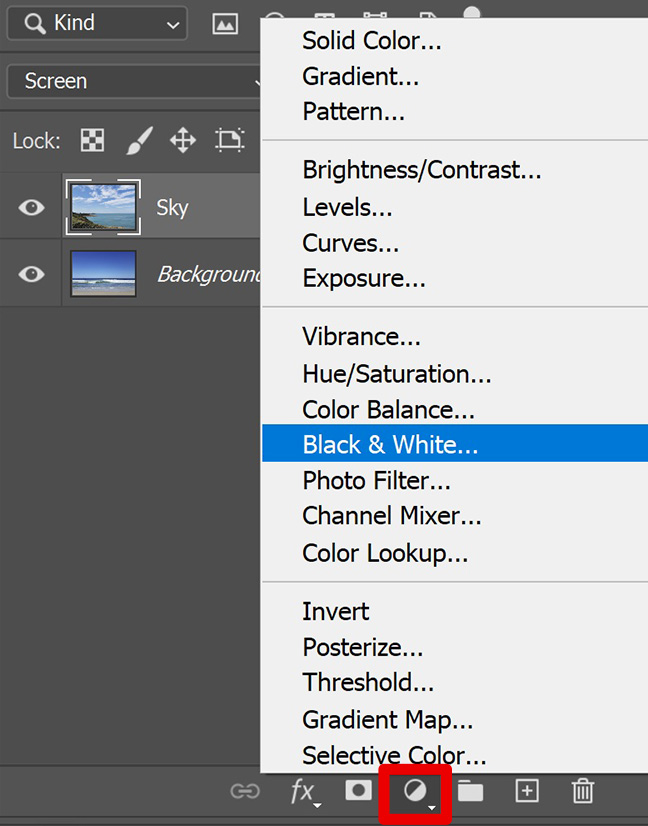
Clip this adjustment layer to the one below it (the sky layer) by clicking in the icon I marked in the image below. You can tell the layer is clipped by the arrow icon next to it.
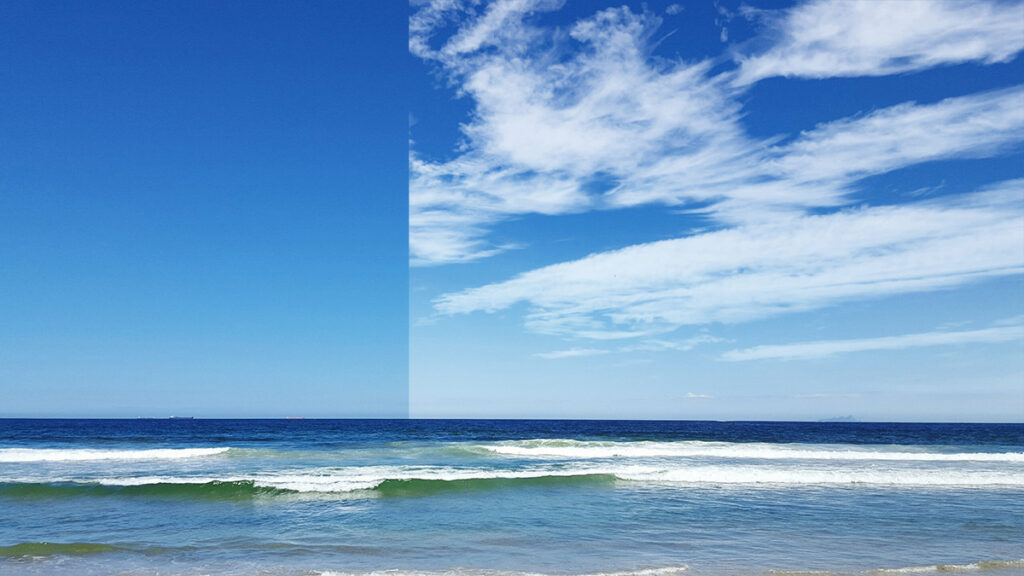
Then adjust the cyans and blues to blend the new sky with the original sky.

As you can see in the image above, part of the new sky is covering the foreground (the sea) of the original photo.
To fix that, select the background layer. Then navigate to ‘Select > Sky‘. Photoshop will now select the original sky.
Then select the sky layer and add a layer mask. The new sky now only covers the sky area and it no longer covers the foreground.
Step 3: Blend sky with foreground
You can make the transition between the new sky and the original foreground a bit smoother to make it look more realistic.
To do that, select the layer mask of the sky layer. Then select the brush tool, I use a soft round brush. Make the foreground color black and lower the opacity to 20%. Then brush over the area where the sky meets the foreground.
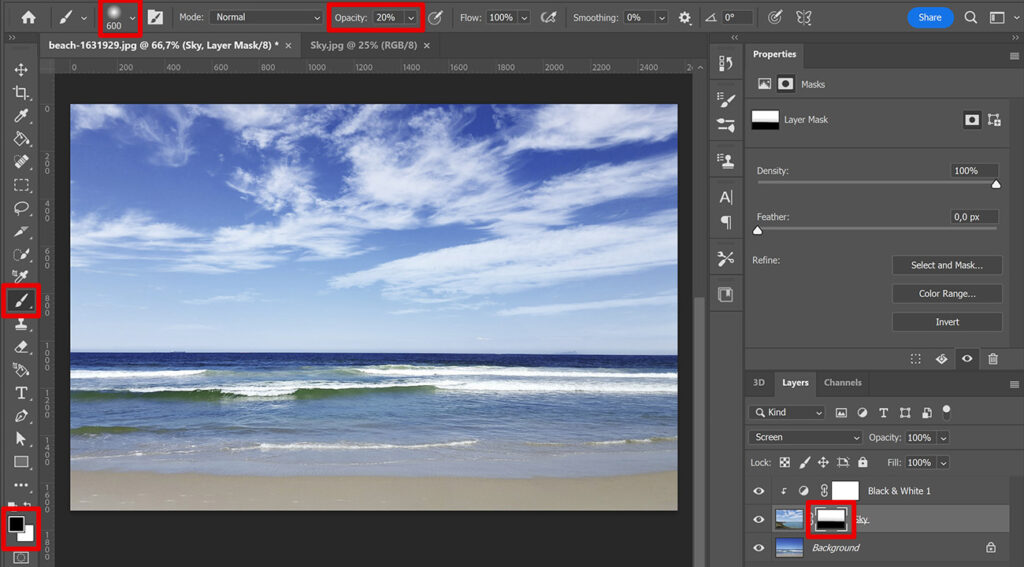
If you want to adjust the clouds, select the black & white layer and adjust the cyans and blues.
And that’s how you add clouds to your sky in Adobe Photoshop!
To add clouds to your sky, you can also use a cloud brush. You can make these cloud brushes yourself! Want to know how? You can read it in this blog!
Want to learn more about editing in Adobe Photoshop? Check out my other blogs or take a look at my YouTube channel.
Follow me on Facebook to stay updated! You can find the video with instructions below.
Photoshop
Basics
Photo editing
Creative editing
Camera Raw
Neural filters
Text effects