Published on February 9, 2023
Blur background (motion blur)
In this blog I’ll show you a super fast and simple method to blur a background using motion blur in Adobe Photoshop.
Rather watch the YouTube video with instructions? Then click here or scroll down to the end of this page.
You can download the photo I used here.
Step 1: Select and mask subject
Open the photo you want to edit. Press CTRL+J to duplicate the background layer. Right click on the new layer and select ‘convert to smart object‘.
Then navigate to ‘Select > Subject‘. Photoshop will now select the subject for you.
Add a layer mask. Navigate to ‘Image > Adjustments > Invert‘ (or press CTRL+I) to invert your layer mask. Your layers should now look similar to mine (see image below).

Step 2: Blur background (motion blur)
Click on the thumbnail of layer 1 to select the layer. Make sure the layer mask is not selected!

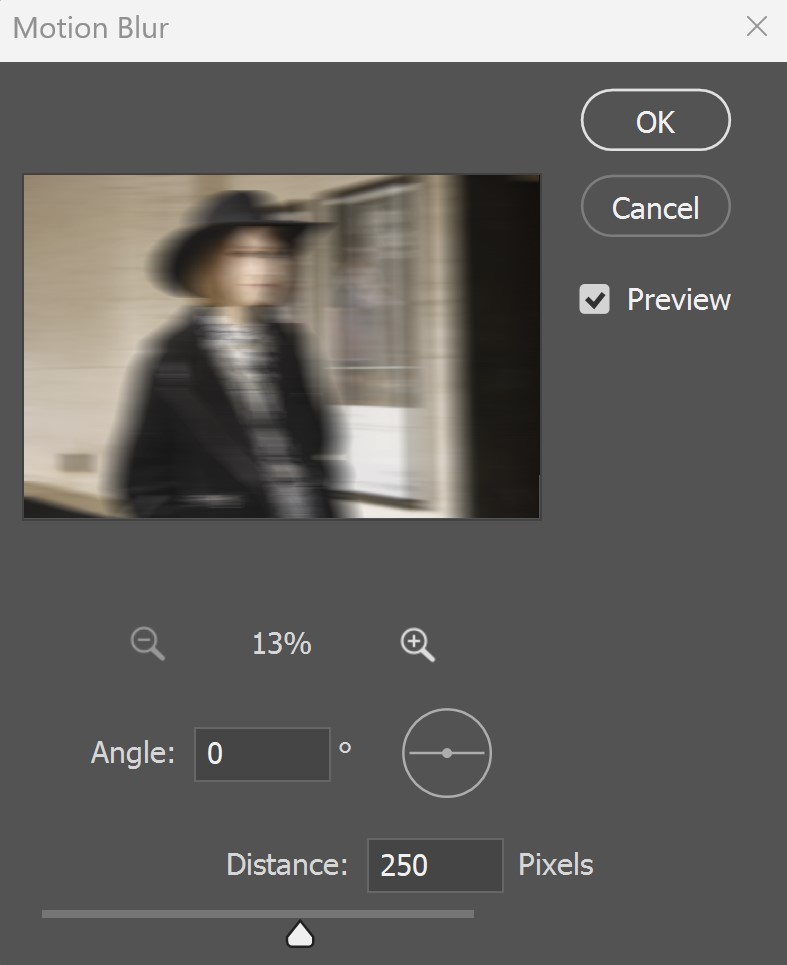
Then navigate to ‘Filter > Blur > Motion blur‘. You can find the settings I used in the image below.

Click OK. Because you added a layer mask, the subject is not blurry.
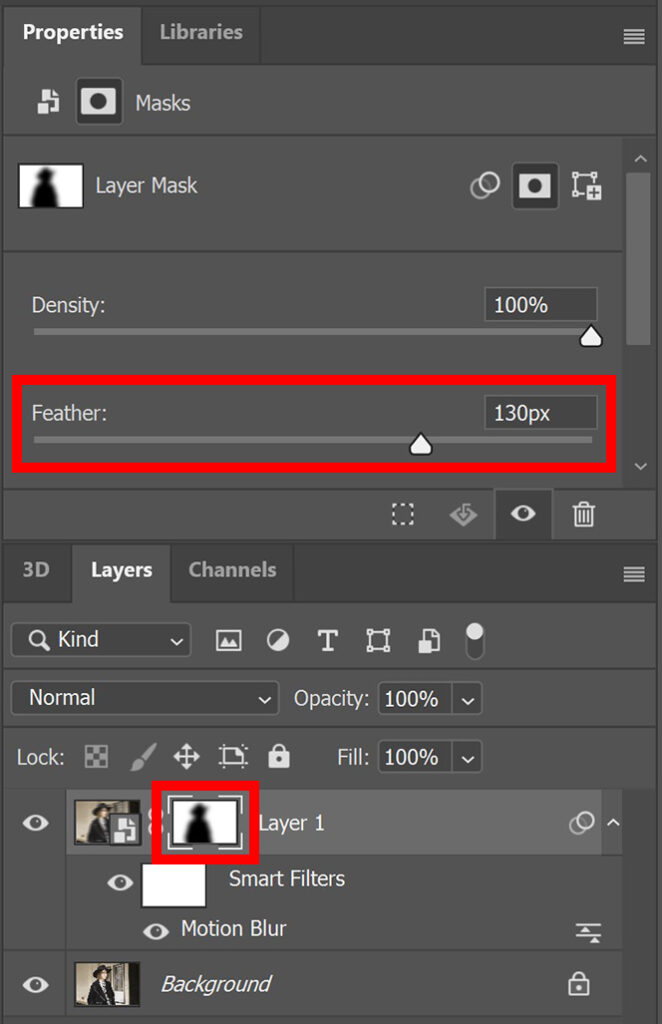
The transition between the subject and the background is very rough now. Select the layer mask and increase the feather to smoothen that transition. If you increase the feather too much, the subject will get blurry. So keep an eye on that while adjusting the feather.

If you want to adjust the amount of blur, double click on the ‘motion blur’ layer and increase or decrease the distance.
To adjust the feather, select the layer mask and increase or decrease the feather (see image above).
And that’s how you blur a background using motion blur in Adobe Photoshop!

Learn more about editing in Photoshop
Want to learn more about editing in Adobe Photoshop? Check out my other blogs or take a look at my YouTube channel.
Follow me on Facebook to stay updated about new blogs and tutorials! You can find the video with instructions below.
Photoshop
Basics
Photo editing
Creative editing
Camera Raw
Neural filters
Text effects

