

Published on November 6, 2021
How to blur your background in Photoshop?
In this blog I’ll show you how to blur your background in Adobe Photoshop. If you’d rather watch the video tutorial of this process, click here or scroll down to the end of this page.
If you want to download the image I used for this explanation, click here. Now, let’s get started!
Step 1: Select and mask
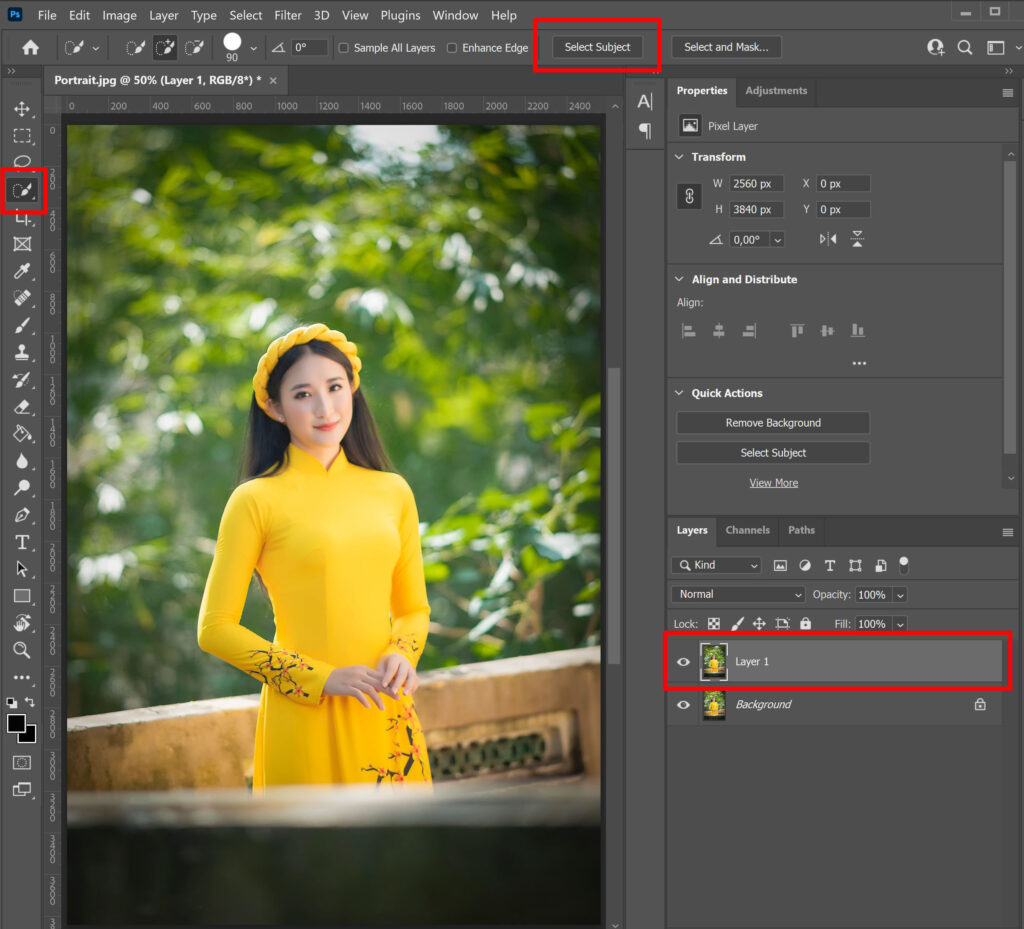
Press CTRL+J to duplicate the background layer. We need to ‘cut out’ our subject, so select the layer copy and select the quick selection tool. Select your subject or click ‘select subject‘ if you want Photoshop to make the selection.
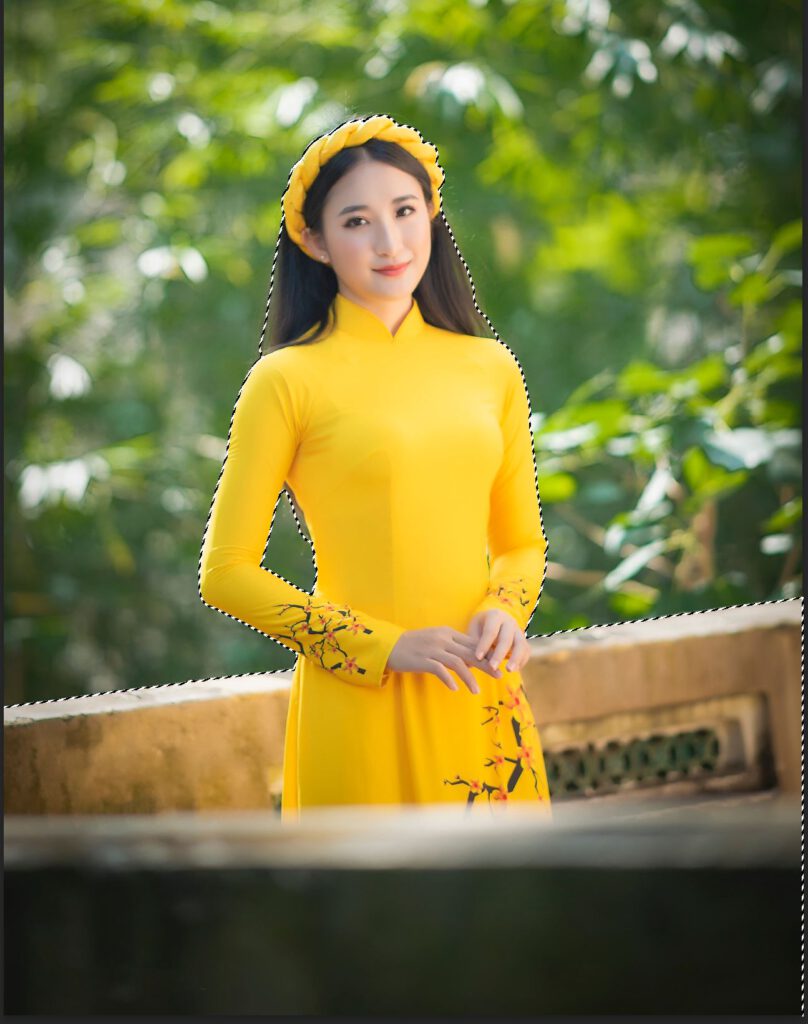
I only want to blur the greenery behind my subject. So I select both my subject and the walls in front of and behind her.
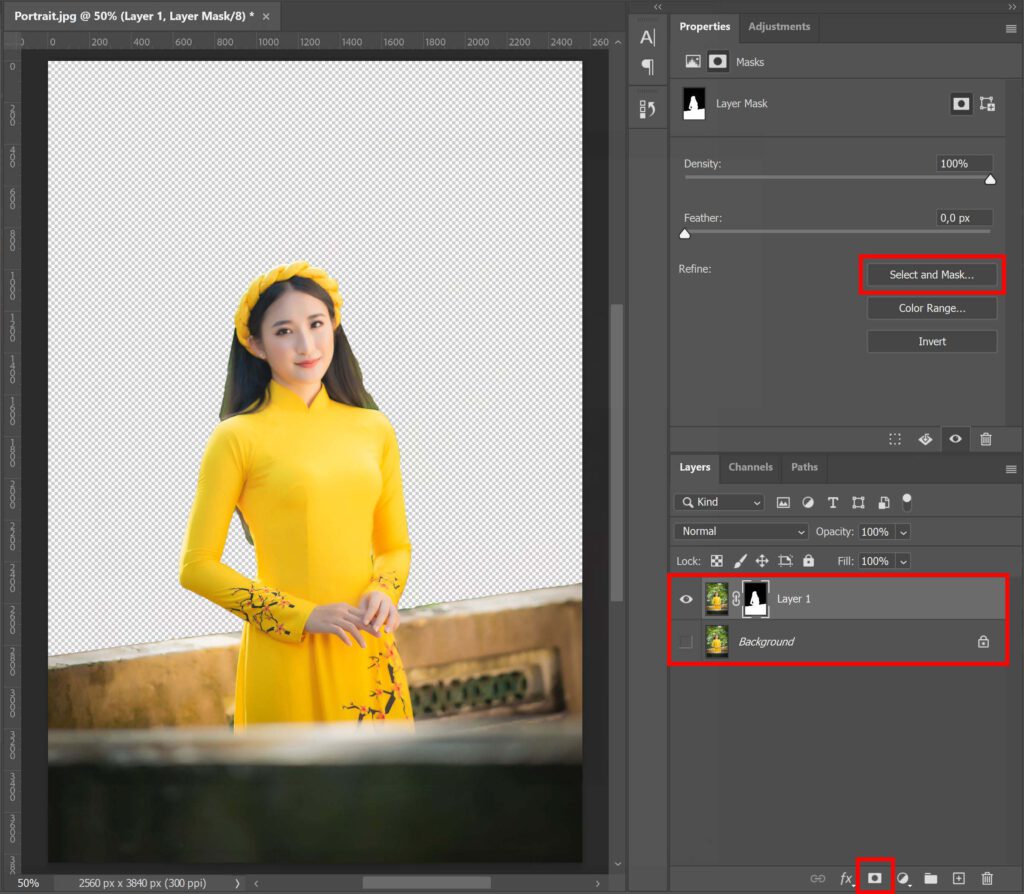
Add a layer mask. If you make your background layer invisible (click on the eye icon next to it), you’ll see that the selection of the subject is a bit rough. Select your layer mask and click on ‘select and mask‘ to fix that.
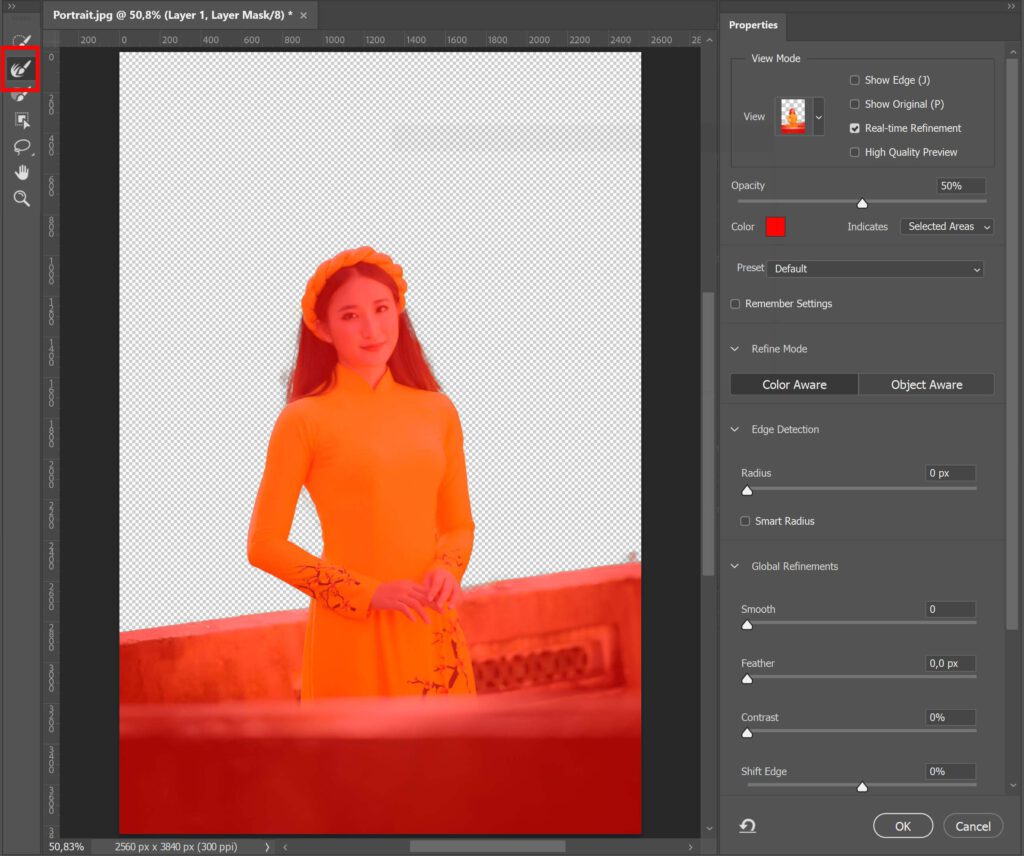
Select the refine edge brush tool and brush over the rough edges of your selection. The refine edge brush tool is a great tool to select complex shapes, such as hair. This tool allows you to precisely select these areas. Once you’re done, click OK.
Step 2: Blur your background
Now that we have cutted out our subject by adding a layer mask, we need to blur the background. Select the background layer and press CTRL+J to duplicate it again. Make the layer with the layer mask (Layer 1) invisible for now and select the new layer (Background copy).

To blur the background, we want to remove our subject first. Select the lasso tool and make a rough selection around your subject (in this case the girl and the walls).

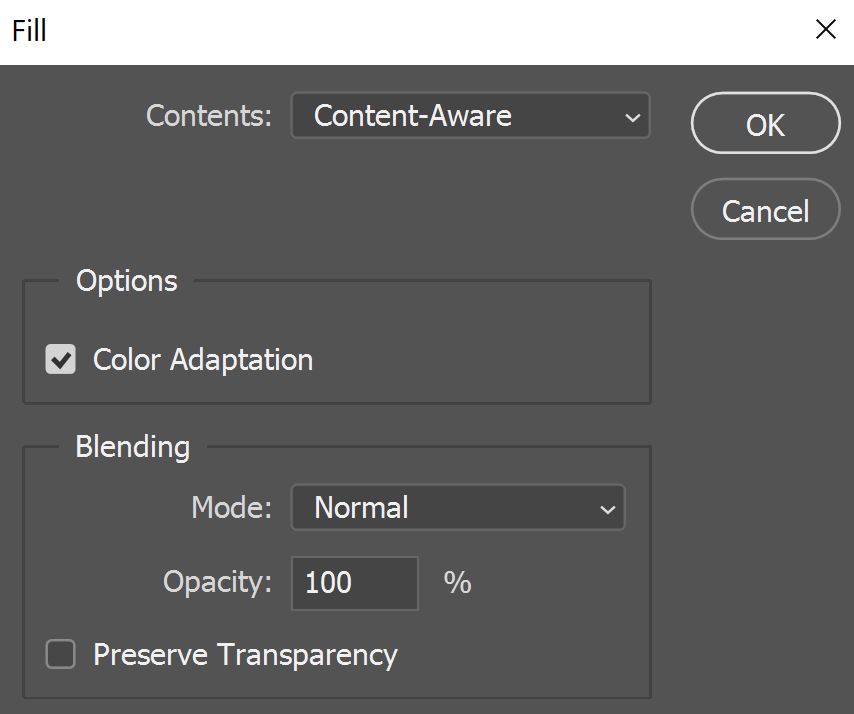
Now navigate to ‘Edit > Fill‘ and copy the setting below, or navigate to ‘Edit > Content-Aware Fill‘. Both methods use content-aware fill to fill the selected area.
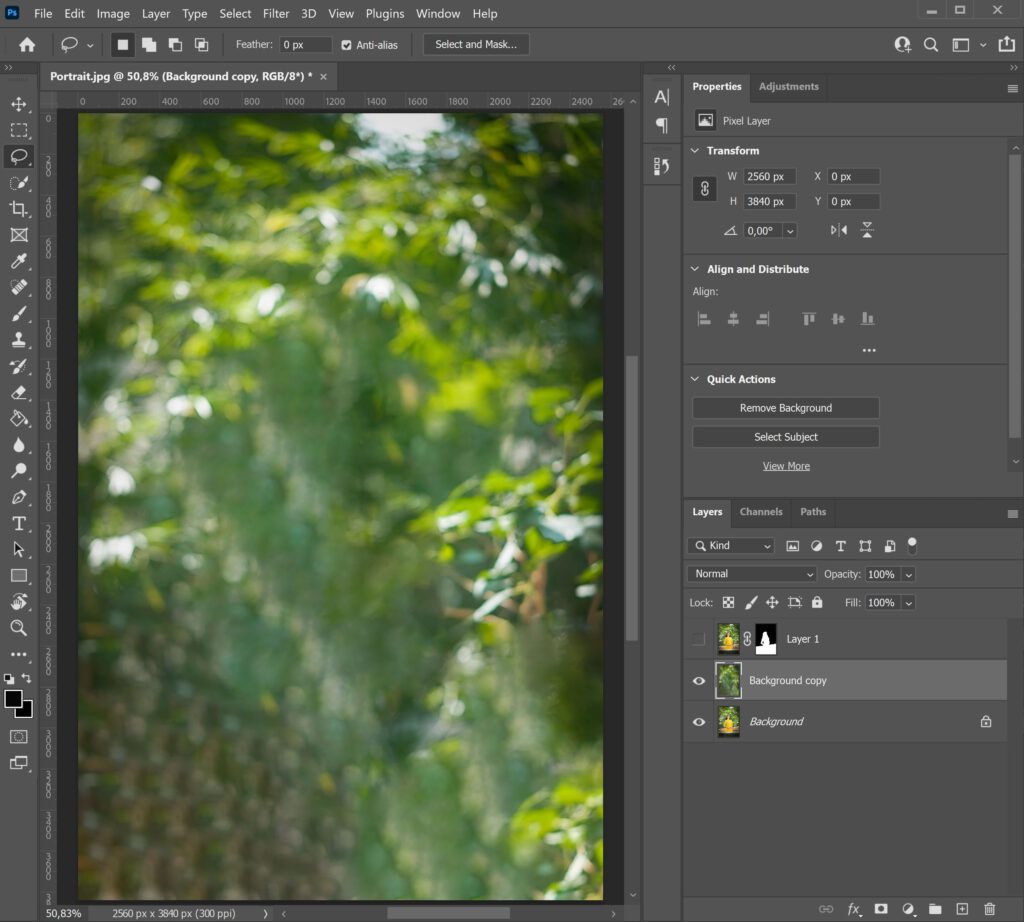
Press CTRL+D to deselect. My image is now filled with greenery and my subject is gone (see image below). This doesn’t have to look great, because we’ll blur it and our subject will go over a large part of it.
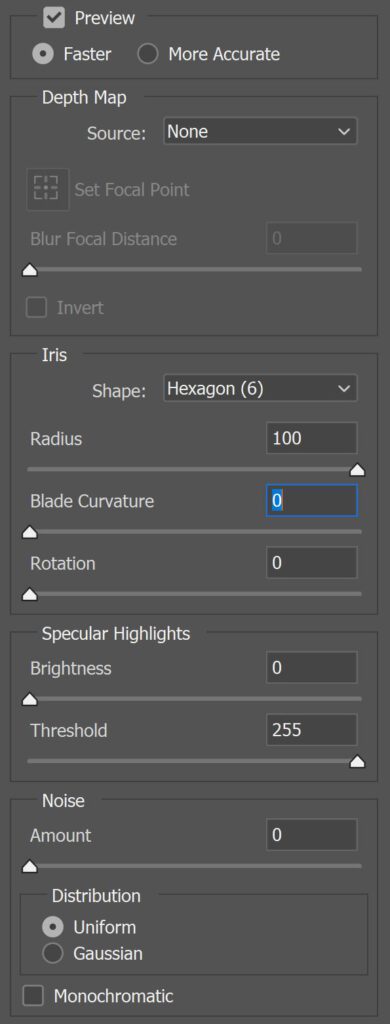
So now we need to blur this layer. Navigate to ‘Filter > Blur > Lens blur‘. You can see the settings I used in the image below, but feel free to use different settings.
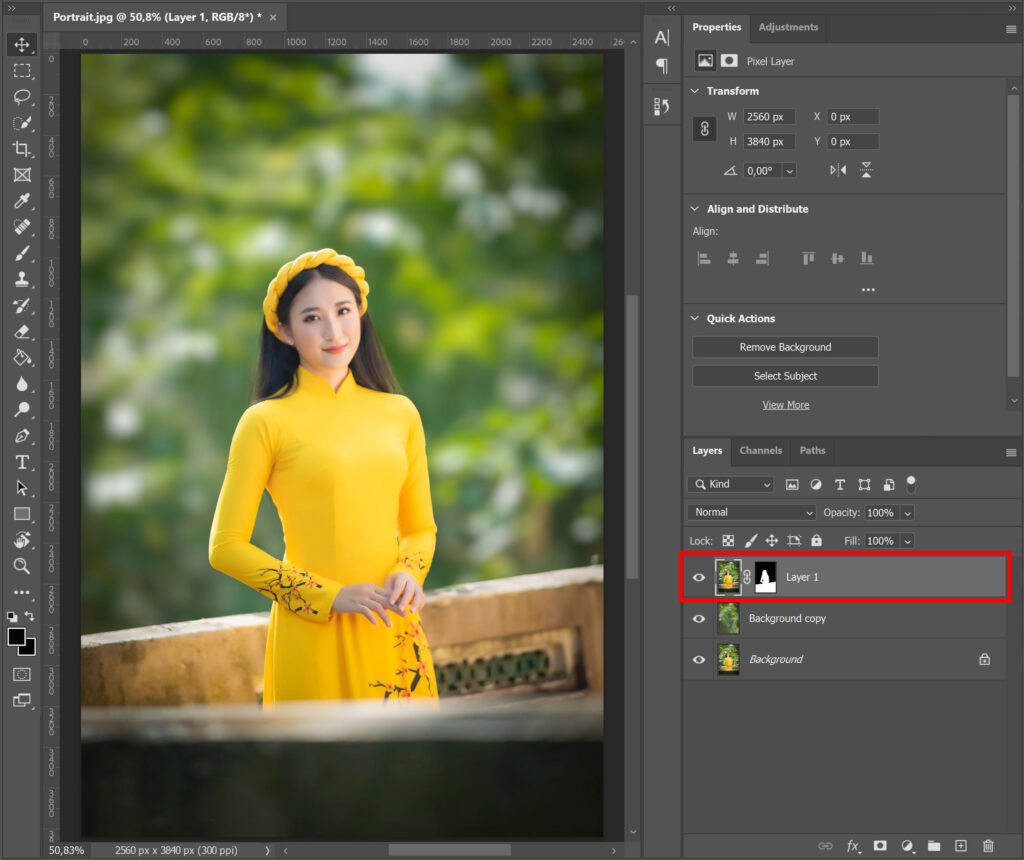
Press OK. This layer is now blurred, so all we need to do is bring back our subject. Make the layer with your subject visible again by clicking the eye icon.
Tip: Hold ALT while clicking on the eye icon next to your background layer. All other layers will become invisible, so you can see your original image. Now hold ALT and click the eye icon next to the background layer again to make all layers visible. This way you can clearly see the difference between your before and after image.
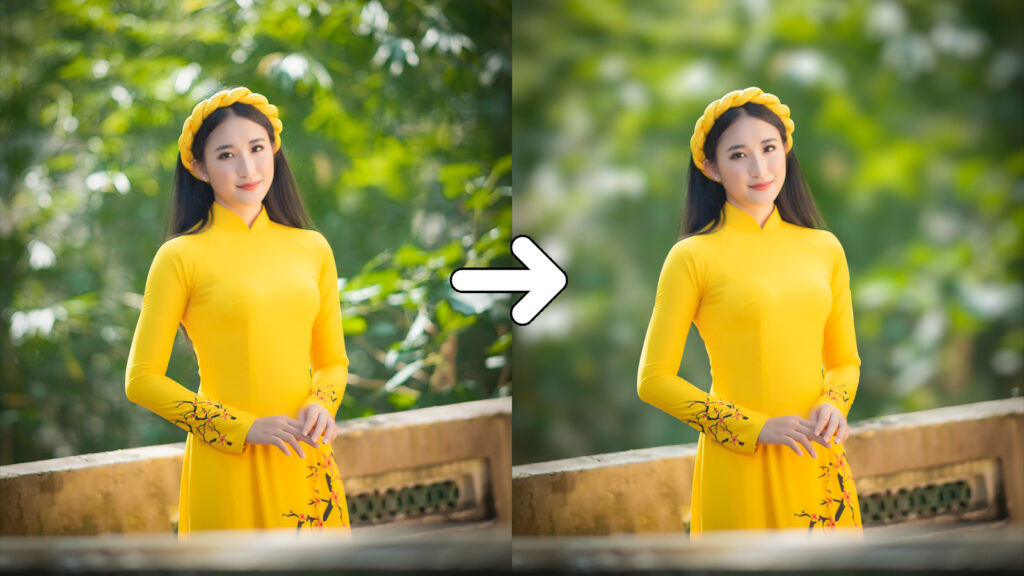
And that’s how you blur your background in Adobe Photoshop. See the image below for the before and after image.
Learn more about Photoshop
If you’re looking for a faster method to blur your background, you can also use the blur background quick action. Want to know more about this method? Then read the blog I wrote about it.
Want to learn more about editing in Adobe Photoshop? Check out my other blogs or take a look at my YouTube channel.
Follow me on Facebook to stay updated! You can find the video tutorial below!
Photoshop
Basics
Photo editing
Creative editing
Camera Raw
Neural filters
Text effects