
Published on November 2, 2021
The update for Adobe Photoshop offers some new Neural Filters. One of them is the Landscape Mixer. With this filter you can transform your landscape photo completely by mixing different landscape photos together or by changing the season.
Rather watch the video tutorial of this process? Click here or scroll down to the end of this page!
If you want to download the image I used for this explanation, click here.
Landscape mixer
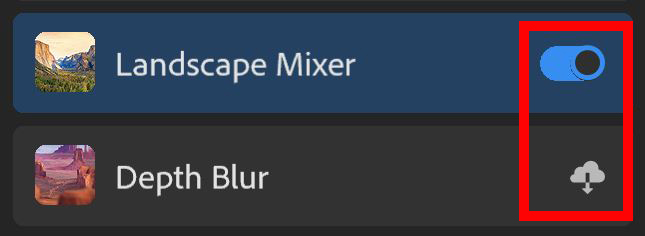
Navigate to ‘Filter > Neural Filters‘. If you’re using the Landcape Mixer for the first time, you have to download it first by clicking on the cloud icon. If you downloaded it already, activate it by clicking on the icon next to it.
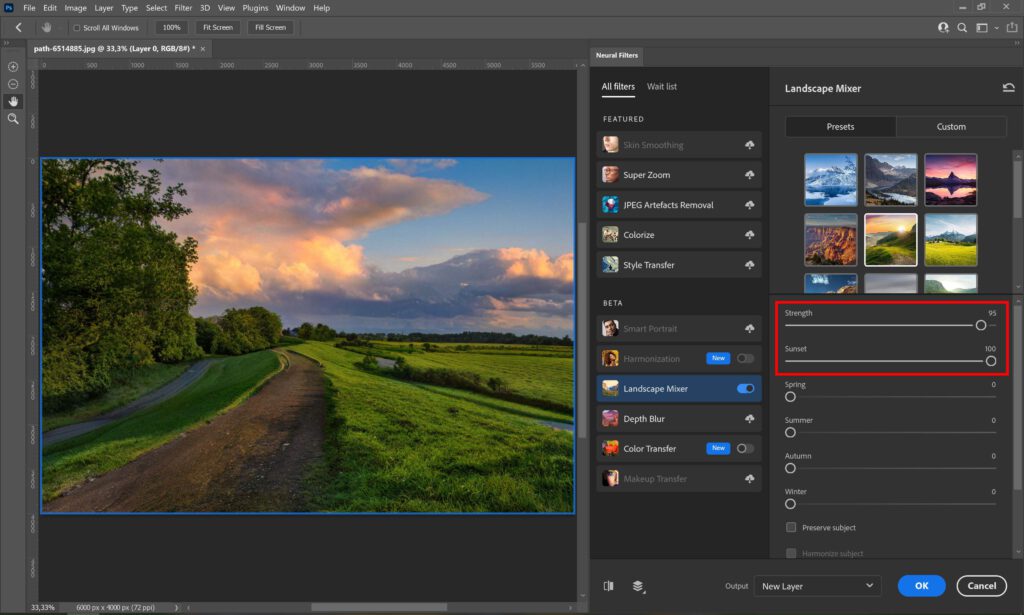
Under ‘presets‘, you’ll find different landscape photos. You can pick one of these presets as a starting point. For this example below, I picked a sunset landscape.

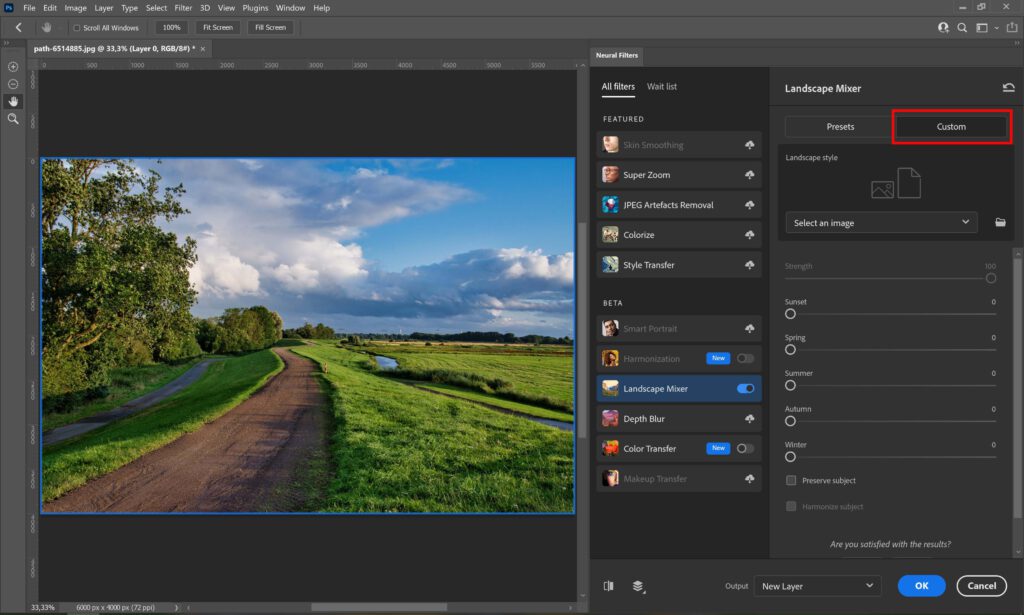
As you can see, there are sliders for each season and one for sunset. Try out some different things to see what that does to your image and in combination with the photo you selected to mix your original photo with.
I increased the sunset to 100. If the colors look oversaturated and unrealistic, lower the strength a little (lowering it to 95 instead of 100 already made a big difference for this photo).
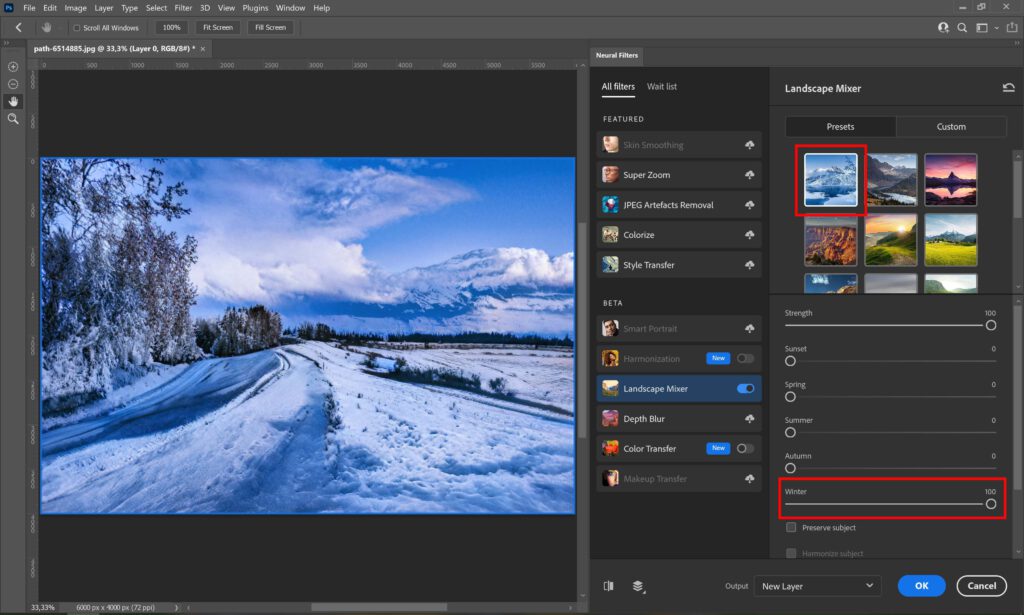
Instead of creating a sunset effect, you can also create a snowy winter wonderland. Select a snow photo from the presets and increase the winter effect.
If you want to use a different landscape photo to mix your photo with, select ‘custom‘ instead of ‘presets’. You can upload a photo that you want to mix with the photo your editing.
Output options
Click on the icon I marked in the image below to switch between your original image and the edited one to see the difference. If you’re done editing, you can choose from a variety of output options:
- Current Layer: Applies the adjustments to the layer you’re working on.
- New Layer: Creates a new layer with the adjustments.
- New Layer masked: Creates a new layer and applies the adjustments as a mask.
- Smart Filter: Applies the adjustments as a smart filter.
- New Document: Opens the adjusted image in a new document.
It’s up to you which option you pick.

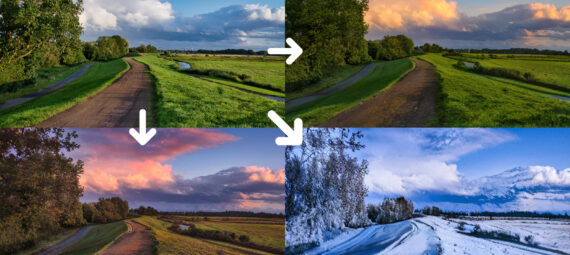
And that’s how you use this new Neural Filter in Adobe Photoshop. Try it out yourself to see the possibilities that this new feature offers! The photo below shows some examples of what you can do with the Landscape Mixer (the photo in the upper left corner is the original).

If you want to learn more about editing in Adobe Photoshop, check the list of categories below or take a look at my YouTube channel. You can find the video tutorial of this process below!
Photoshop
Basics
Photo editing
Creative editing
Camera Raw
Neural filters
Text effects