

Published on June 8, 2022
How do I compare my before and after image?
When I edit a photo in Photoshop, the first thing I often do is duplicating the background layer. You can do this by selecting the background layer, then press CTRL+J to duplicate (copy) this layer.
Then I edit the layer copy, instead of the background layer. The benefit of doing this, is that you leave your background layer untouched. Therefore you can compare your edited image to the original, unedited version of your photo or image (compare the before to the after image).
I’ll show you a simple trick to switch between the before and after image in Adobe Photoshop. You can also watch this short video to see how it works.
Edit image
To compare the before and after image, it’s important that you keep your background layer untouched. So if you’re going to make adjustments to the layer itself, duplicate the background layer first (press CTRL+J) and then edit the layer copy.
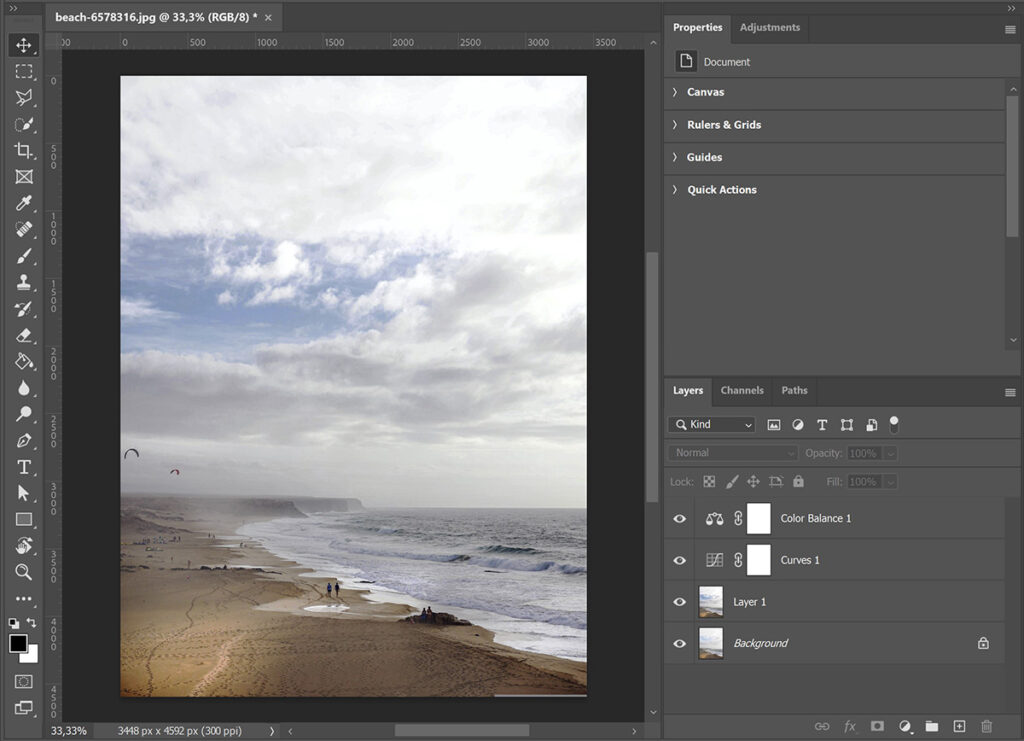
For this example I duplicated the background layer and made some adjustments to layer 1 (the copy) with the Camera Raw Filter. If you don’t convert this layer to a smart object, the adjustments will directly apply to the layer.
If you add adjustment layers, your background layer will also stay unedited (because adjustments layers are new layers and they don’t directly affect the layer itself). So I also added some adjustment layers.
You can see what my layer panel now looks like in the image below.
Compare before and after image
If you want to compare the edited image to the original image, you need to make all the layers invisible except the background layer. There’s a simple trick to make all these layers invisible at once!
Hold the ALT key and click on the eye icon next to your background layer. All the layers will become invisible, except the background layer. You now see your before image.
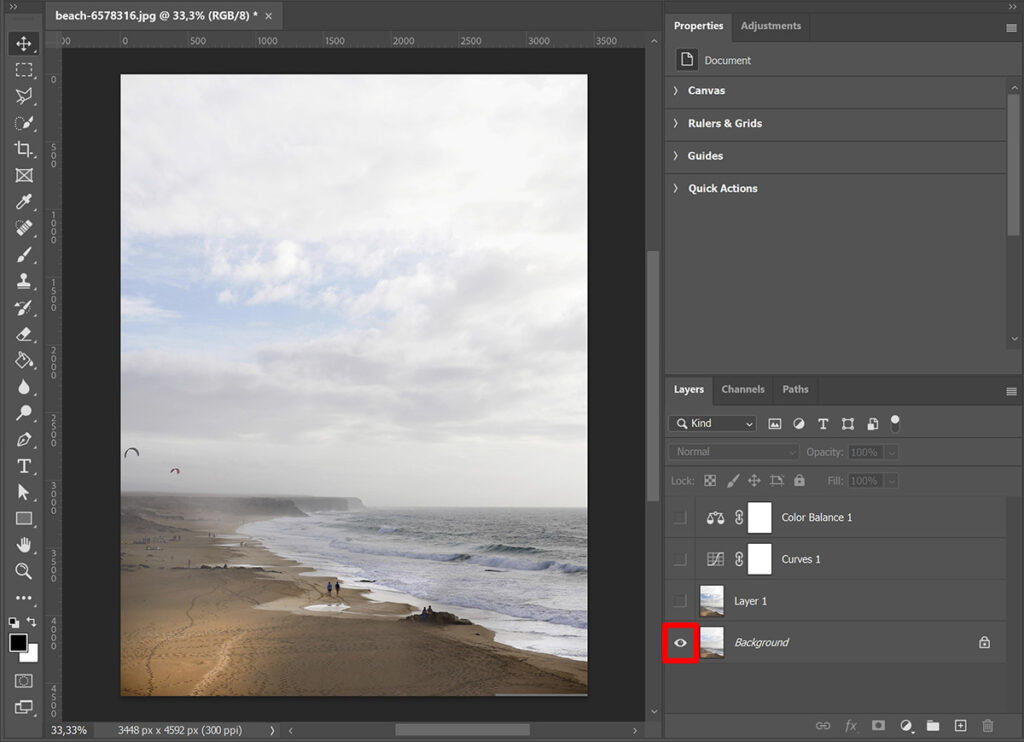
Hold ALT and click on the eye icon again to make all the layers visible again. You’ll now see the edited (after) image. This way you can easily switch between the original and edited image, so you can compare them!
If you hold the ALT key and you click on the eye icon of another layer, that layer will stay visible and the rest will become invisible. So it doesn’t only work on the background layer, you can use this trick for all the layers. The layer of which you click on the eye icon remains visible, the rest will become invisible. Then click on the eye icon again, while pressing ALT, to make the rest visible again.
Learn more about Photoshop
Want to learn more about editing in Adobe Photoshop? Check out my other blogs or take a look at my YouTube channel.
Follow me on Facebook to stay updated about new blogs and tutorials!
Photoshop
Basics
Photo editing
Creative editing
Camera Raw
Neural filters
Text effects