Published on September 27, 2022
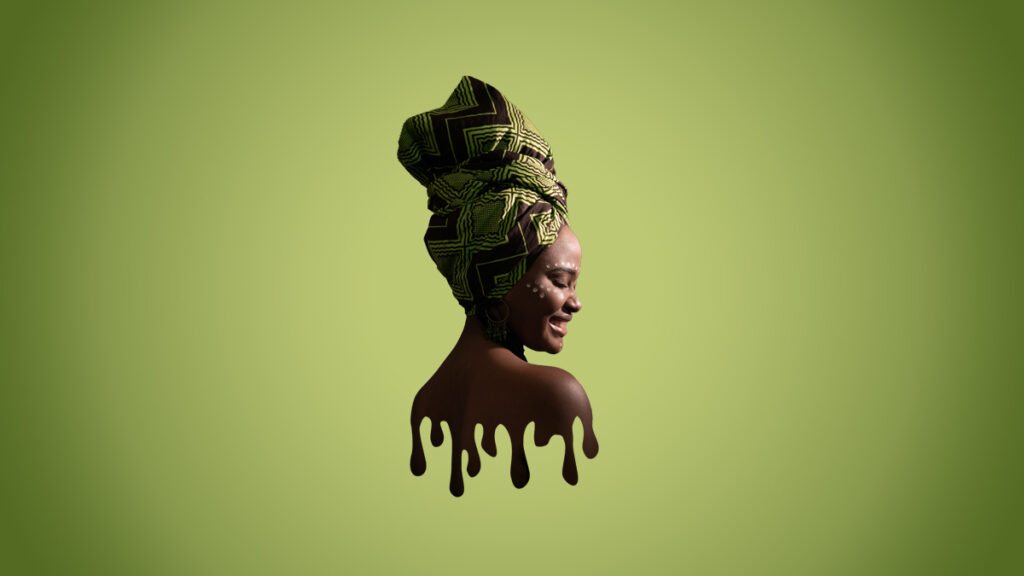
Dripping paint portrait
In this blog I will show you how to create this dripping paint effect for portraits in Adobe Photoshop.
Rather watch the video with instructions? Then click here or scroll down to the end of this page.
You can download the images I used here:
Portrait
Drips
Step 1: Select subject
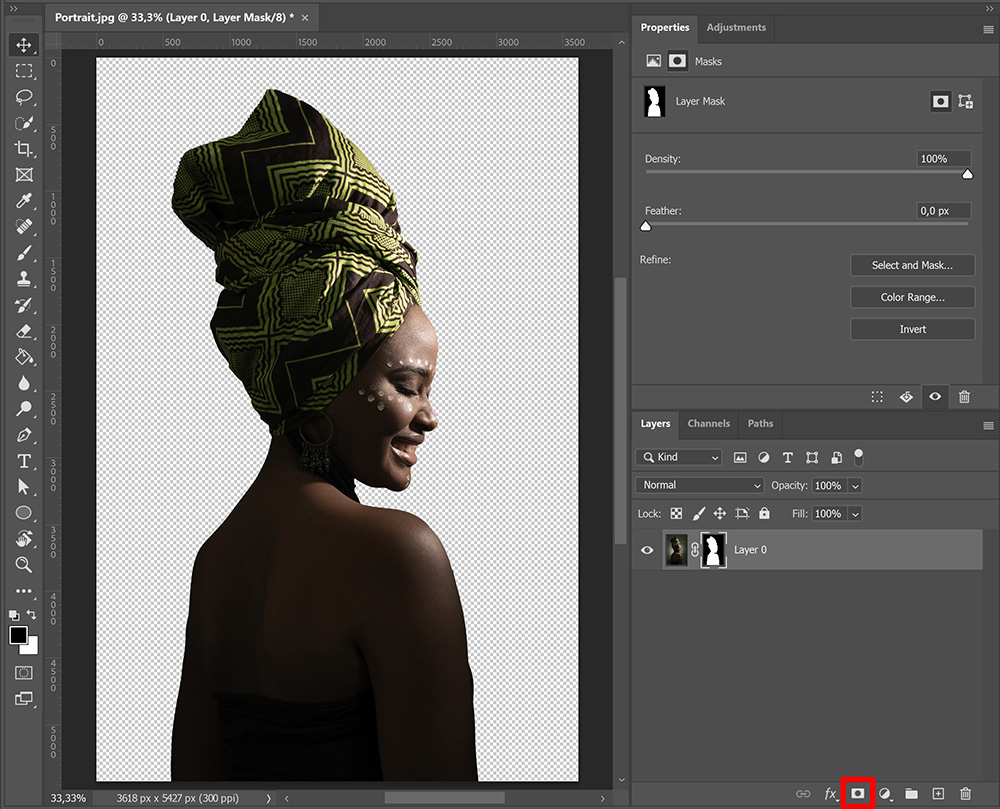
Open the portrait you want to edit. Then navigate to ‘Select > Subject‘. Photoshop will now select your subject.
Add a layer mask. You now have your subject with a transparent background.
Step 2: Dripping paint portrait
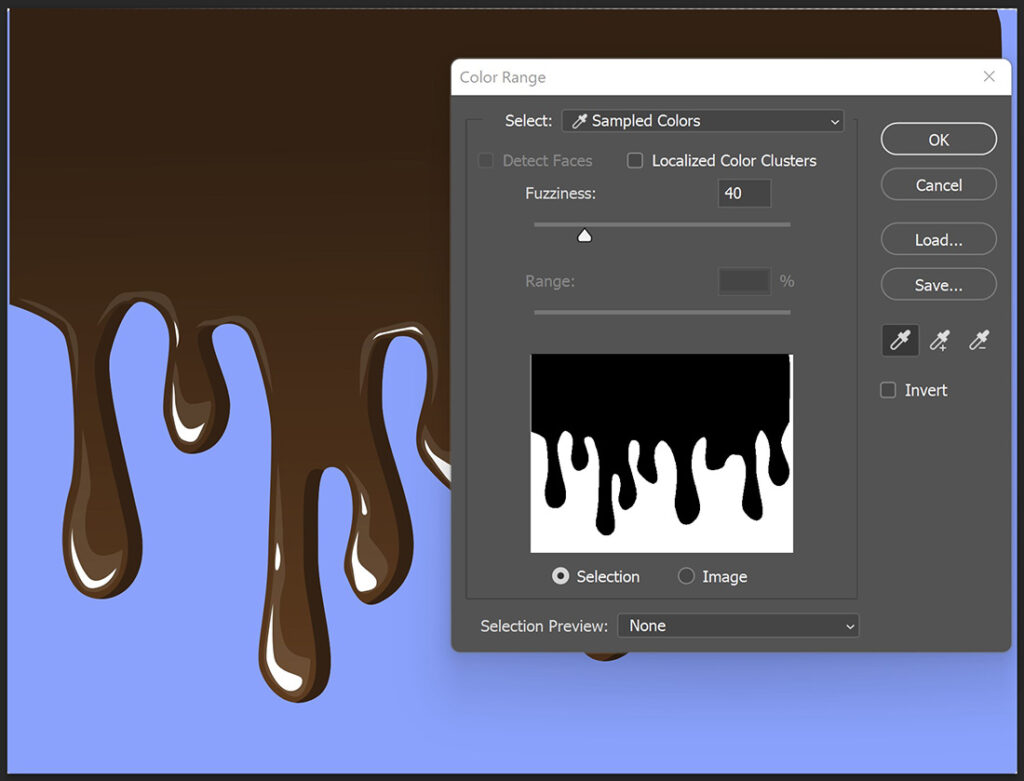
Now open the image with the dripping paint (or dripping chocolate, in this case). Your image needs to have a transparent background. So I remove the background of this image first.
Navigate to ‘Select > Color range‘. Click on the background of your image with the color picker to select it. Click OK.
Then press the backspace or delete key to remove the background. Press CTRL+D to deselect.
Select the move tool. Drag this image towards the file you’re working on and place it over your portrait.
Press CTRL+T to activate free transform. You can now resize the drips and pick the correct position. Make sure the entire subject fits in the drips at the bottom.
Press and hold CTRL and click on the thumbnail of the drip layer. You’ll see that the drips are now selected, because there’s a dashed line around it. Make the drip layer invisible (click on the eye icon). The drips should still be selected.
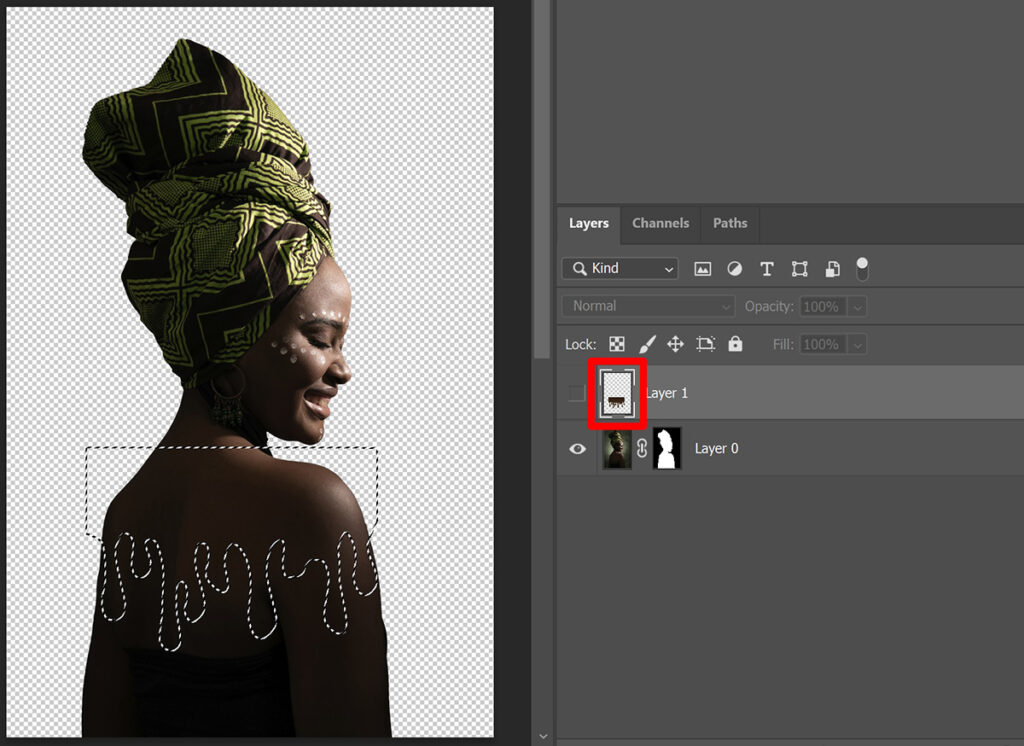
We don’t want to select the drips though. We want to select everything but the drips. So navigate to ‘Select > Inverse‘.
Select the layer mask. Then select the brush tool, opacity 100%. Make the foreground color black and brush over the bottom of the image, below the drips. These areas will now disappear.
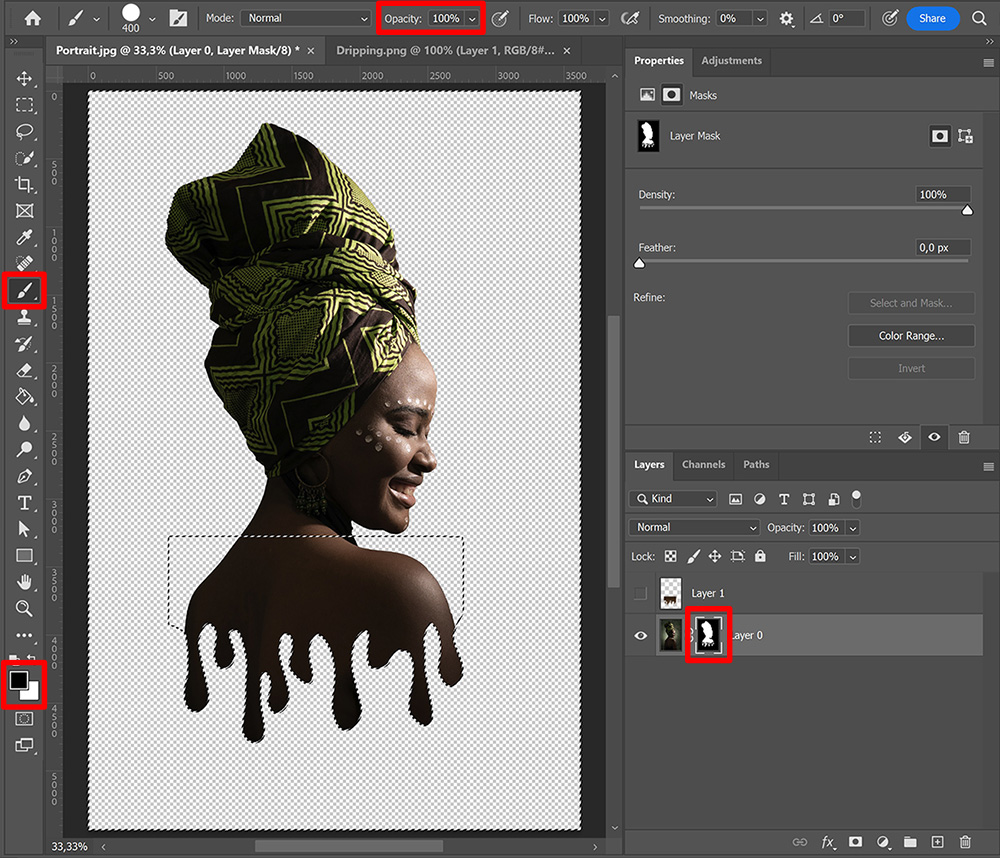
Press CTRL+D to deselect.
If you want to make the transition between the shoulders and the drips less sharp, brush over it. Make sure the layer mask is still selected and the foreground color should be black.
Step 3: Add background
Your file now has a transparent background. To add a solid background, create a solid color layer.
Pick a color and click OK. Then place this layer below the portrait layer. To adjust the color, double click on the thumbnail of the color fill layer.
I created a gradient background by adding a gradient layer instead of a solid color layer.
And that’s how you create this dripping paint portrait in Adobe Photoshop!
Want to learn more about editing? Check out my other blogs about Photoshop and Lightroom or take a look at my YouTube channel.
Also follow me on Facebook to stay updated! You can find the video tutorial below.
Photoshop
Basics
Photo editing
Creative editing
Camera Raw
Neural filters
Text effects

