

Published on September 25, 2022
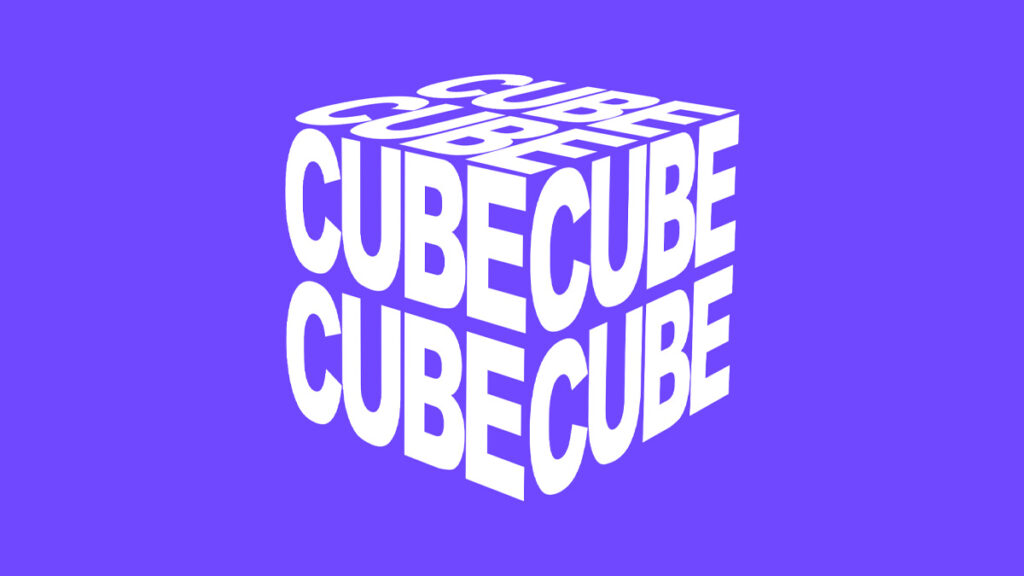
Create a cube text effect
In this blog I’ll show you how to create a cube text effect in Adobe Photoshop.
Rather watch the video with instructions? Then click here or scroll down to the end of this page.
Download the cube I used. Let’s start!
Step 1: Create text
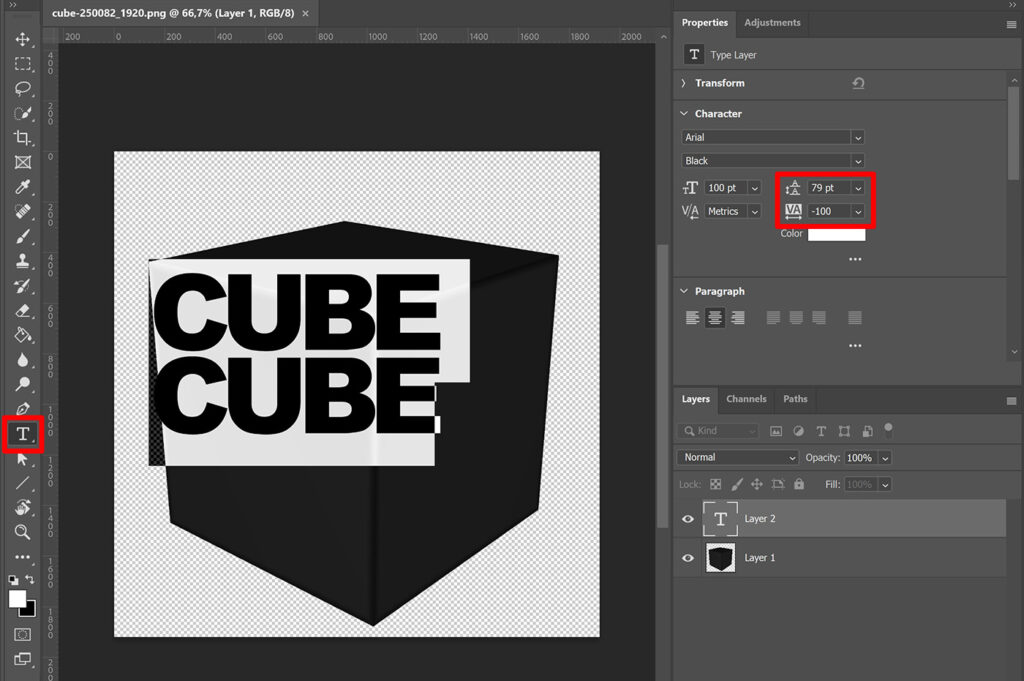
Open an image of a cube. We’ll use this to create the cube shape for the text. Then select the horizontal type tool. Pick a font and text color and type your text.
Press CTRL+A to select the entire text. You can now adjust the leading and tracking to place the words and/or letters closer together or further apart.
Tip: Click on the number next to the leading or tracking icon to select it. Then use the arrow up and down keys to adjust the amount.
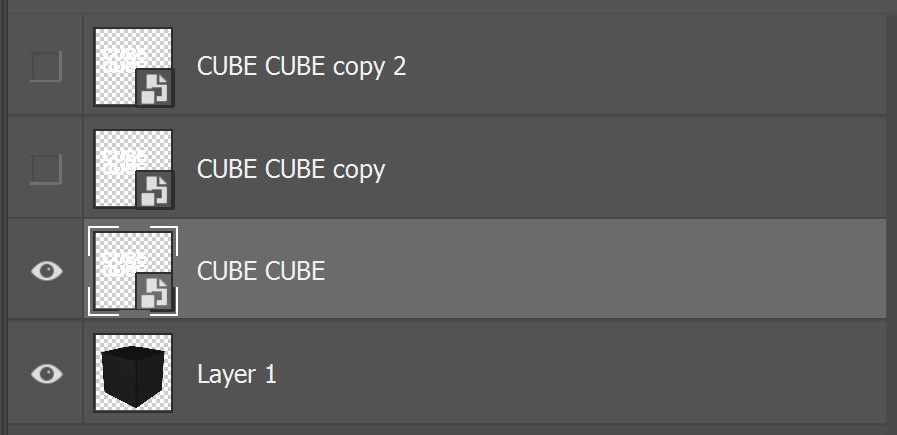
Right click on the text layer and convert it to a smart object. Press CTRL+J twice to duplicate the text layer two times. Make the top two layers invisible (click on the eye icon) and select the bottom text layer.
Step 2: Cube text effect
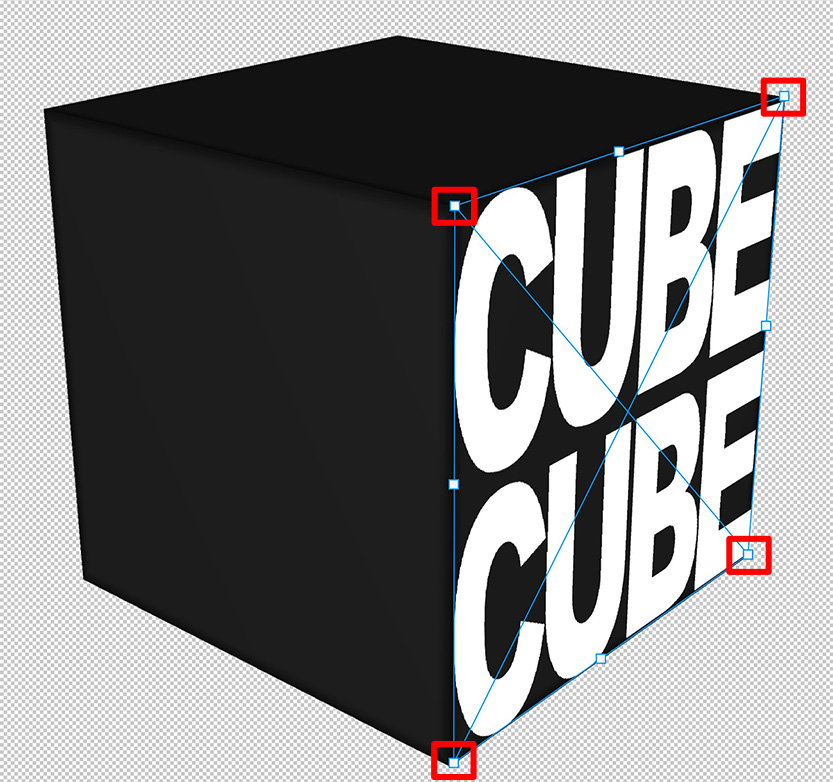
Press CTRL+T. You’ll now see a box (selection) around your text.
If you press and hold CTRL while moving the anchor points in the corner of the selection, you can move the individual points. Place each of the corners in the corner of one side of the cube. Make sure you keep pressing CTRL while doing this.
Click on the ✓ icon when you’re done. You can adjust this later, so don’t worry if it isn’t perfect.
Make the second text layer visible again and select this layer. Again press CTRL+T and fill the other side of the cube with this text (hold CTRL while moving the corners).
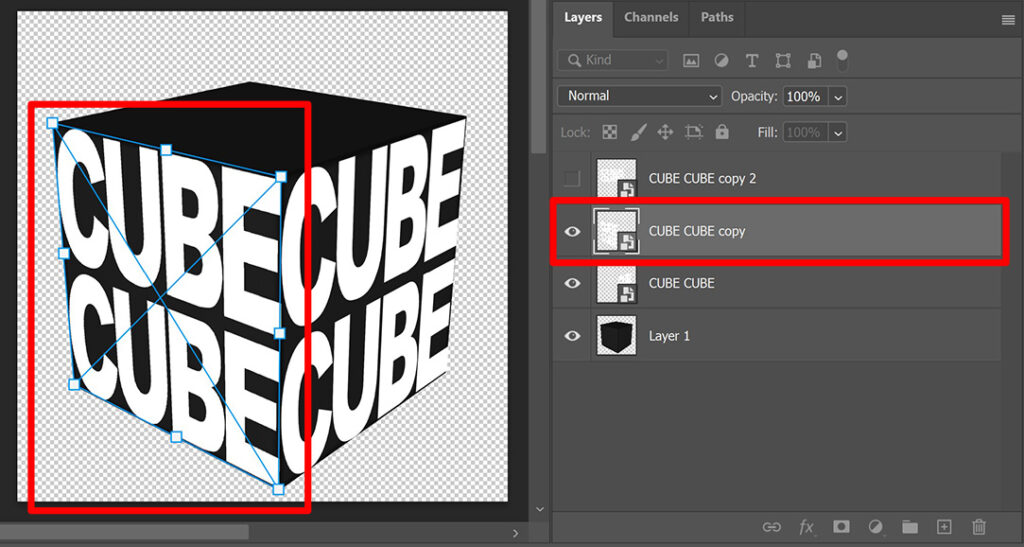
Then make the last text layer visible, select that layer and press CTRL+T. Fill the last side of the cube with this text.
Step 3: Add background
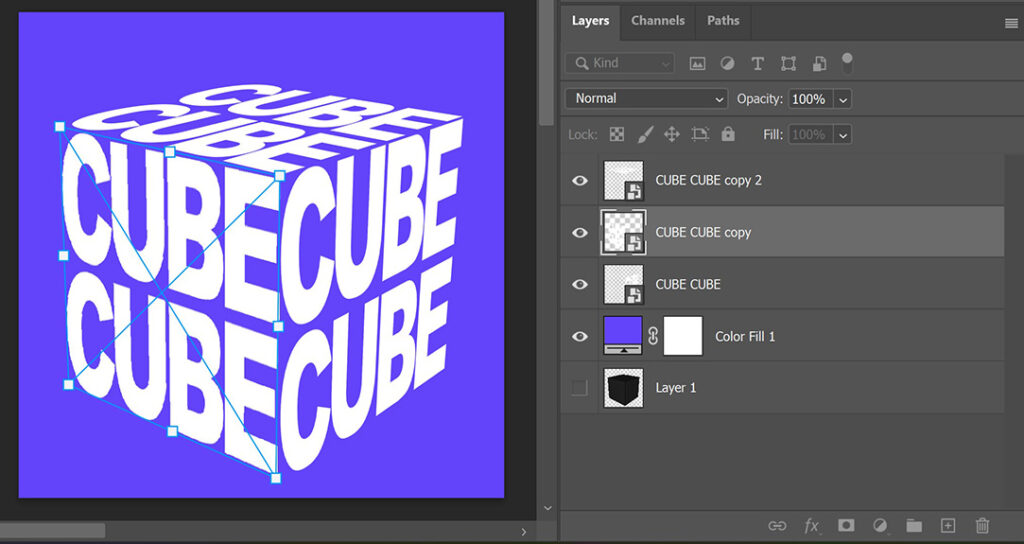
Make the cube layer invisible. You now have a transparent background. To add a background, create a solid color layer.
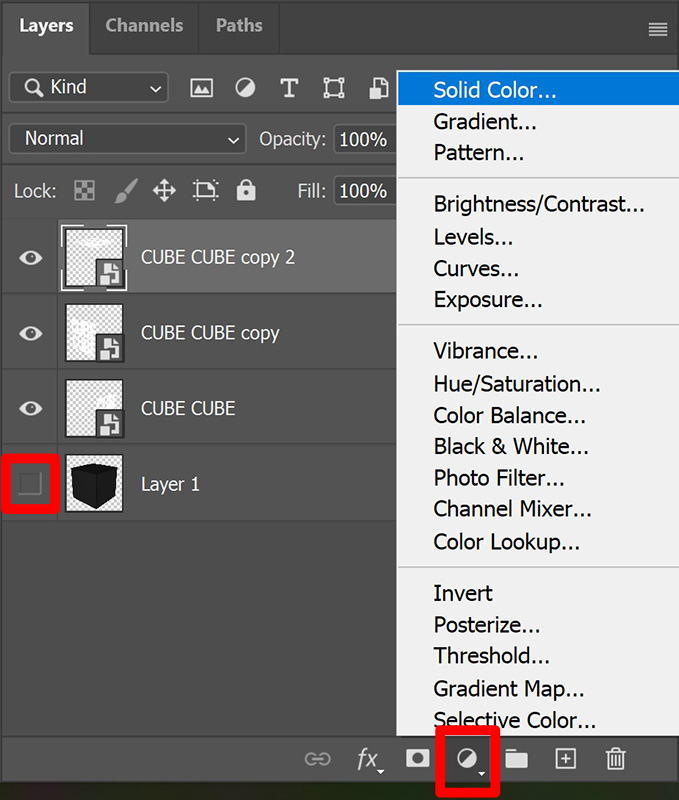
Pick a background color. Then place this layer below all the text layers.
Step 4: Adjust cube text
If you want to adjust one side of the cube, select that layer and press CTRL+T. You can now move the corners (while pressing CTRL) to adjust the shape.
And that’s how you create this cube text effect in Adobe Photoshop!
If you want to learn more about editing, check out the other blogs I wrote about Photoshop and Lightroom or take a look at my YouTube channel.
Follow me on Facebook to stay updated! You can find the video tutorial below.
Photoshop
Basics
Photo editing
Creative editing
Camera Raw
Neural filters
Text effects