

Published on September 20, 2022
Monochromatic abstract portrait
In this blog I will show you how to create an abstract (pop art) portrait with monochromatic colors in Adobe Photoshop.
Rather watch the video with instructions? Click here or scroll down to the end of this page.
You can download the photos I used here:
Photo 1
Photo 2
Step 1: Oil paint
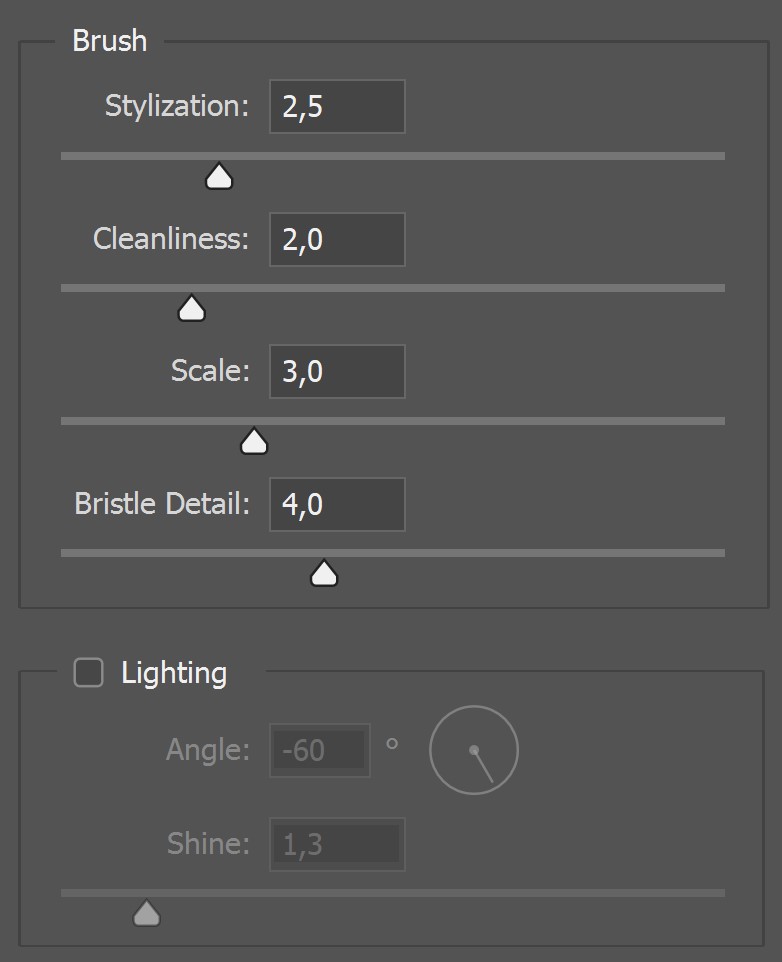
Open the photo you want to edit. Then navigate to ‘Filter > Stylize > Oil paint‘. You can find the settings I used in the image below. Copy these settings.
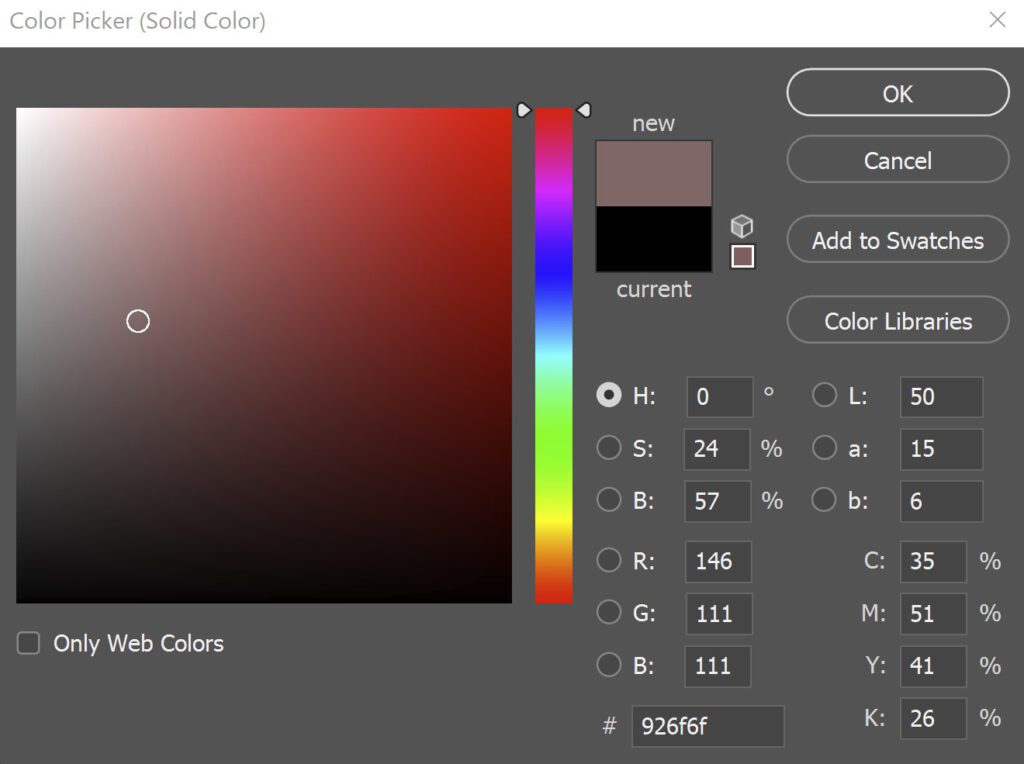
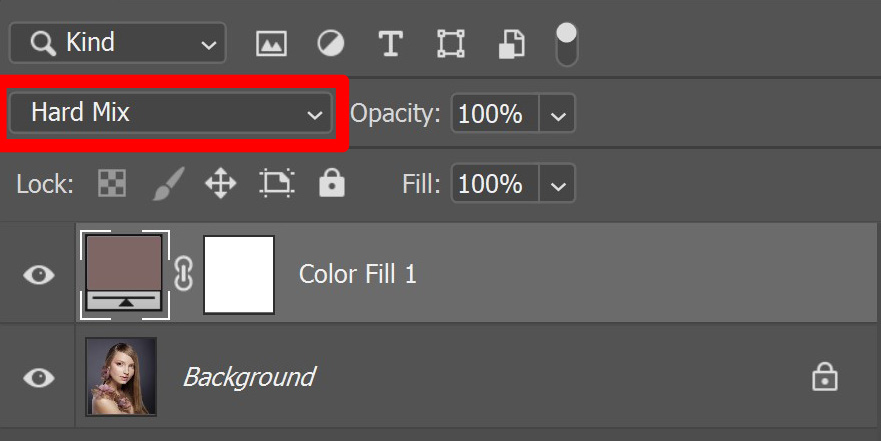
Step 2: Solid color
Create a solid color layer.
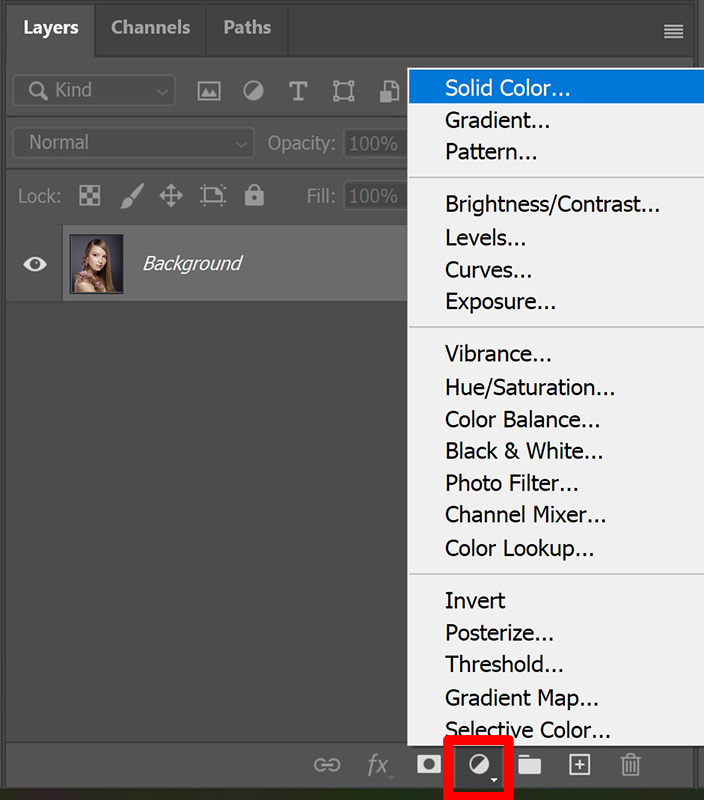
Pick a light red color. We’ll change this later, so you can just pick a random light red color for now.
Change the blend mode of the color fill layer to ‘hard mix‘.
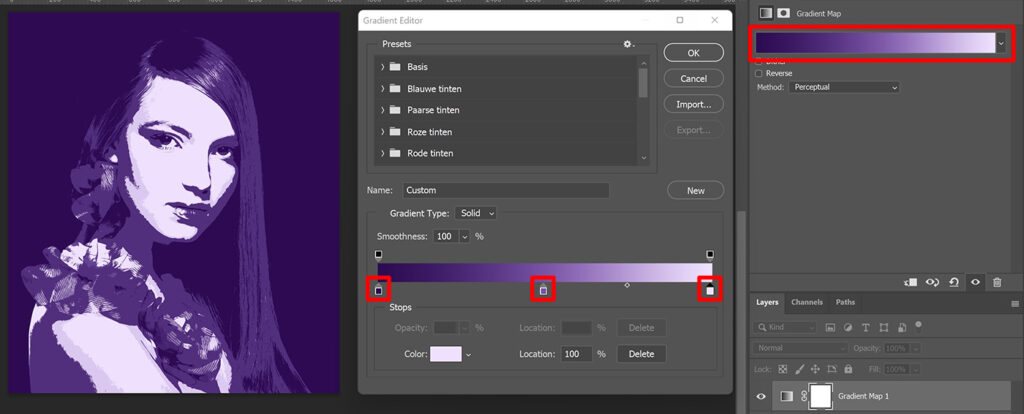
Step 3: Gradient map
Add a gradient map layer.
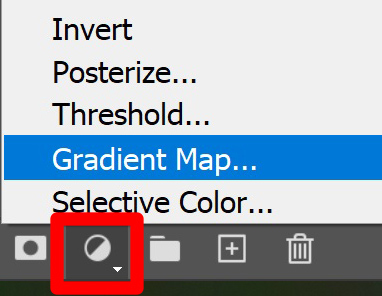
Click on the gradient to change the colors. Double click on the color stop to change the color of that stop.
We’ll create a gradient with 3 stops. Pick a dark color for the left stop, a lighter color for the middle one and an almost white color for the right stop.
To create the monochromatic effect, you have to use one color in different variations. In this case I only use purple.
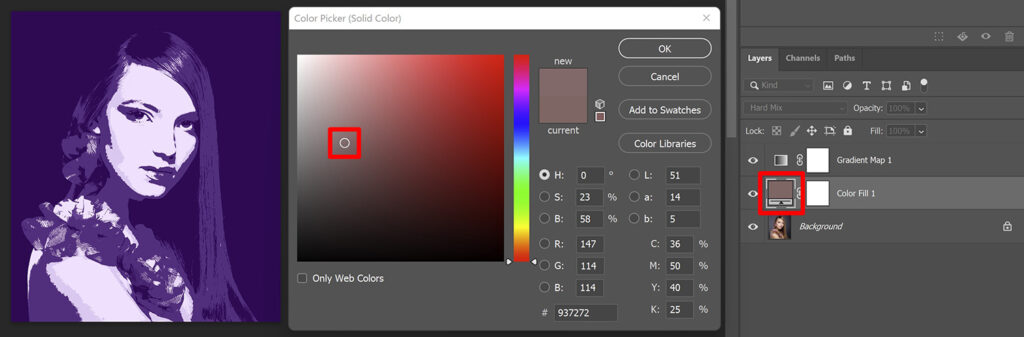
Step 4: Finishing touches
Double click on the color fill thumbnail. If you adjust the color, the ratio between the colors in your image will change. Move the color picker around to see what that does to your image. Stay within the upper left corner to get the best result.
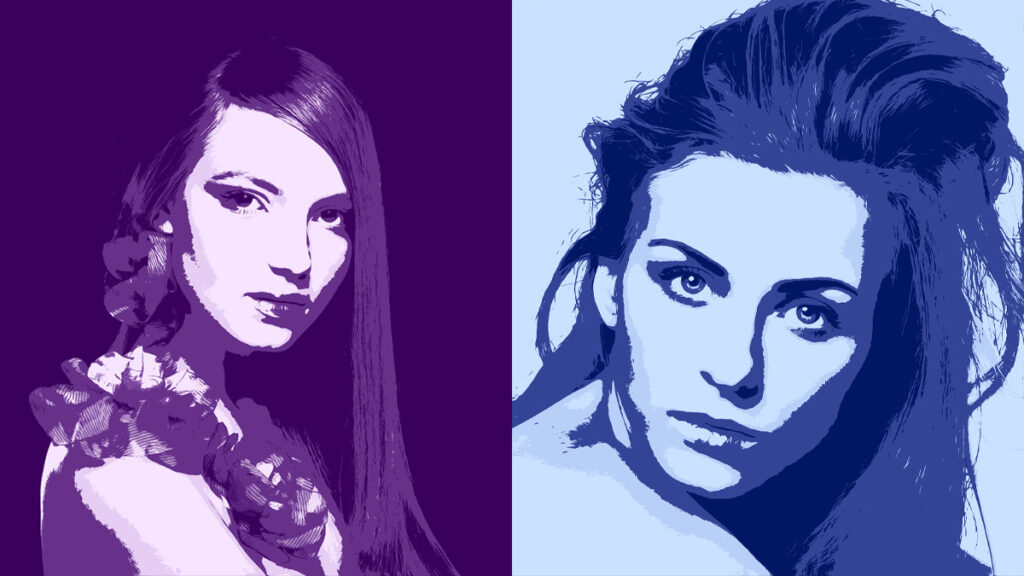
And that’s how you create this abstract portrait effect! It’s very easy to apply this effect to another photo now.
Open another photo and apply the oil paint effect first (see step 1). Then go back to the photo you’ve just edited. Select the gradient map layer and the color fill layer. Press CTRL+C to copy these layers. Then go back to the new photo you want to edit and press CTRL+V to paste these layers. The effect is now applied to this new photo!
Double click on the color fill thumbnail to adjust the ratio between the colors. Move the color picker around in the upper left corner to see what looks good on this photo.
To adjust the colors, select the gradient map layer and click on the gradient. Double click on the color stop to adjust the color. Keep the left one dark, the middle one lighter and the right one almost white.
And that’s how you create this pop art style portrait in Adobe Photoshop. You can find the result in the image below!
Want to learn more about editing? Take a look at the other blogs I wrote about Photoshop and Lightroom or check out my YouTube channel.
Follow me on Facebook to stay updated! You can find the video tutorial below.
Photoshop
Basics
Photo editing
Creative editing
Camera Raw
Neural filters
Text effects