
Published on September 18, 2022
Turn an image into a pattern
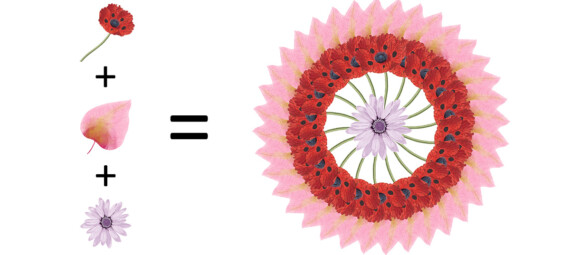
In this blog I’ll show you how to turn an image into a cool pattern in Adobe Photoshop.
Rather watch the video with instructions? Then click here or scroll down to the end of this page.
You can download the images I used here:
Poppy
Leaf
Flower
Step 1: Preparation
First create a new file. It doesn’t matter what size your file is. I create a vertical and horizontal guideline first, so I know exactly where the middle is. If you can’t see the rulers, press CTRL+R.
Then open the first image you want to use. This has to be a PNG file with a transparent background. If you want to use an image that doesn’t have a transparent background, you need to remove the background first. If you want to learn how to remove a solid background, read this blog.
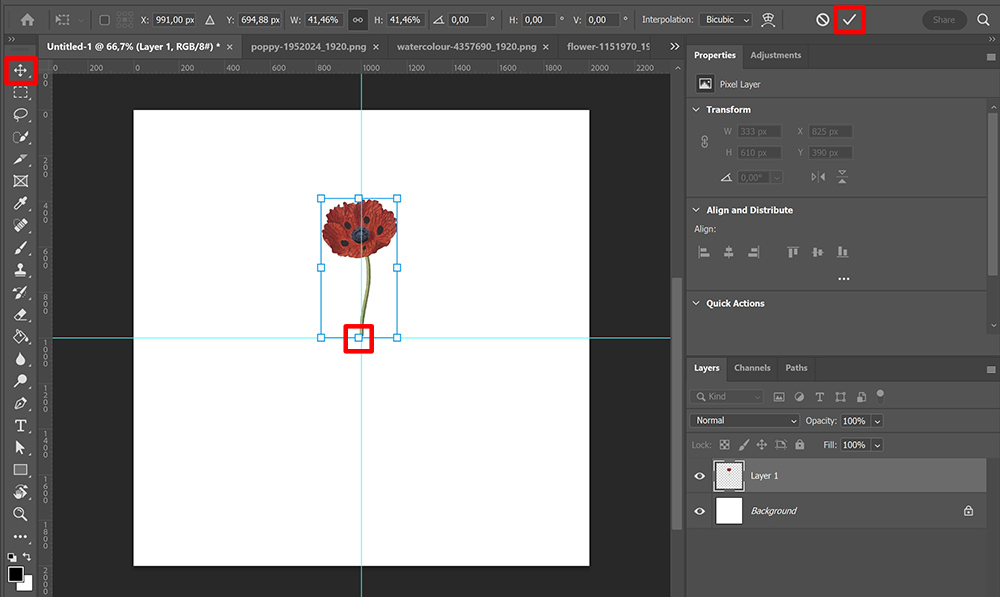
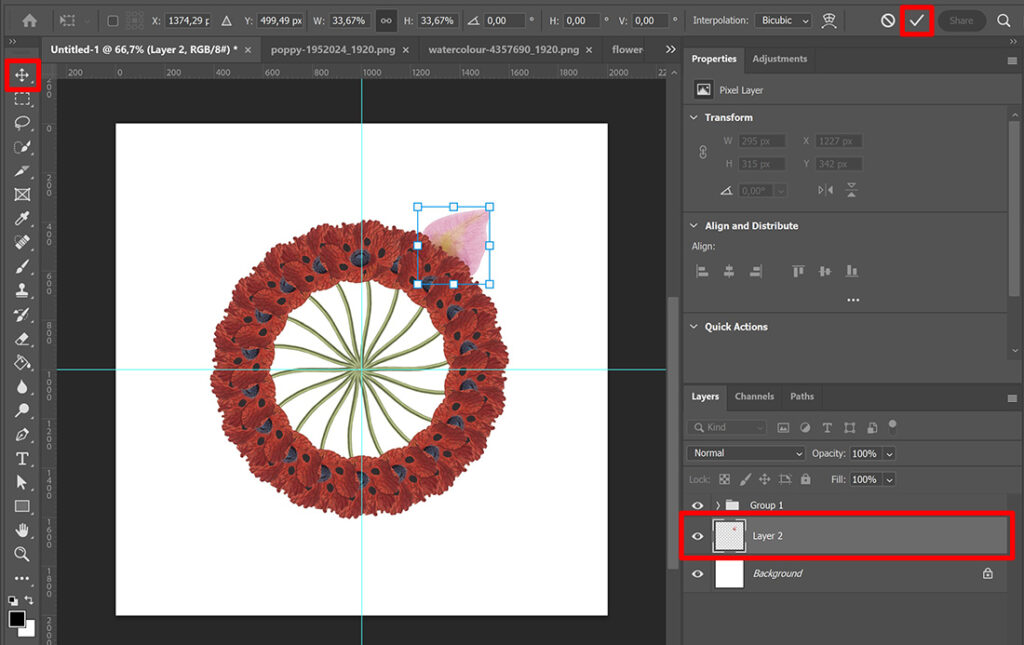
Use the move tool to drag the image towards the file you’re working on. Press CTRL+T to activate free transform. You can now resize the image and pick the correct position. The edge of the image (the stem, in this case) needs to be in the middle. This will be the center of the pattern.
After you’re done resizing the image, click ✓. It’s very important to do this. After this, we’ll rotate the image. Then we’ll repeat the last action to create the pattern. If you don’t click ✓ between resizing and rotating the image, Photoshop will consider this to be one action. If you repeat it then, it will not only rotate the image to create the pattern, but it will also change the size. So always click ✓ after you’re done resizing to close this action!
Step 2: Create pattern
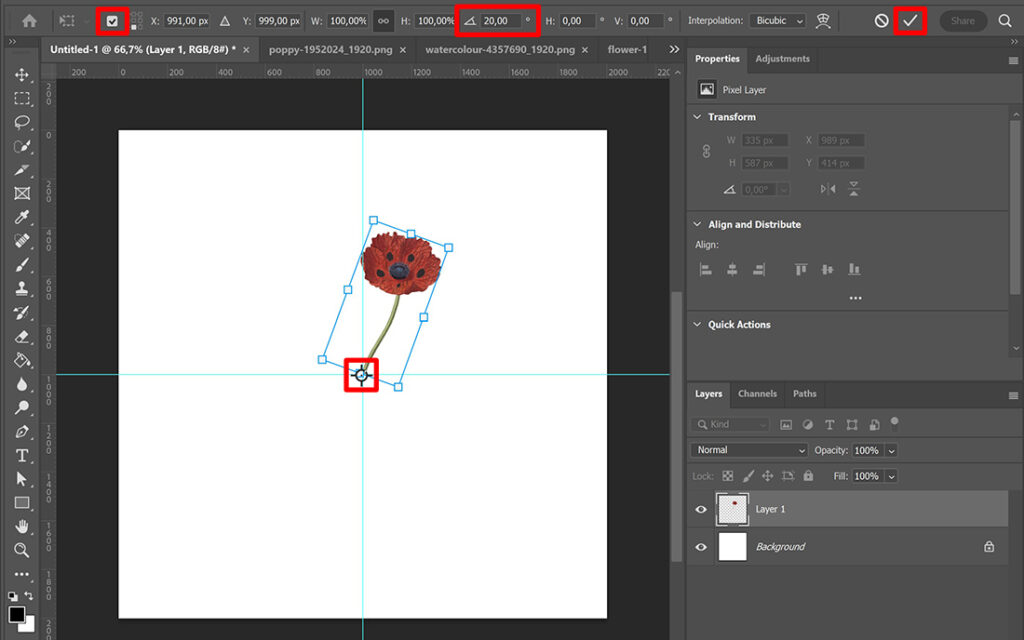
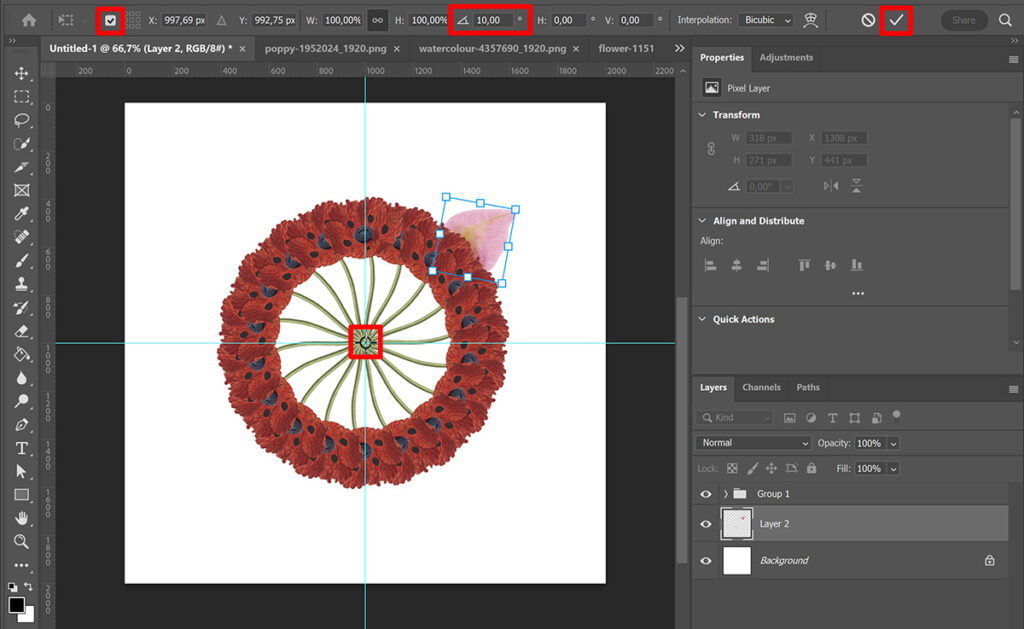
Press CTRL+T again (this is a new action, as explained above).
Select the toggle reference point box. Place the reference point in the middle. Then set the rotation. I use an angle of 20° now, but you can use any amount. If you rotate it a little, the images in the pattern will be closer together (and you will need more images to fill the pattern). If you rotate it more, the images will be further apart and you’ll need less images to fill the pattern. So try out some different settings to see what looks good with the image you’re using.
Click on the ✓ icon when you’re done.
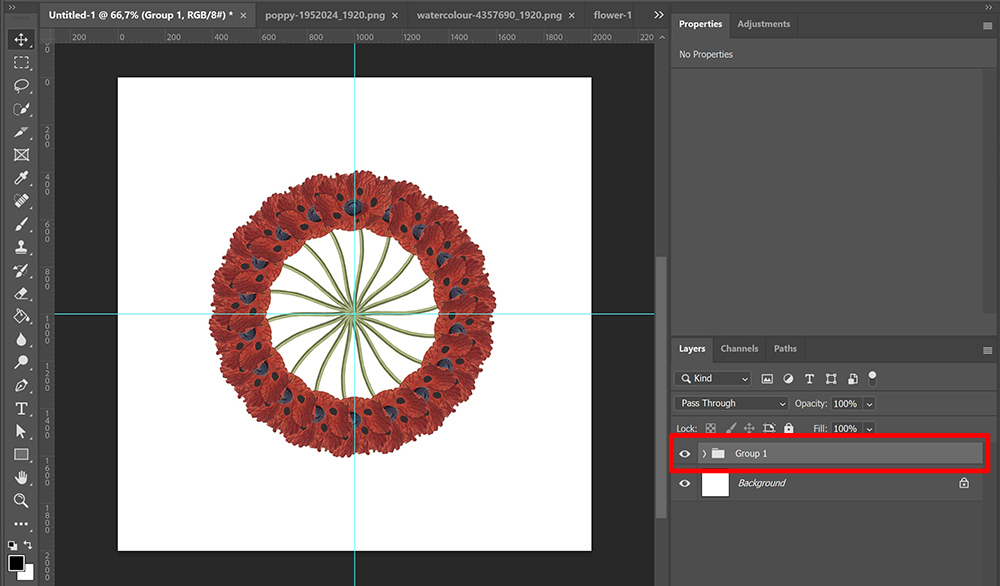
Press CTRL+SHIFT+ALT+T. This will repeat the last action (rotating the image). Continue pressing this until the pattern is finished.
Select all the layers and press CTRL+G to group them. This way you keep the layer panel uncluttered.
Step 3: Expand pattern
You have now created a pattern with just one image, but you can add more images to your pattern. Open another image (with a transparent background) and use the move tool to place it over the file you’re working on.
Place this layer below the group. Then press CTRL+T to resize the image and pick the correct position. After doing this, click ✓ to close this action before rotating the image.
Then press CTRL+T again to start a new action. Make sure the toggle reference point box is still selected and place the reference point in the middle of the pattern. Set the rotation. This time I only rotate the image with 10°, because I want the leafs to be closer together.
Click ✓.
Now press CTRL+SHIFT+ALT+T again to repeat the last action (rotating the image). Again repeat this until the pattern is finished.
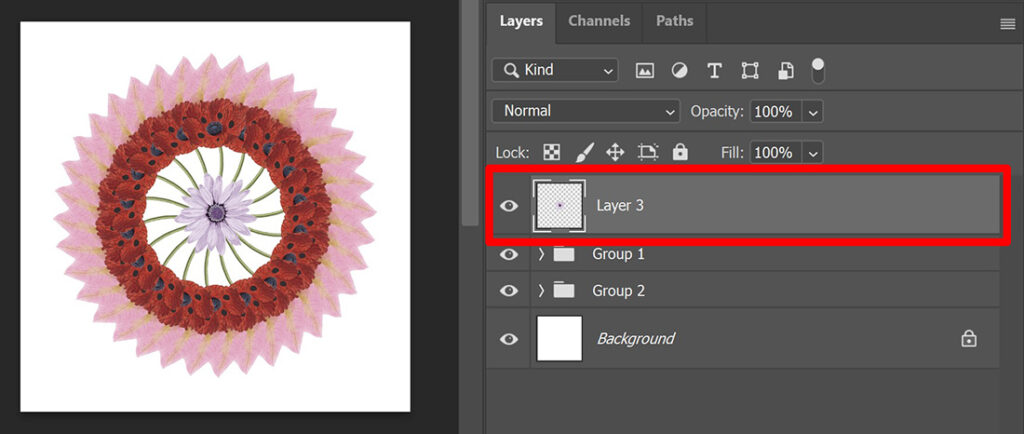
Select all layers again and press CTRL+G to group them. I now added two images to this pattern, but you can repeat this process as often as you want.
If you want to cover the center of the pattern, you can place another image over it. I placed a flower over it. Drag this layer above the other layers (and groups). Press CTRL+T to resize the image and place it in the middle.
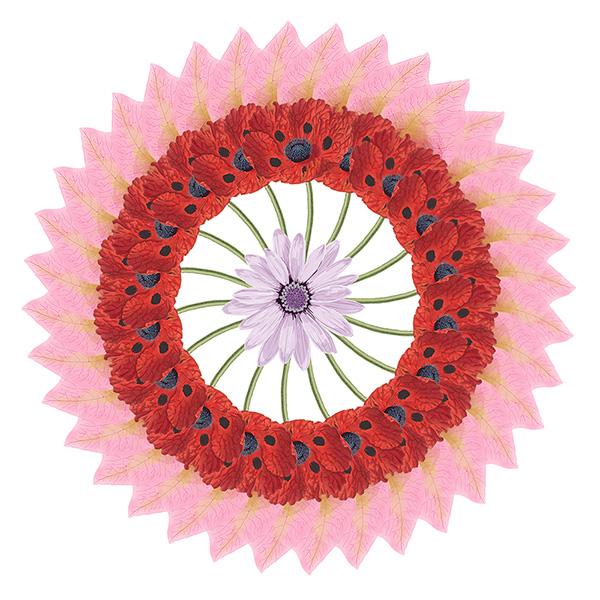
To resize the entire pattern, select all the layers and groups that are part of the pattern. Then press CTRL+T and resize it.
And that’s how you create this cool pattern! You can see the result below.
Learn more about editing
If you want to learn more about editing, take a look at the other blogs I wrote about Photoshop and Lightroom or check out my YouTube channel.
Follow me on Facebook to stay updated! You can find the video tutorial below.
Photoshop
Basics
Photo editing
Creative editing
Camera Raw
Neural filters
Text effects