

Published on July 17, 2022
Create a half text half photo effect
I’ll show you how to place a photo inside a text to create a half text half photo effect in Adobe Photoshop.
Rather watch the video with instructions? Then click here or scroll down to the end of this page.
Click here if you want to download the photo I used.
Step 1: Cover half of the photo
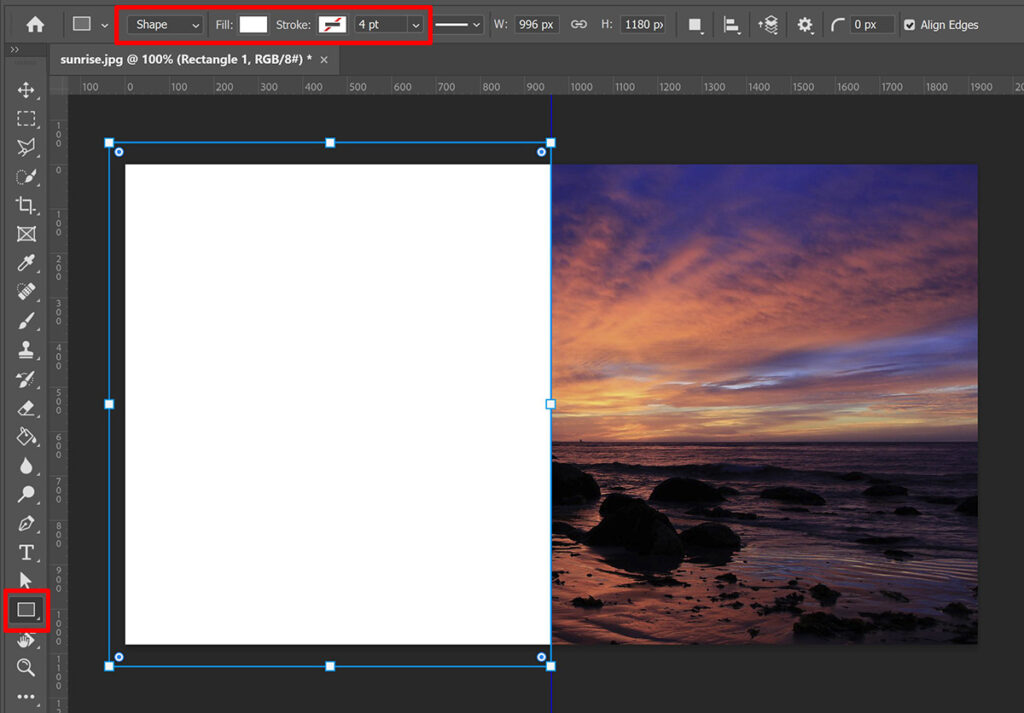
First I’ll create a guideline to divide the photo exactly in half. Then select the rectangle tool and create a shape that covers half of the photo (you can choose which side).
Select ‘shape’. Pick a color and select ‘no color’ for the stroke.
You don’t need the guideline anymore, so you can remove that if you want.
Step 2: Create text
Select the horizontal type tool and pick a font. Your photo will be best visible if you pick a bold font.
The color of the text should be the same as the rectangle you just created.
Type your text. Press CTRL+A to select the entire text and pick the alignment you want (I align my text in the center). You can set the leading to place the text closer together or further apart.
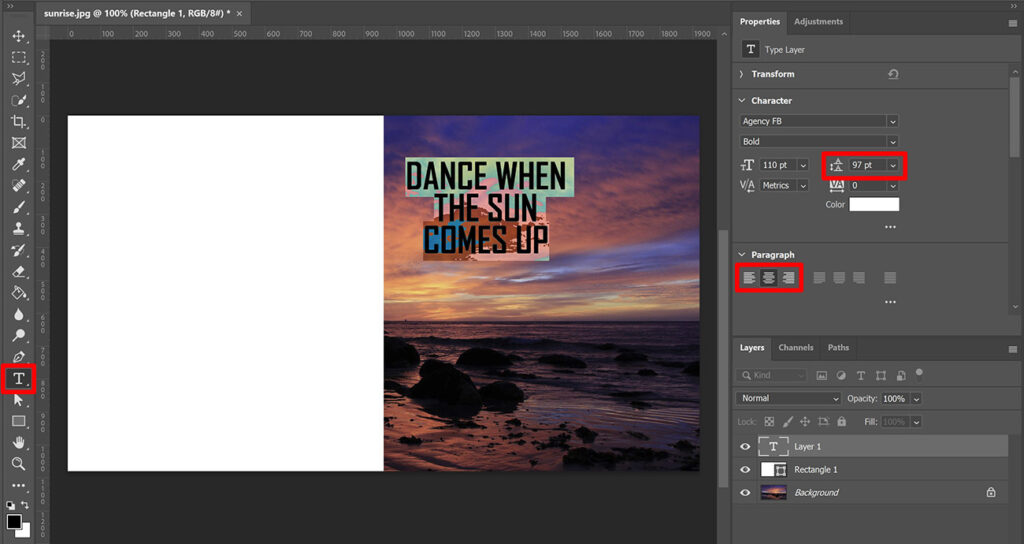
Select the move tool and press CTRL+T to activate free transform. You can now resize the text and pick the right position.
Step 3: Half text half photo effect
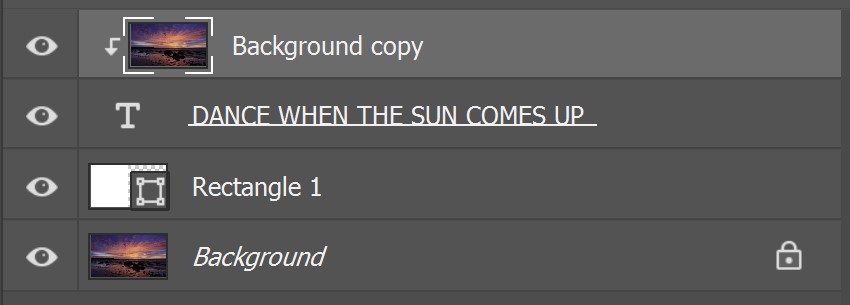
Select the background layer and press CTRL+J to duplicate it. Place the copy above the text layer.
With that copy selected, navigate to ‘Layer > Create clipping mask‘ or press ALT+CTRL+G. The photo is now placed inside of the text.
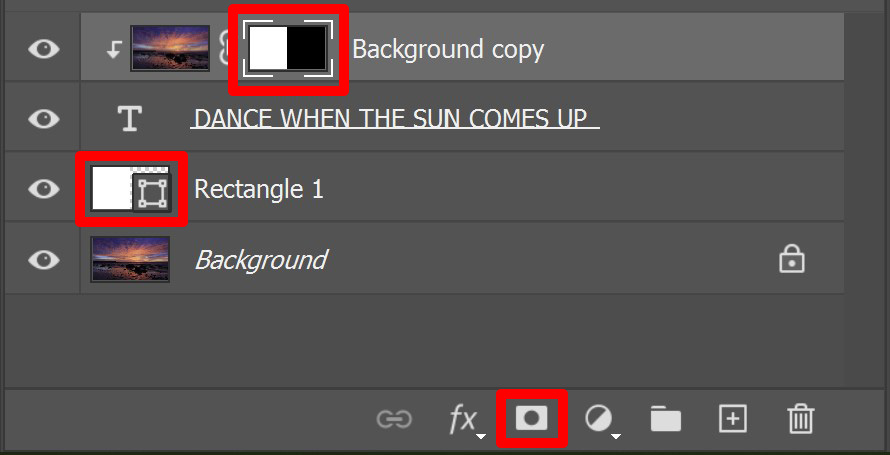
Half of the text is now visible. To make the other half visible too, hold CTRL and click on the thumbnail of the rectangle layer (make sure you click on the thumbnail and not on the layer itself, the background copy layer should still be selected after you did this).
By doing this, you selected half of the image. Now add a layer mask (to the background copy layer). The other half of the text is now visible too.
If you want to move your text, select the move tool and the text layer. You can now adjust the placement of the text without changing the half-half effect.
To resize the text, select the move tool and the text layer and press CTRL+T. You can then change the size of the text.
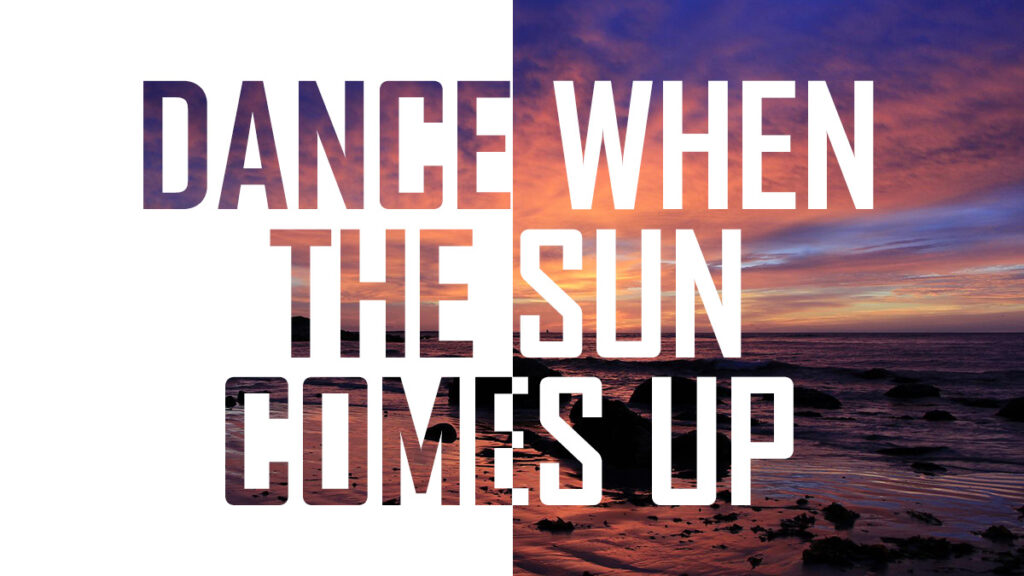
And that’s how you create a half text half photo effect in Adobe Photoshop. You can see the result below.
Want to learn more about editing in Adobe Photoshop? Check out my other blogs or take a look at my YouTube channel.
Follow me on Facebook to stay updated! You can find the video tutorial below.
Photoshop
Basics
Photo editing
Creative editing
Camera Raw
Neural filters
Text effects