

Published on September 4, 2022
Create a long faded shadow
In this blog I’ll show you how to create a long faded shadow for a text in Adobe Photoshop.
Would you rather watch the video with instructions? Click here or scroll down to the end of this page.
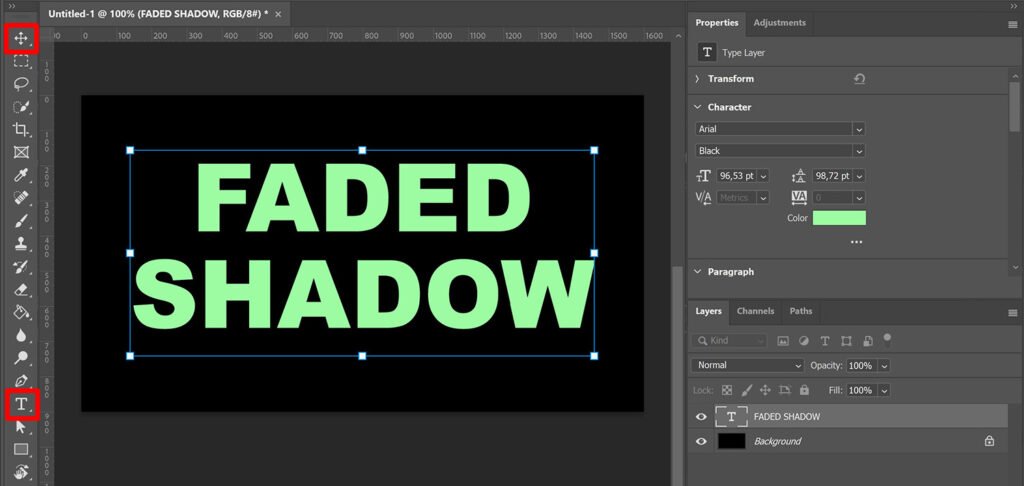
Step 1: Create file and text
First create a new file. It doesn’t matter what size your file is. Also pick a background color while creating the file.
Then select the horizontal type tool. Pick a font and color you like and type your text.
When your text is done, select the move tool. Press CTRL+T to activate free transform. You can now adjust the size and position of the text.
Step 2: Long faded shadow
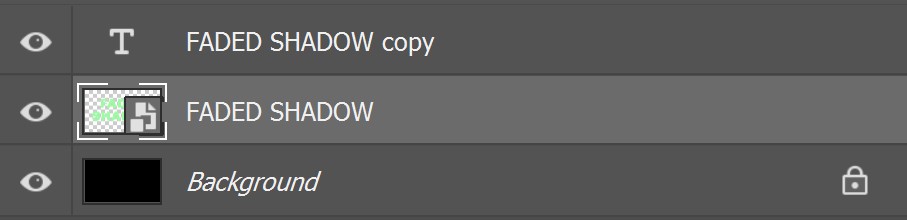
Select the text layer and press CTRL+J to duplicate it. Then select the original text layer (the bottom one). Right click on the layer and select ‘convert to smart object‘.
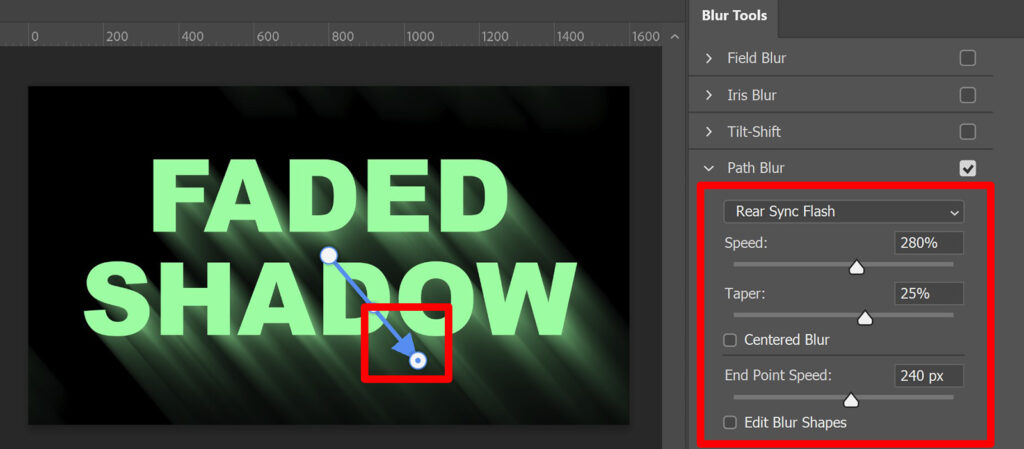
With this layer seleted, navigate to ‘Filter > Blur gallery > Path blur‘.
Select ‘rear sync flash‘ instead of ‘basic blur’. Move the arrow to change the direction of the shadow.
You can make the following adjustments to your shadow:
- Speed: Determines the overall blur amount (you can make the shadow longer or shorter by adjusting this).
- Taper: Use this to adjust how the edges of the shadow look.
- End point speed: Determines the blur amount of the selected end point (you can use this slider too to make the shadow longer or shorter). If the amount of pixels is too high, you might see the lines above and next to your text as well. If you look closely, you can see that this is also the case in the image below. We’ll fix this in the next step.
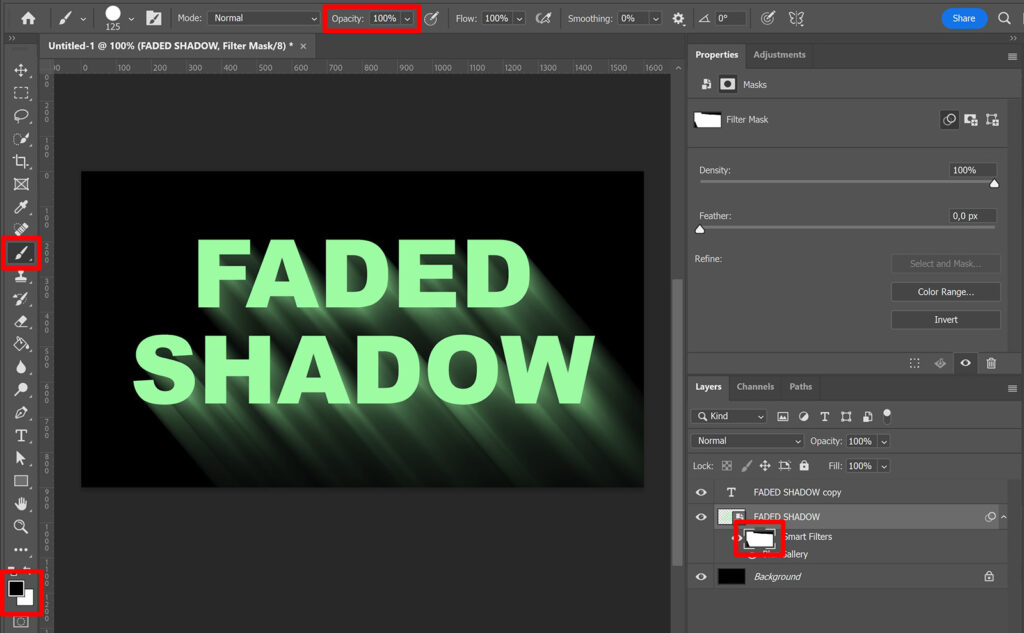
Step 3: Masking
As you can see in the image above, the lines of the shadow are also visible above and on the left side of my text. If that’s not the case for you, you can skip this step.
Select the mask of the smart filter. Then select the brush tool (opacity 100%) and make the foreground color black.
Brush over the areas that you want to remove (the lines above and next to your text). If you accidentally brush over an area that did not needed to be removed, make the foreground color white and brush over it again. It will then reappear.
Step 4: Adjust faded shadow
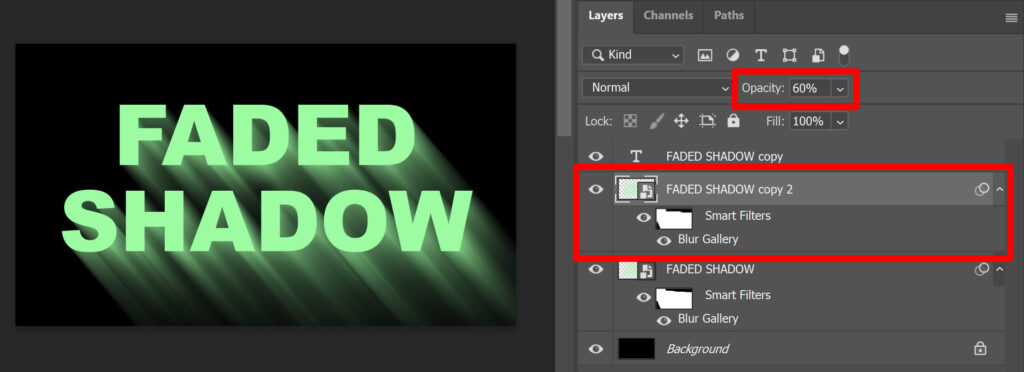
If you want to make the effect more powerful, select the text layer with the effects and press CTRL+J to duplicate it. If the effect is too powerful now, you can lower the opacity of this layer.
If you want to adjust the shadow, double click on the ‘blur gallery’ layer. You can then make adjustments to the shadow effect.
And that’s how you create a long faded shadow for a text in Adobe Photoshop. You can find the result below!

Want to learn more about editing in Adobe Photoshop? Check out my other blogs or take a look at my YouTube channel.
Follow me on Facebook to stay updated! You can find the video with instructions below.
Photoshop
Basics
Photo editing
Creative editing
Camera Raw
Neural filters
Text effects