
Published on February 17, 2022
Edited on May 11, 2022
In this blog I’ll show you a super fast and simple method to replace a sky in Adobe Photoshop.
Rather watch the video tutorial of this process? Click here or scroll down to the end of this page!
Click here to download the image I used.
Replace sky
Open the image you want to edit. Then navigate to ‘Edit > Sky replacement‘.
You can now pick a sky. Not every sky will match your image, so try out some different skies to see what looks good.
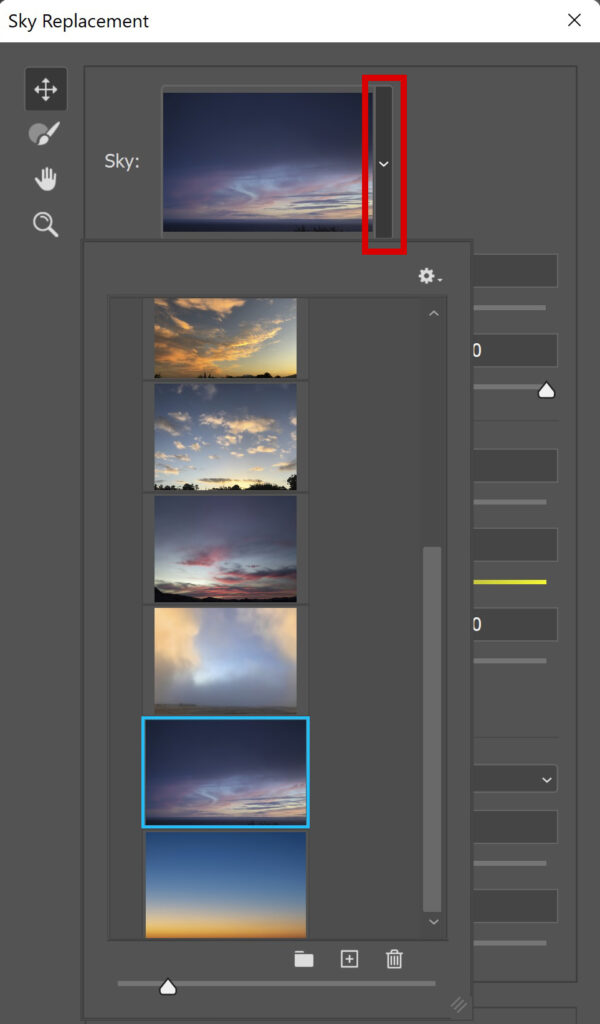
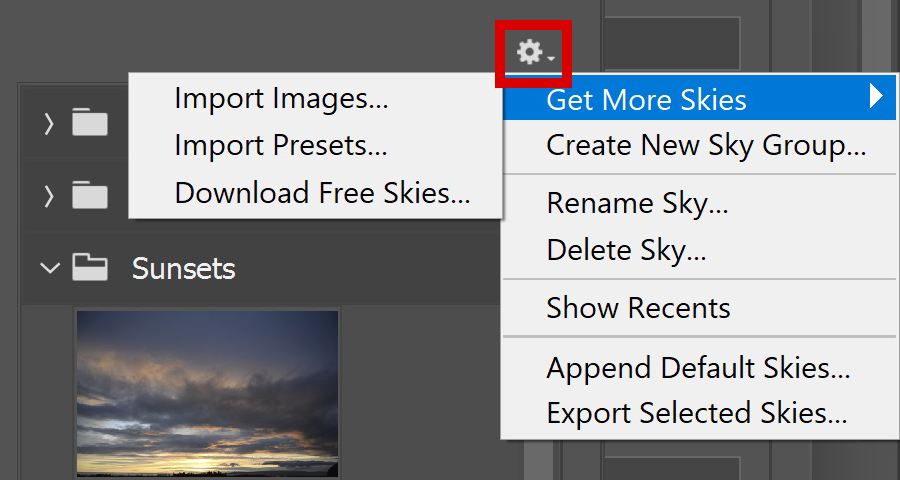
Instead of using one of the skies Photoshop offers, you can also use your own images or download more free skies from the Photoshop website (see image below).
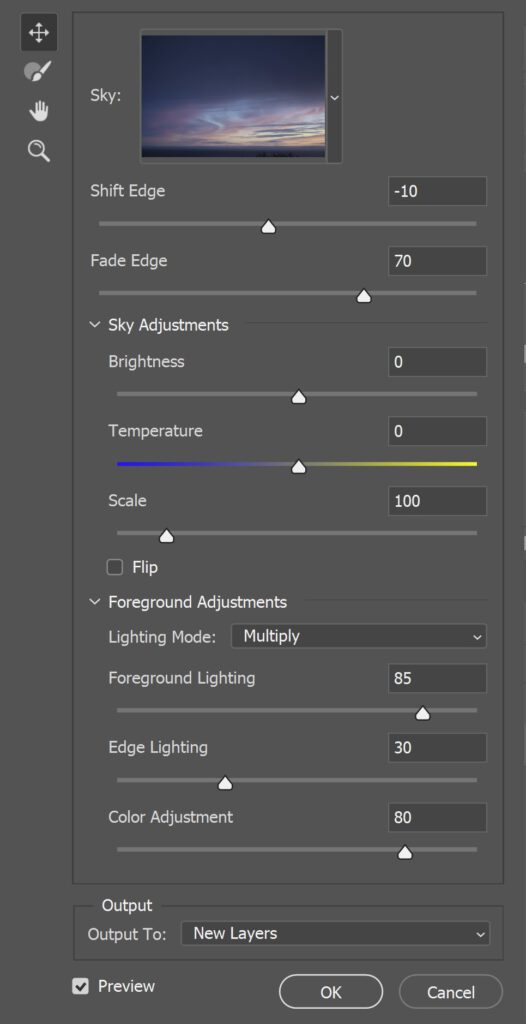
Photoshop has automatically selected and masked the sky. Use the sliders to adjust the sky and blend it with the foreground:
- Shift Edge: Determines the transition between the sky and the foreground of the original image.
- Fade Edge: The amount of fading from the new sky to the original photo along the edges (a high amount will make the original sky more visible, a low amount makes the original sky less visible).
Sky adjustments:
- Brightness: The brightness of the sky.
- Temperature: Makes the sky warmer (more yellow) or cooler (more blue).
- Scale: Resizes the sky image (if you make the sky too small, it won’t cover the entire image, so keep an eye on that).
- Flip: Flips the sky image horizontally.
Foreground adjustments:
- Lighting mode: The blend mode used for the lighting adjustments.
- Foreground Lighting: Apply lighting adjustments to the foreground.
- Edge Lighting: Preserve details along the edges and reduce halos by adjusting the edge lighting.
- Color Adjustment: Determines the amount of harmonization between the foreground and the sky colors.
Output:
- New Layers (a group of new layers).
- Duplicate Layer (single flattened layer).
Try out some different settings to see what looks good on your image. You can find the settings I used in the image below.
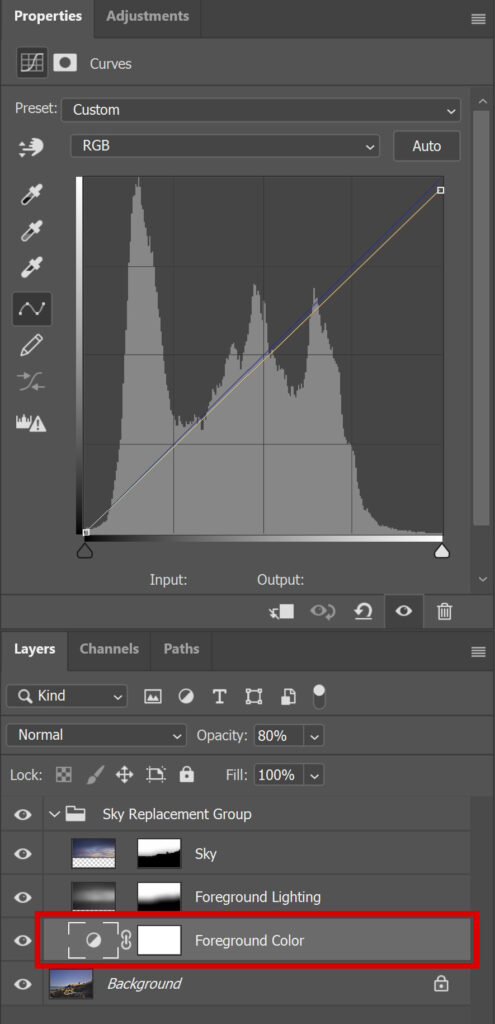
Extra adjustments
I chose output to new layers, so I now have a layer group with all the new layers. If you select the adjustment layers, you can make some extra adjustments. If I select the foreground color layer, I can make extra adjustments using curves.
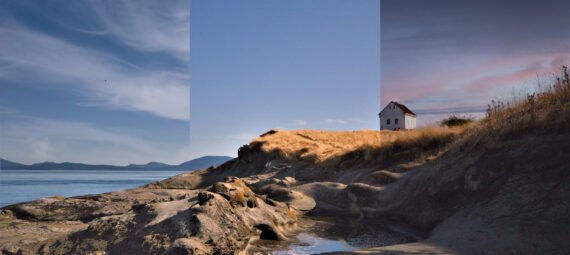
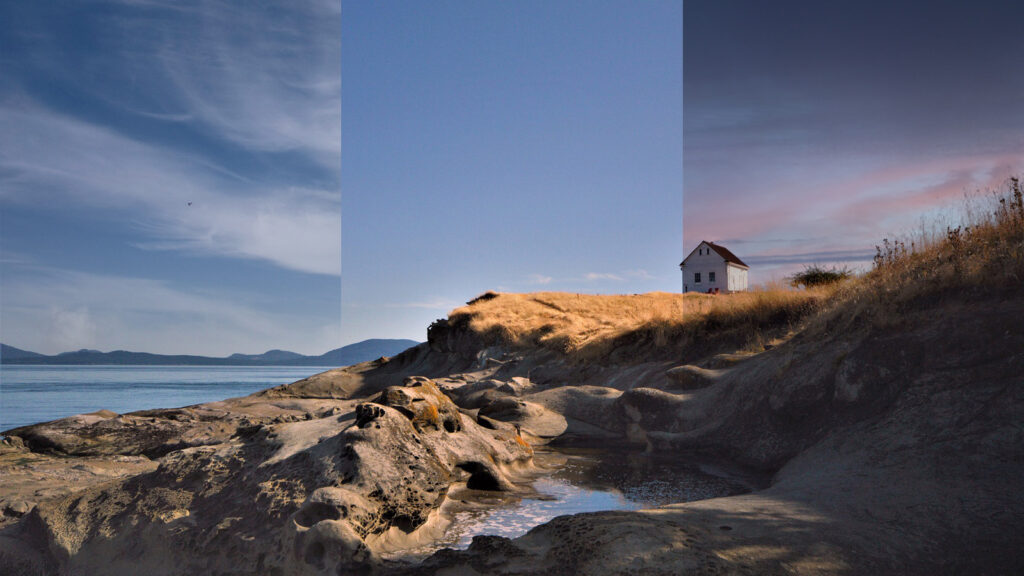
And that’s how you replace a sky in Adobe Photoshop! You can find some examples in the image below (the middle part is the original image).
Want to learn more about editing in Adobe Photoshop? Check out my other blogs or take a look at my YouTube channel.
Follow me on Facebook to stay updated! You can find the video with instructions below!
Photoshop
Basics
Photo editing
Creative editing
Camera Raw
Neural filters
Text effects