

Published on May 20, 2024
How to Create a Solid Colored Vignette in Photoshop (Step‑by‑Step Tutorial)
Want to create a solid colored vignette in Photoshop? In this step‑by‑step tutorial, you’ll learn how to use a radial gradient to make a smooth vignette in a color of your choice.
This effect is perfect for highlighting your subject or product. By following these simple steps, you’ll be able to create a custom colored vignette effect in just a few clicks.
Rather watch the video with instructions? Click here to open the YouTube video or scroll down to the end of this page.
You can download the photo I used here.
Solid colored vignette (with radial gradient)
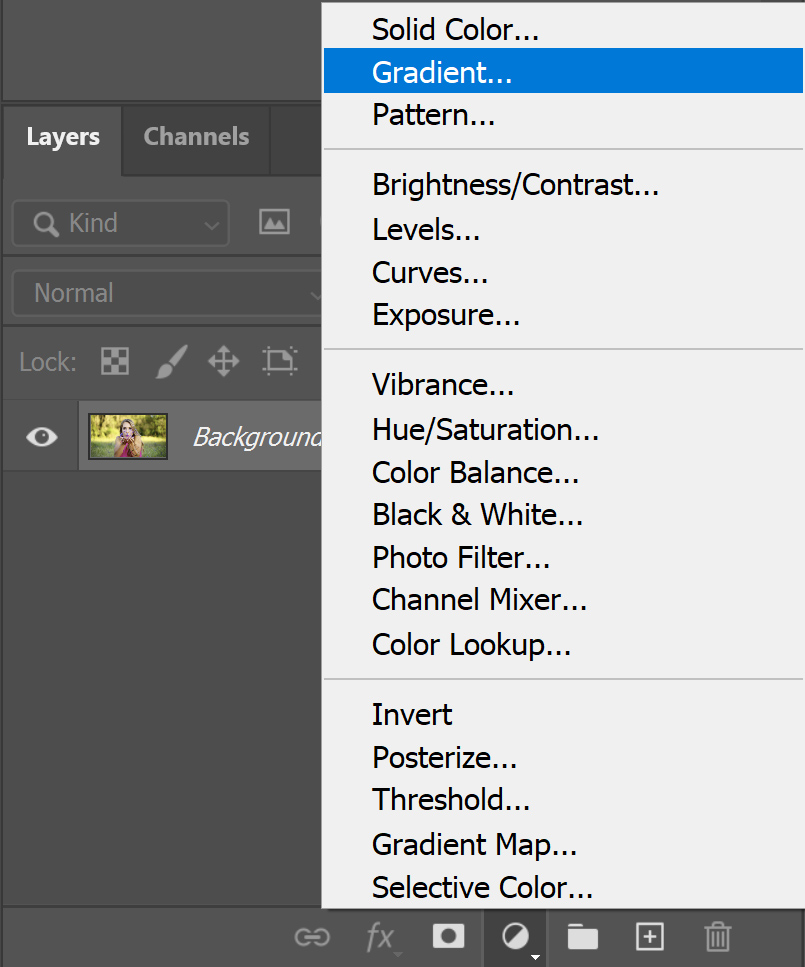
Open the photo you want to edit. Then create a gradient layer.
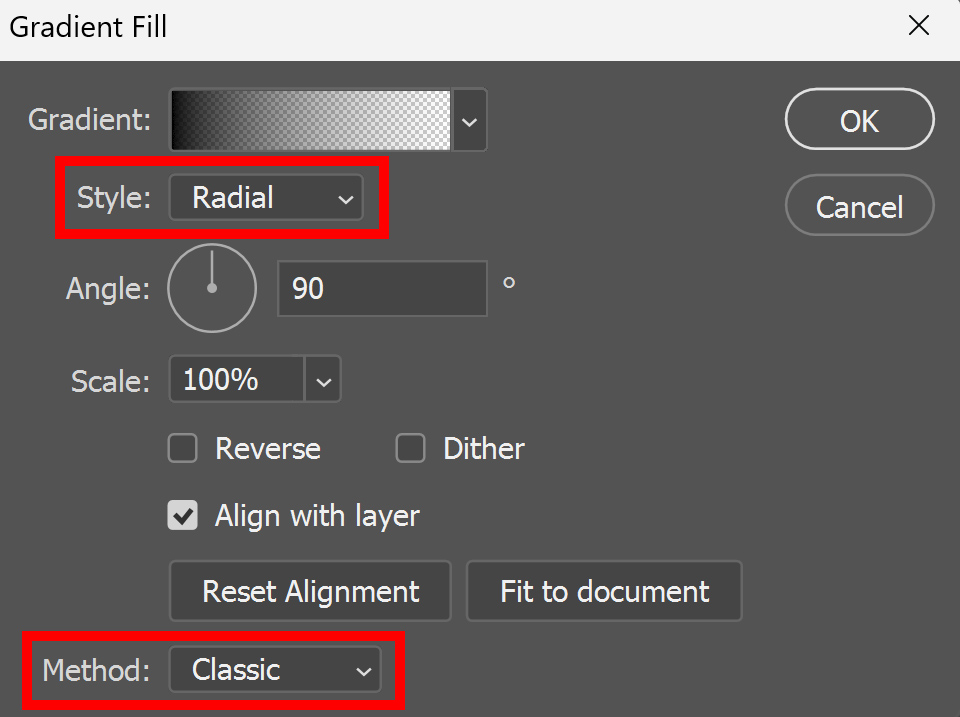
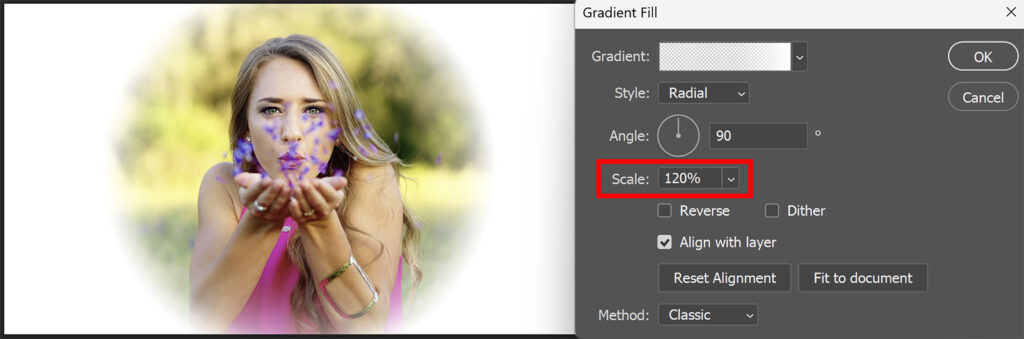
Select the radial style. I use the classic method, but you can also use a different method.
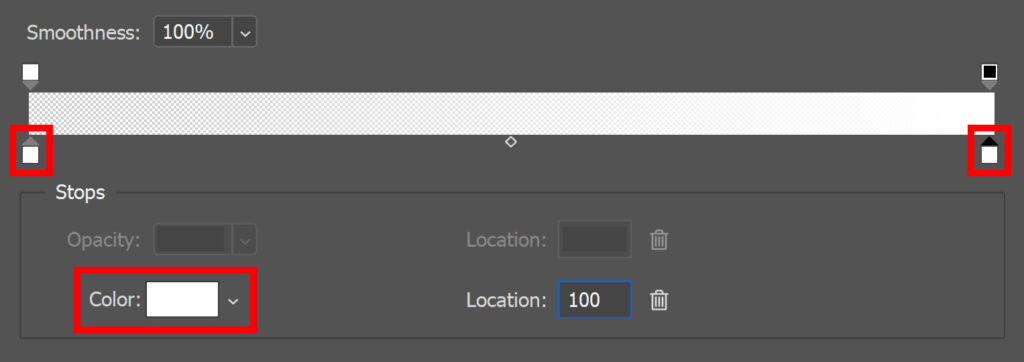
Click on the gradient to adjust it.
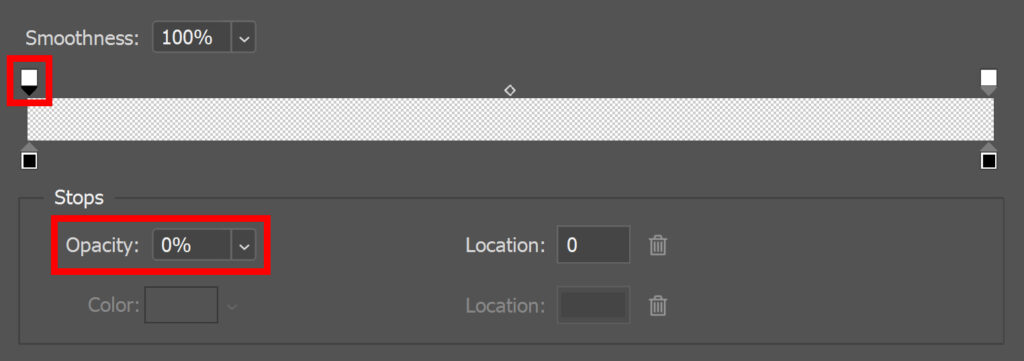
First select the left opacity stop and lower the opacity to 0% to make it transparent.
Then select the right opacity stop. Make the opacity of this stop 100%.
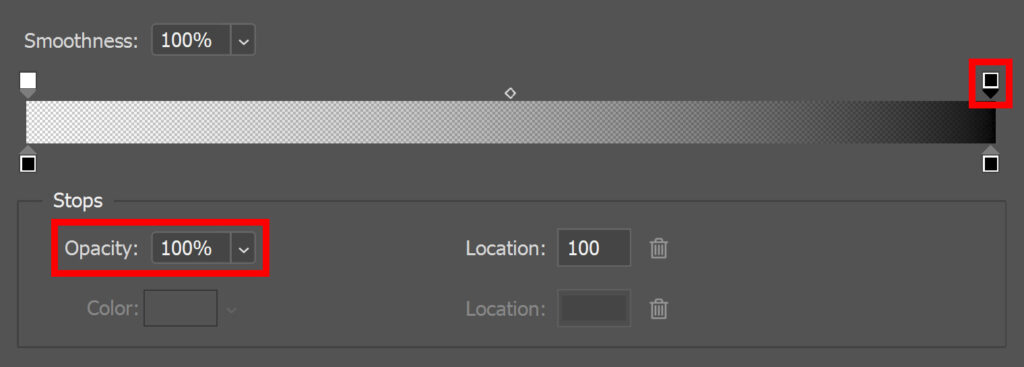
Make both color stops the same color. I make them white, but you can use any color you want. This will be the color of the vignette.
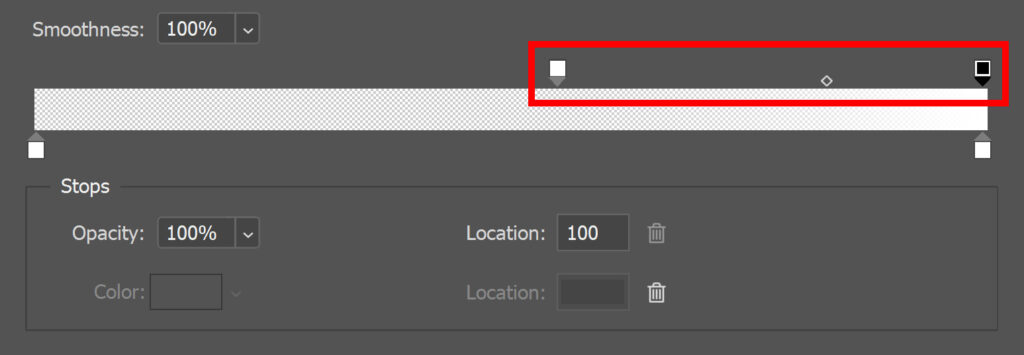
You can now move the opacity stops to make the circle larger or smaller. You can also use the opacity midpoint to make the edges of the circle more or less blurry.
If you want, you can also adjust the scale to make the circle larger or smaller.
And that’s how you place a photo inside of a circle with soft edges (solid vignette) in Adobe Photoshop!

Learn more about editing in Photoshop
Check out my other blogs and my YouTube channel if you want to learn more about editing in Adobe Photoshop!
Follow me on Facebook if you want to stay updated about new blogs and tutorials!
Photoshop
Basics
Photo editing
Creative editing
Camera Raw
Neural filters
Text effects