

Published on June 8, 2024
How to Add Clouds to a Sky in Photoshop for a Realistic Effect
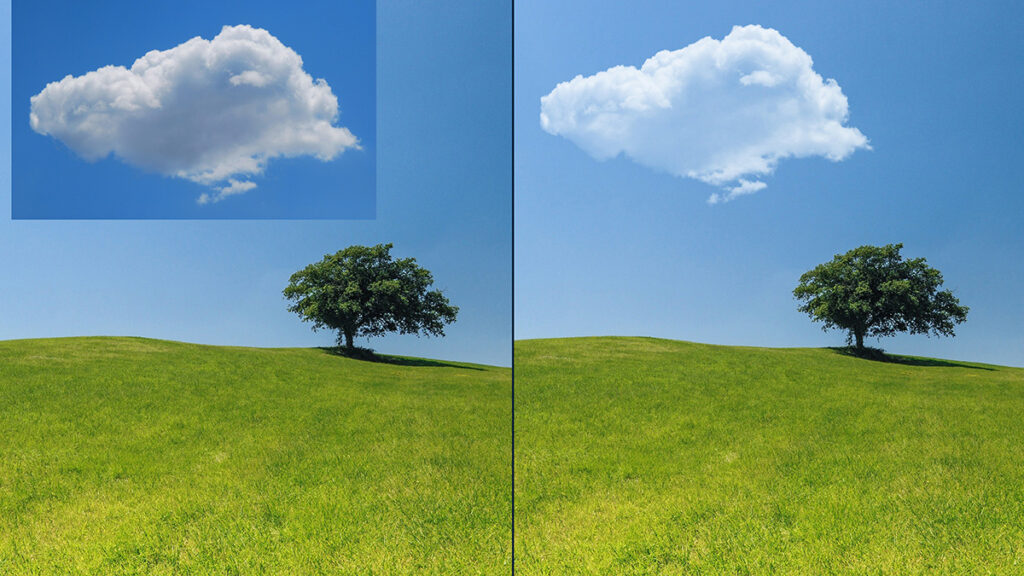
Want to add clouds to a sky in Photoshop and make your photos look more dynamic? In this step-by-step tutorial, you’ll learn how to place and blend clouds into any image using simple tools in Adobe Photoshop.
Adding clouds is an easy way to enhance a dull or empty sky and create a more eye-catching result. By using blending modes and basic adjustments, you can add clouds to the sky in Photoshop and achieve a natural, realistic look in just a few minutes.
Would you rather watch the video with instructions? Then click here to open the YouTube video or scroll down to the end of this page.
You can download the photos I used here:
Landscape
Cloud
Step 1: Add cloud to sky
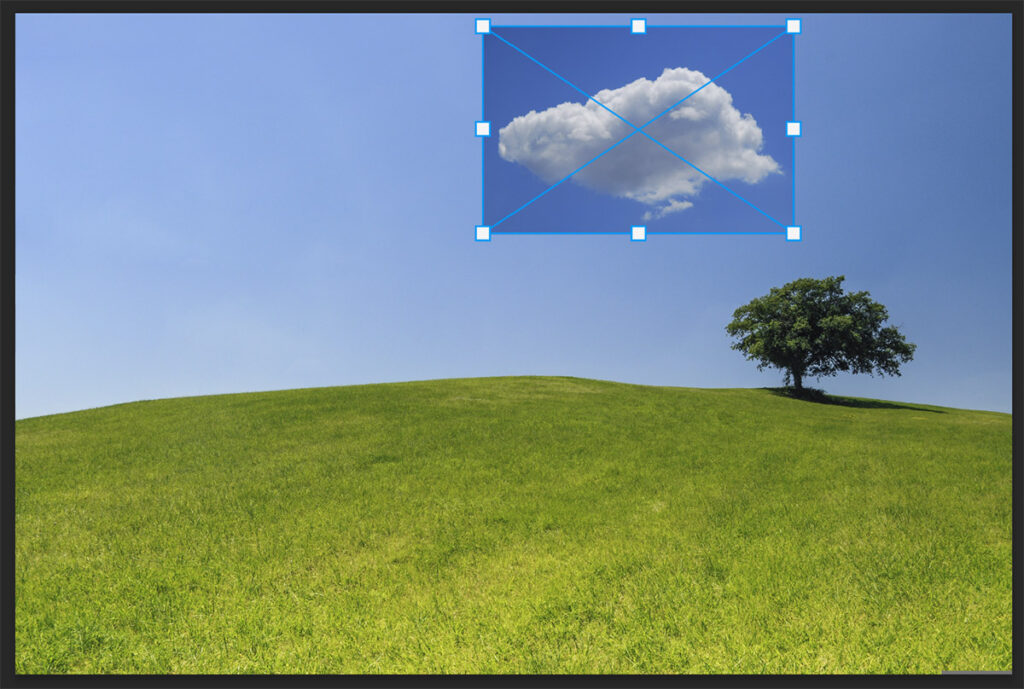
Open the photo you want to add the clouds to. Then navigate to ‘File > Place embedded‘ and select the photo of the cloud you want to use.
Resize the cloud layer and pick the correct position for the cloud.
Step 2: Blend clouds with sky
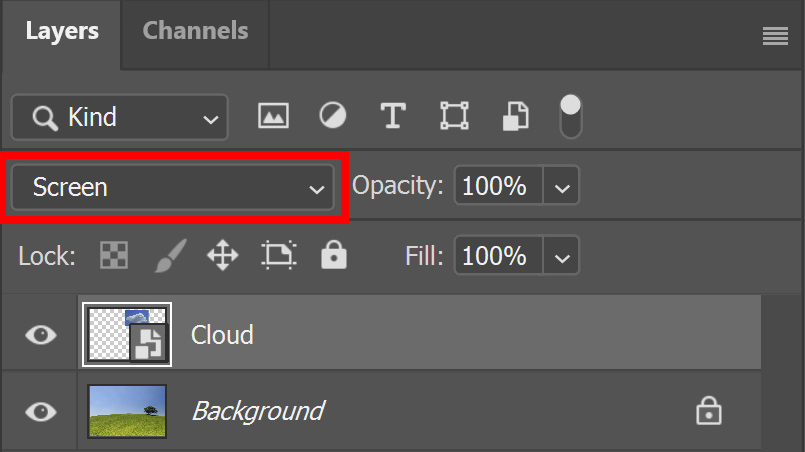
Change the blending mode of the cloud layer to ‘screen‘.
Then add a black & white layer.
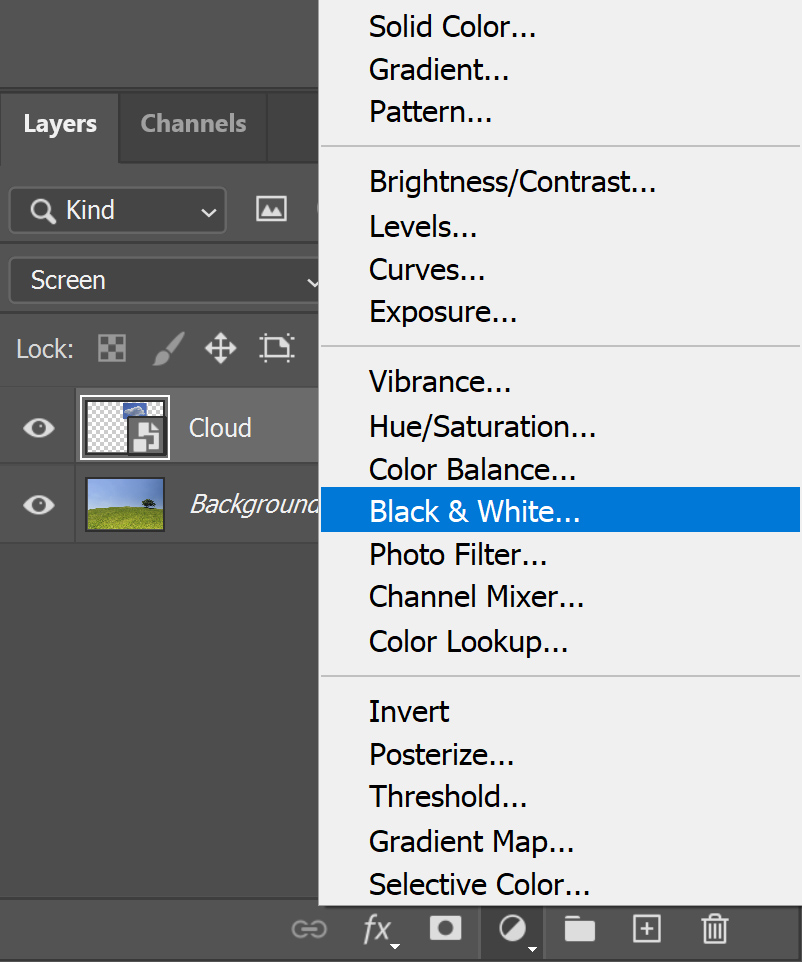
Right click on the black & white layer and select ‘create clipping mask‘. These adjustments now only affect the cloud layer.
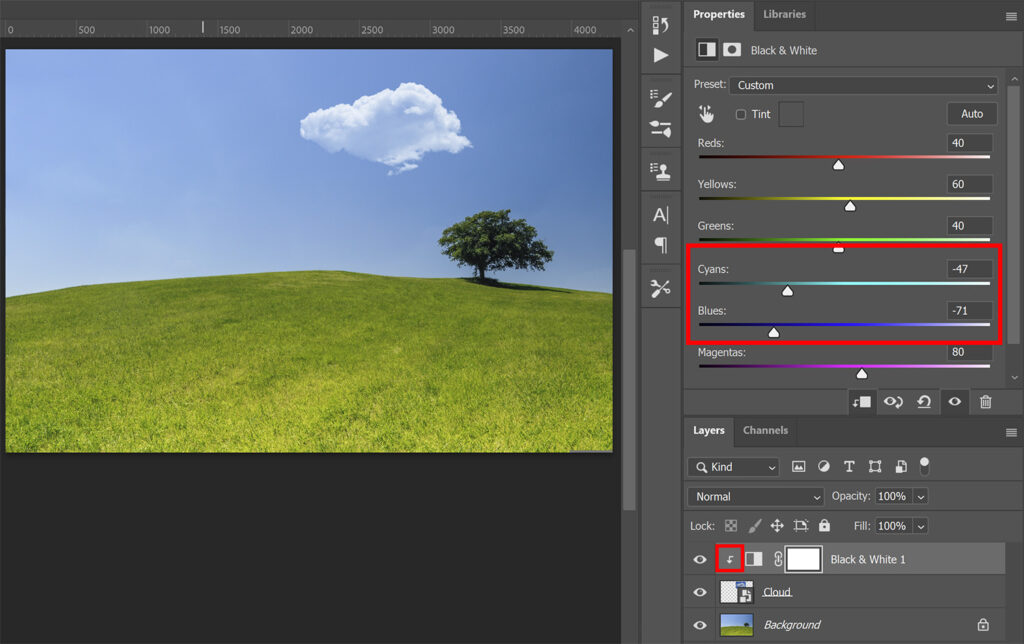
Then adjust the cyans and the blues until the cloud is blended with the sky.
And that’s how you can easily add clouds to a sky and achieve a realistic cloud effect in Adobe Photoshop!
Learn more about editing in Adobe Photoshop
Check out my other blogs and my YouTube channel if you want to learn more about editing in Adobe Photoshop!
You can also follow me on Facebook if you want to stay updated about new blogs and tutorials!
Photoshop
Basics
Photo editing
Creative editing
Camera Raw
Neural filters
Text effects