

Published on April 20, 2023
Square photo effect (collage) with brush tool
In this blog I’ll show you how to create a square brush in Adobe Photoshop. Then I’ll show you how to use that brush to create a square photo collage effect!
Rather watch the video with instructions? Then click here or scroll down to the end of this page.
You can download the photo I used here.
Step 1: Create square brush
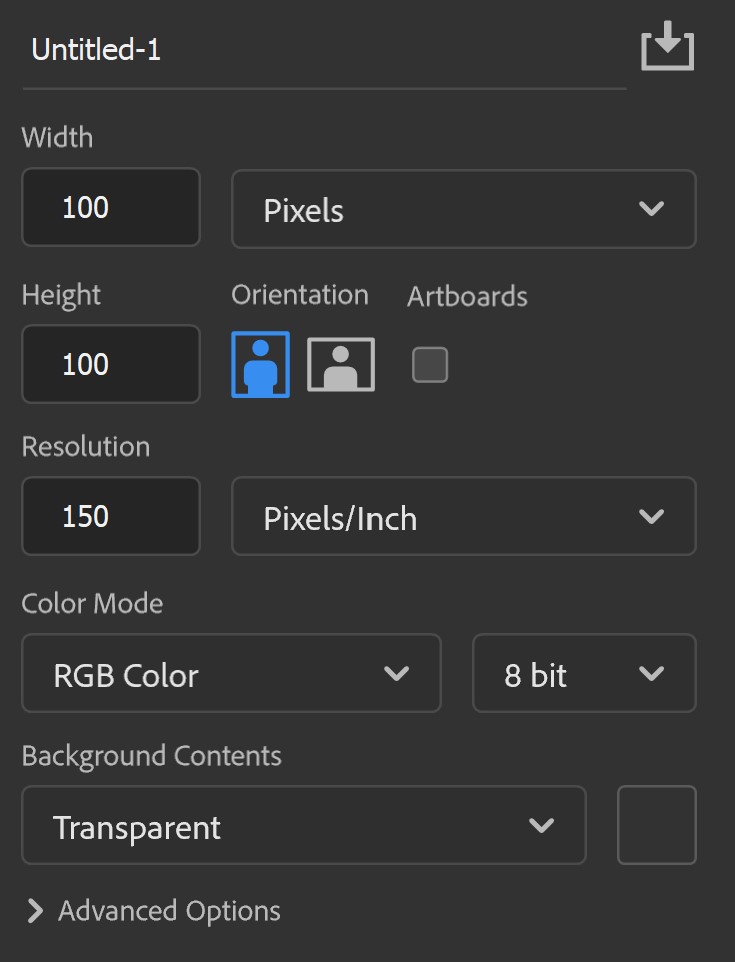
Create a new file. You can find the settings I used in the image below. You can use a different size and resolution if you want, as long as the document is square. So make the width and height the same amount of pixels (1000 x 1000 pixels, for example).
Make the background transparent.
Select the rectangle tool. Use these settings:
- Select ‘shape’
- Fill: Black
- Stroke: No color
Now create the shape. Make the rectangle exactly the same size as your canvas.
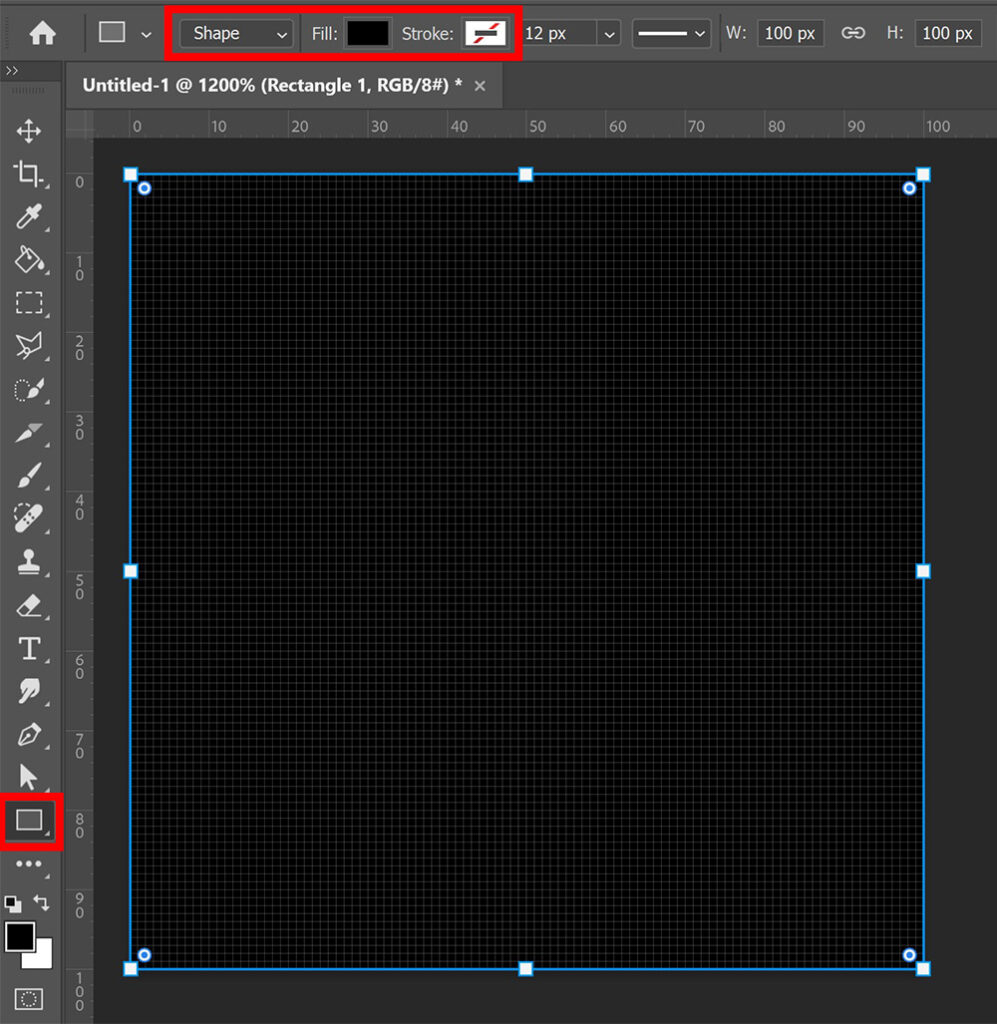
Then navigate to ‘Edit > Define brush preset‘. Give your brush a name and click OK. You have created a square brush now!
Step 2: Square photo effect
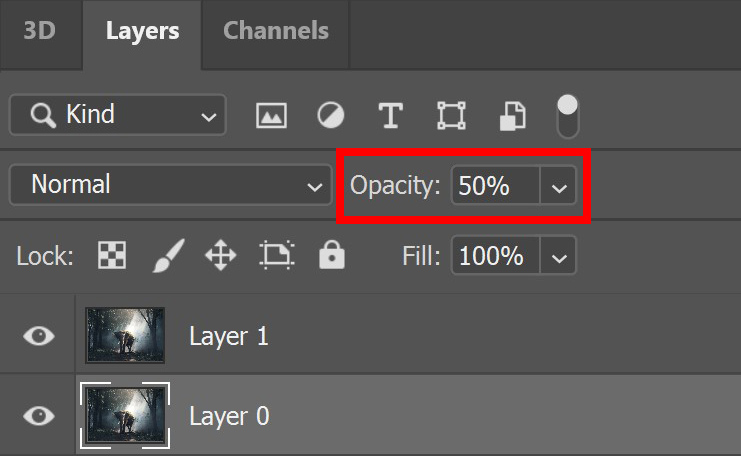
Open the photo you want to edit. Press CTRL+J to duplicate the background layer.
Then unlock the background layer (click on the lock icon). Lower the opacity of the background layer (which is called layer 0 now) to 50%.
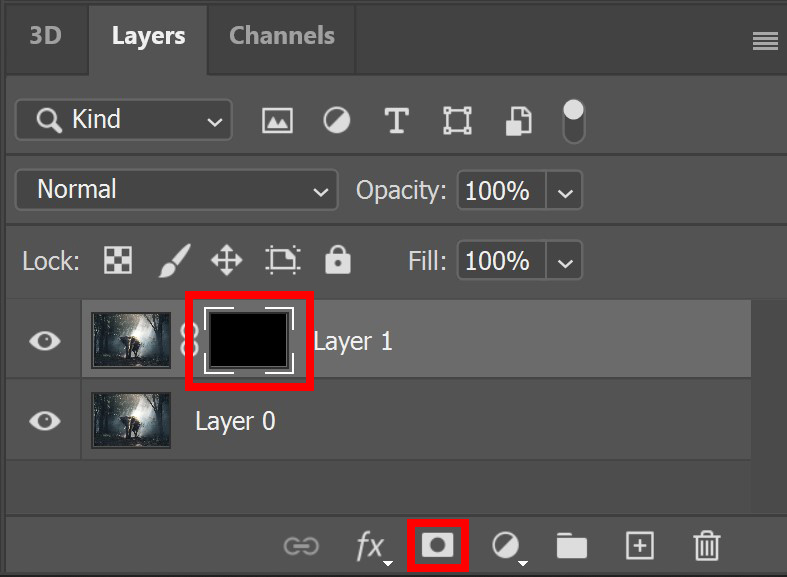
Select the top photo layer (layer 1). Add a mask.
Then navigate to ‘Image > Adjustments > Invert‘ (or press CTRL+I). The mask should be black now.
Select the brush tool and then select the square brush you just created.
Make the foreground color white. Make sure the layer mask is selected. If you click somewhere on your photo now, this area will become visible. Because we lowered the opacity of the background layer, you can see the photo. This way you can clearly see what you’re doing and which areas you want to make visible.
Tip: Use the [ and ] keys to adjust the brush size.
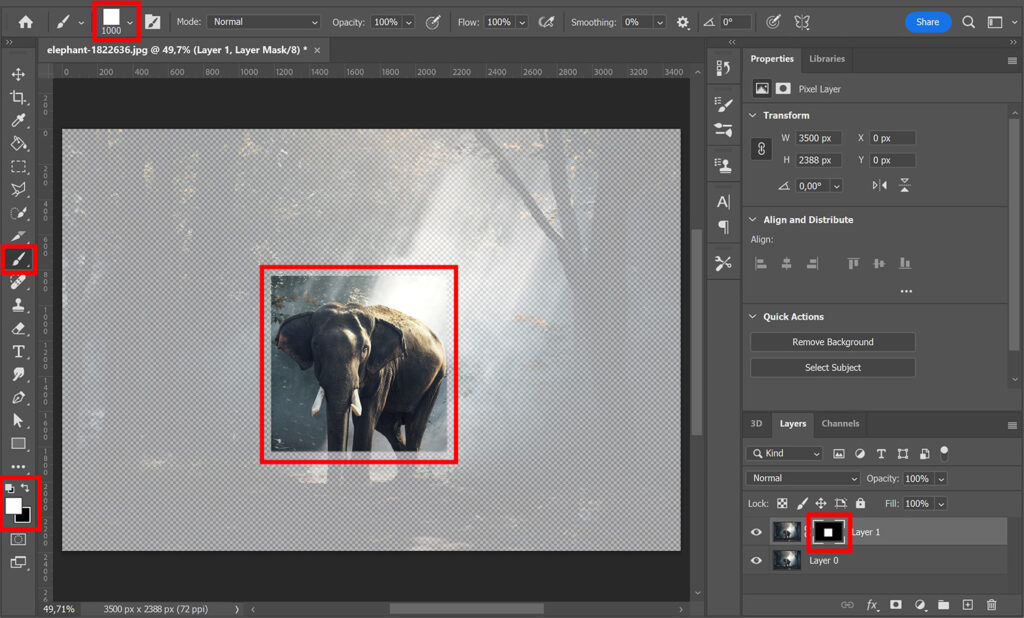
Continue clicking on your photo to create more squares. Use different sized squares.
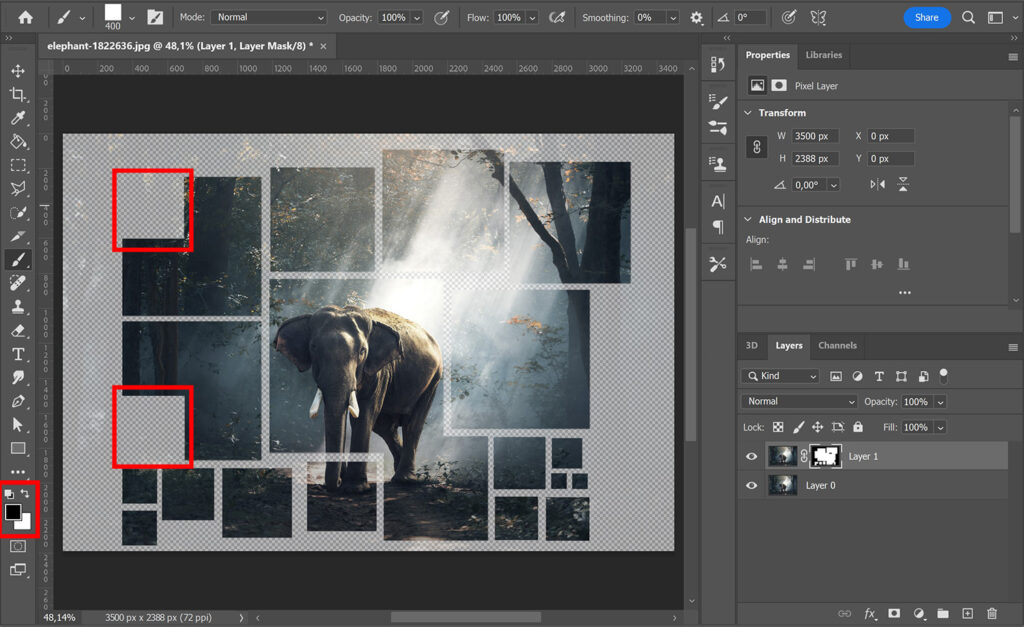
If you make the foreground color black, you can (partially) remove a square. You can use this to remove a square entirely if you’re not happy with the placement. You can also use this to remove the corner of a square (see image below).
Continue this until you’re happy with the effect! And remember:
- Foreground color white = add a square
- Foreground color black = remove a square
Step 3: Add background
If you want to add a background, create a solid color layer. Pick a color for the background. Then place the color fill layer in between the two photo layers.
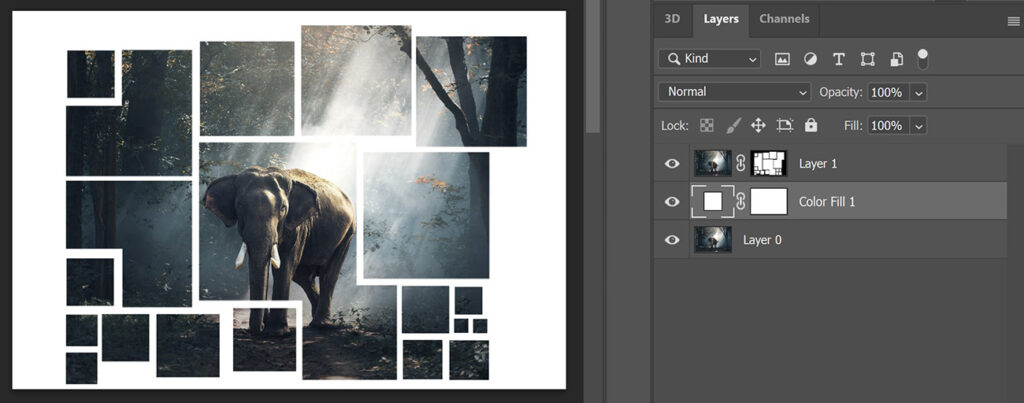
You can still add or remove more squares after adding the background. Select the layer mask of the top photo layer (layer 1). Select the brush tool and continue adding or removing squares.
If you want to see the photo in the background, make the color fill layer invisible (click on the eye icon). Make the layer visible again when you’re done with the squares.
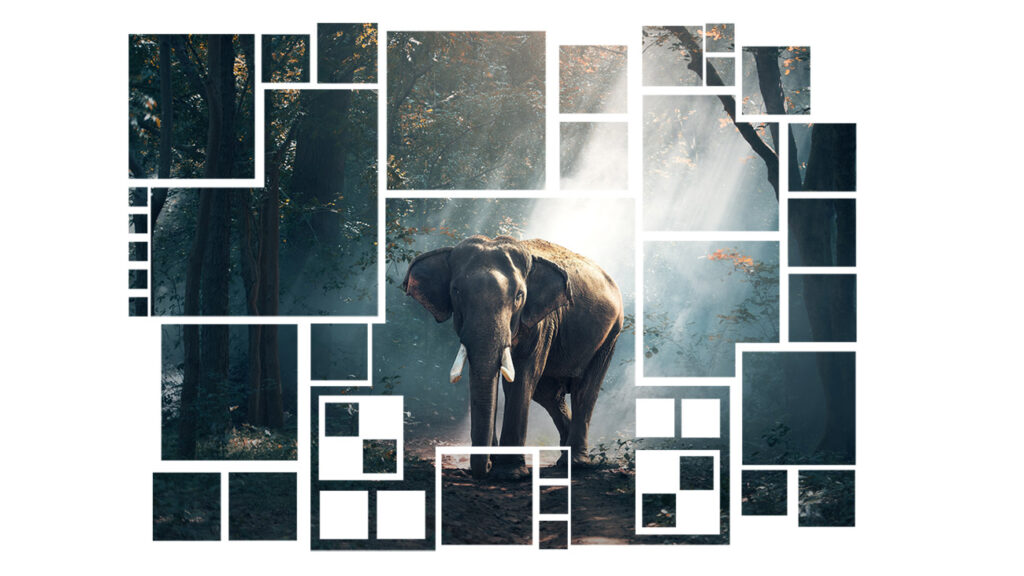
And that’s how you create this square photo collage effect in Adobe Photoshop!
Learn more about Photoshop
Check out my other blogs or my YouTube channel if you want to learn more about editing in Adobe Photoshop!
Follow me on Facebook to stay updated about new blogs and tutorials! You can find the video with instructions below.
Photoshop
Basics
Photo editing
Creative editing
Camera Raw
Neural filters
Text effects