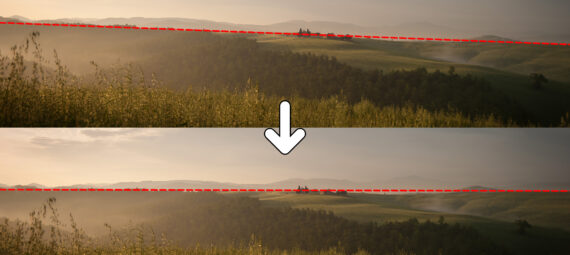
Published on November 16, 2021
If you straighten an image, it usually means you lose part of the image because it’s getting cropped. I’ll show you a simple method to straighten an image without losing parts of the image in Adobe Photoshop!
I’m using Content-Aware Fill. This works best if the edges of your image don’t contain very detailed elements (like people, detailed buildings, etc). If you want to download the image I’m using, click here.
Rather watch the video tutorial of this process? Click here or scroll down to the end of this page!
Straighten image
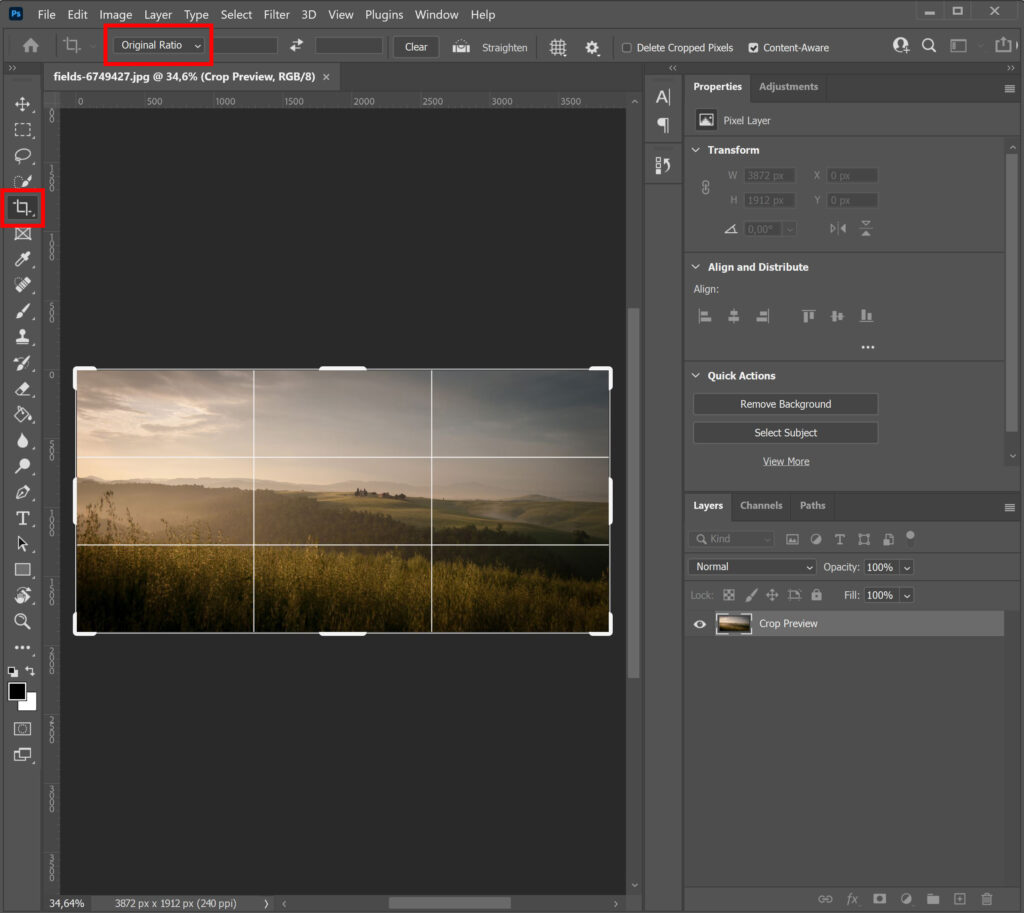
I duplicate the background layer first (press CTRL+J) so you can see the difference in the end, but that’s not necessary. Select the crop tool and select ‘original ratio‘.
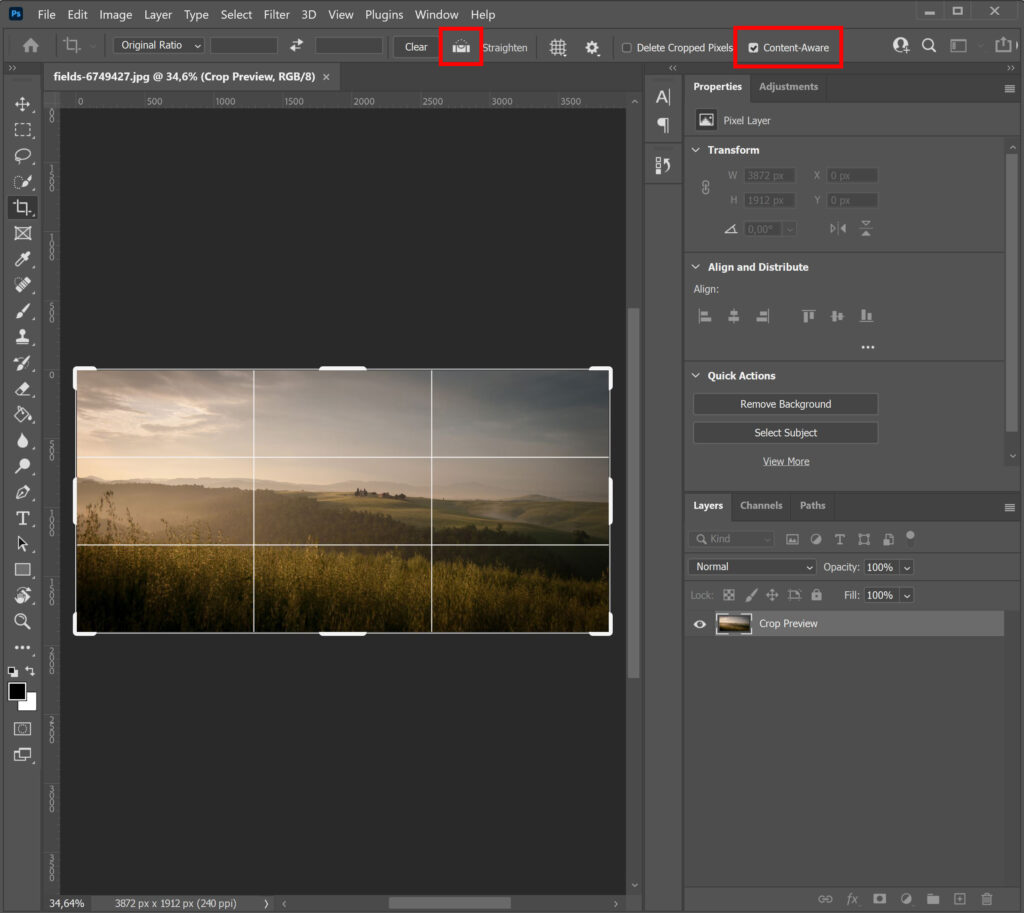
Check the box next to ‘Content-Aware‘ and then select the icon next to ‘Straighten‘.
You can now drag a line over the horizon. Photoshop will straighten the image based on this line.
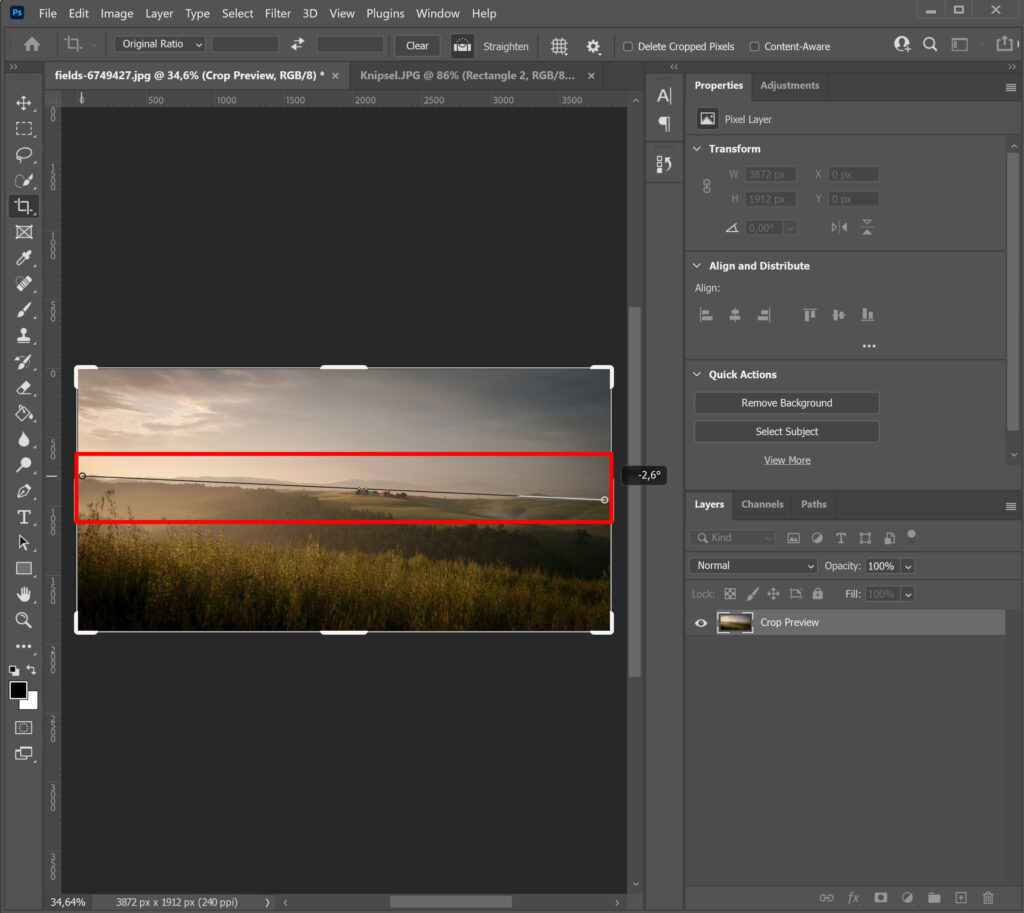
As you can see in the image below, the image is cropped and you’ll lose a large part of your original image.
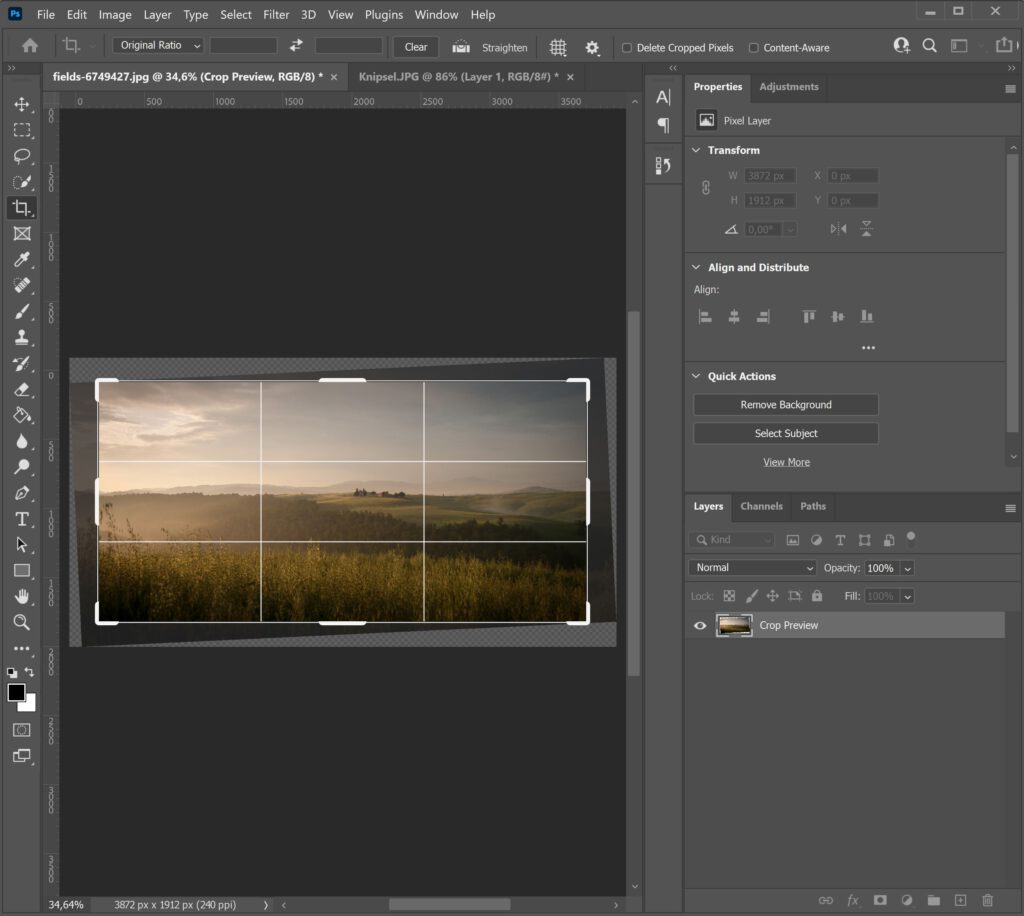
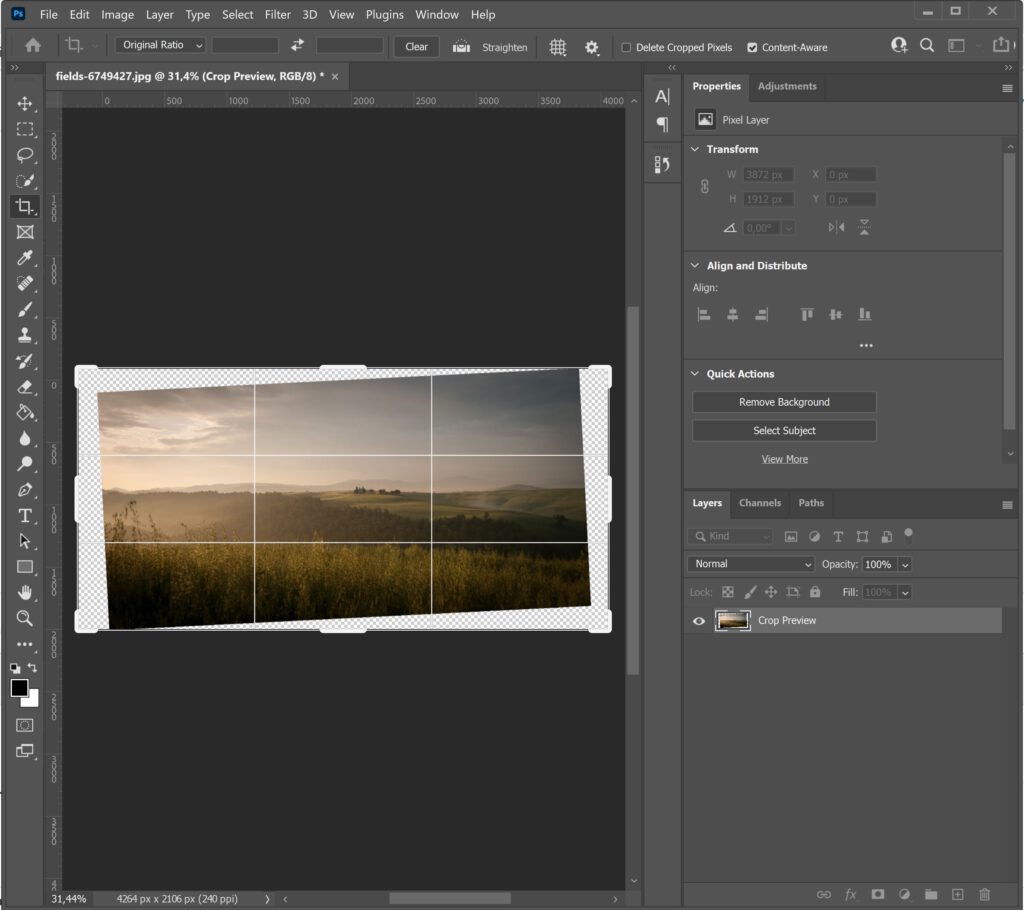
We don’t want that, so we make the frame larger. You can include the transparent areas, this will be filled in the next step. Make sure your entire image is inside of the frame. The image below shows an example of how your frame should look.
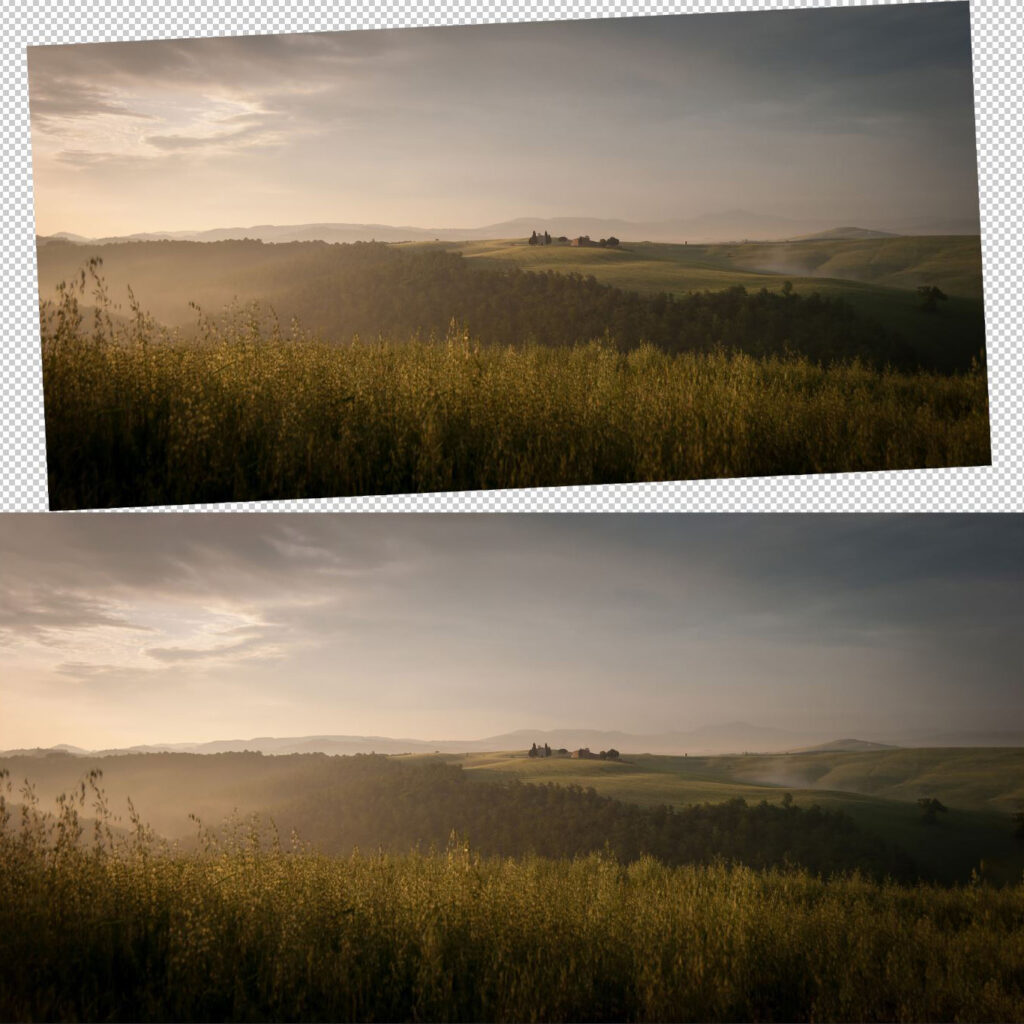
Now press the enter key. Because you selected ‘Content-Aware‘, Photoshop will fill the transparent areas. If you check the image below, you can see what it looked like before (top) and after (bottom) using Content-Aware. All the transparent areas are filled based on the rest of your image. By using this method, you won’t lose large parts of your image!
And that’s how you straighten your image without cropping it! If you want to learn more about Adobe Photoshop, check out my other blogs or take a look at my YouTube channel. You can find the video tutorial of this process below!
Photoshop
Basics
Photo editing
Creative editing
Camera Raw
Neural filters
Text effects

