Published on January 15, 2022
Stretch text in Photoshop
In this blog I’ll show you how to stretch text and create a drop shadow and outer glow in Adobe Photoshop.
Step 1: Type your text
Create a new file. My file size is 1600×900 pixels. You can use any size you want, but you might have to use different settings for the drop shadow and outer glow if you do that.
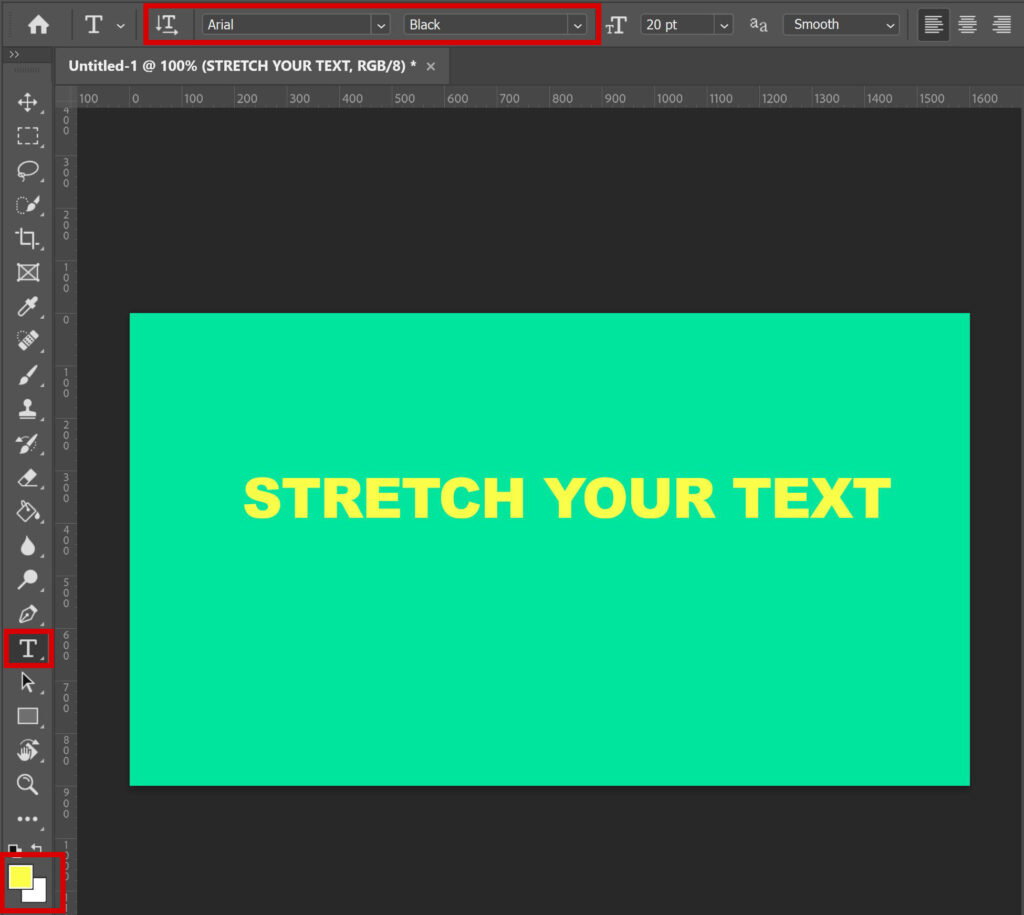
Select the horizontal type tool, pick a font and color you like and type your text.
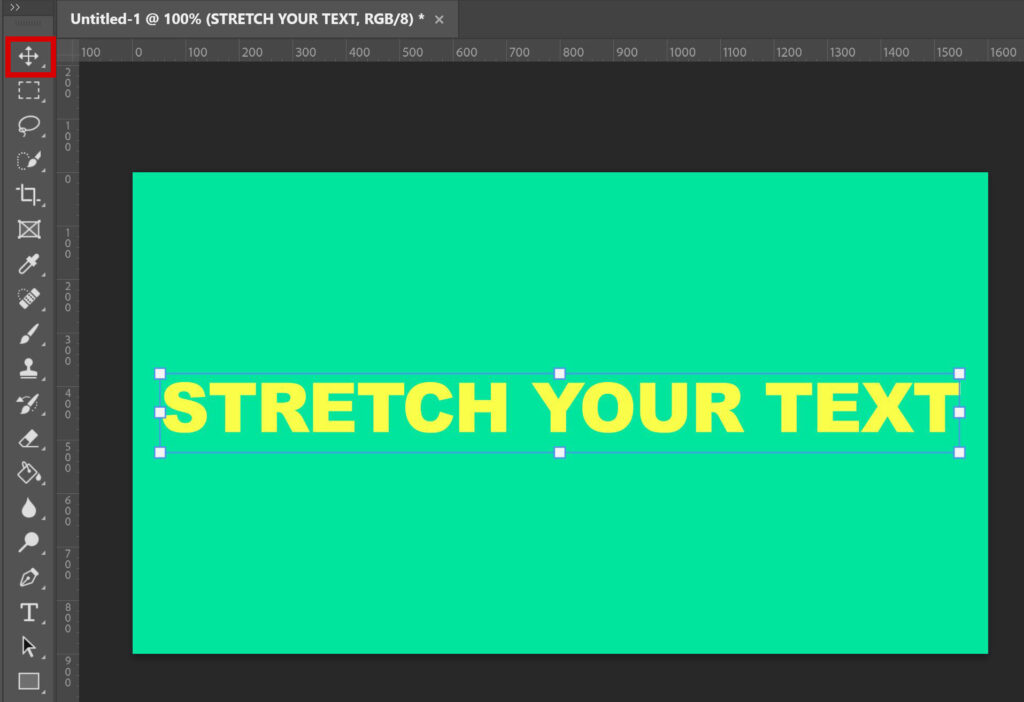
Then select the move tool and press CTRL+T. Resize your text and pick the correct placement.
Step 2: Drop shadow and outer glow
If you don’t want to create a drop shadow and outer glow, you can skip this step and continue with step 3.
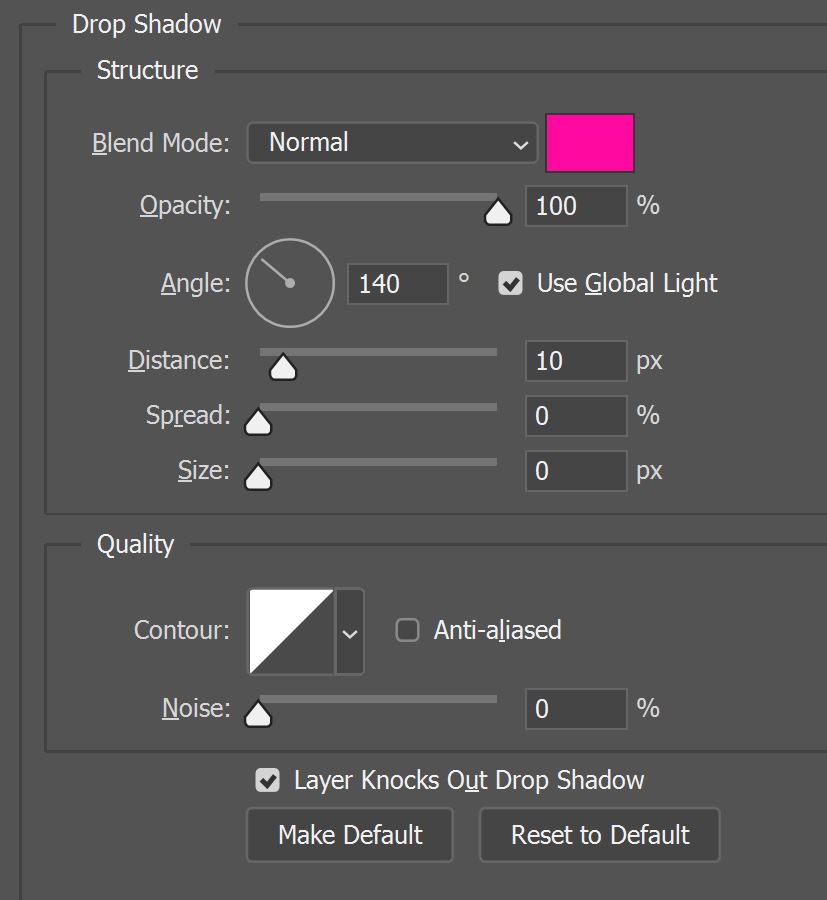
Double click on your text layer to open the layer style window. Select ‘drop shadow‘. You can find the settings I used in the image below.
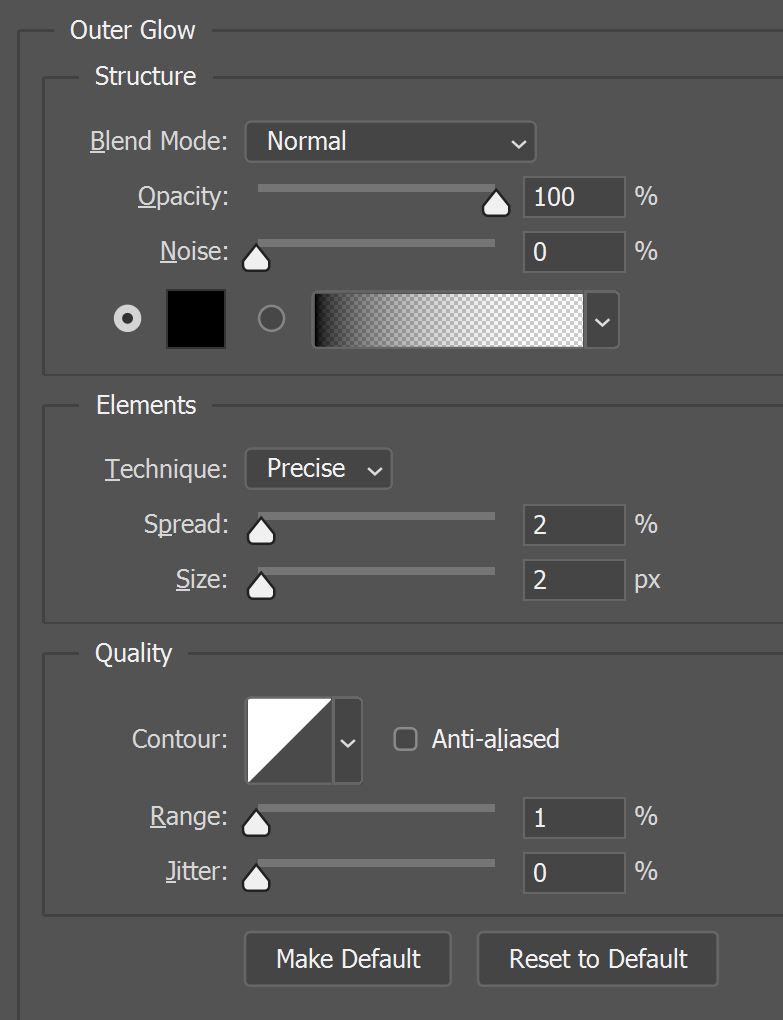
Now select ‘outer glow‘. Again you can find the settings I used in the image below.
Step 3: Stretch text
Right click on your text layer and select ‘convert to shape‘. Select the direct selection tool and click on the letter that you want to stretch. If you can’t select your letter, try clicking on one of the anchor points around your letter first.
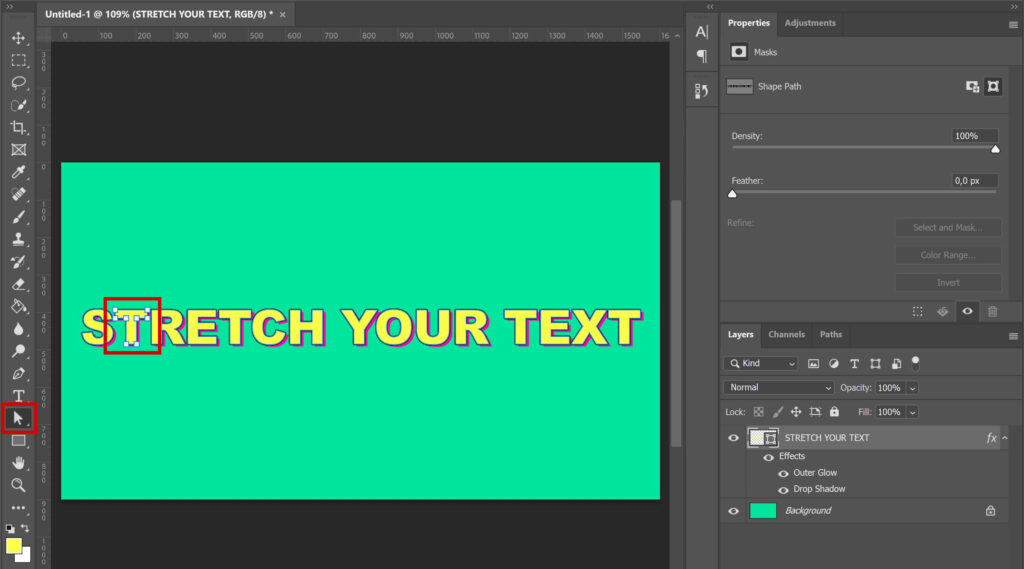
I’m stretching the bottom of the letter T. Click on the bottom of the letter and drag it down. Make sure you go straight down (or up).
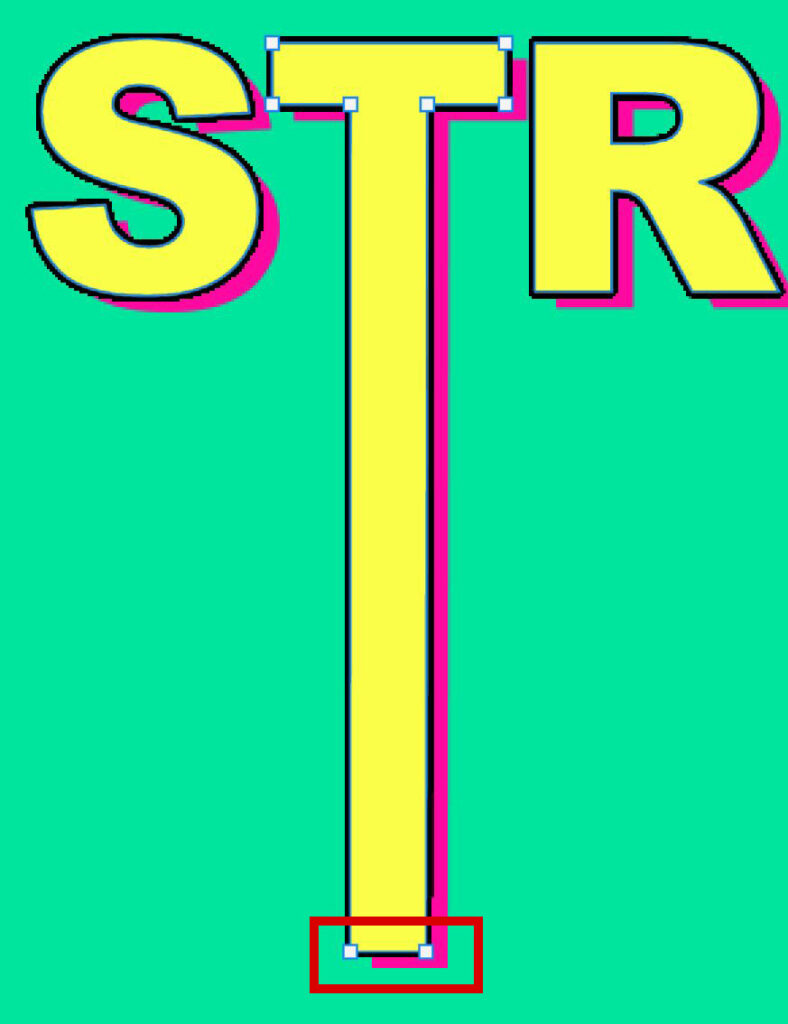
Don’t select and move the anchor points. If you do that, only one corner of the letter will stretch. If this happens, simple press CTRL+Z to undo your last action. Always select and move the area between the anchor points to stretch the entire letter.

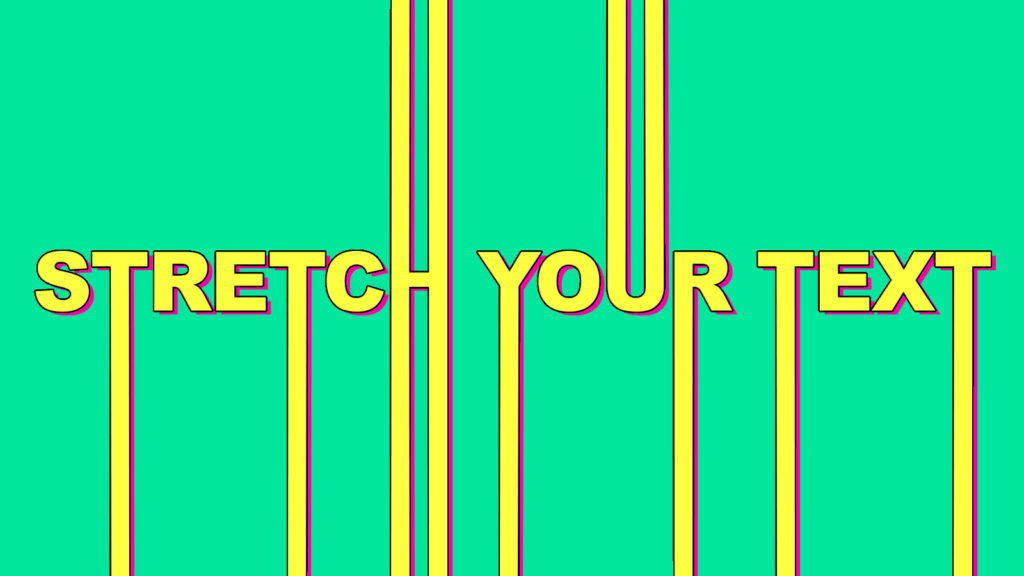
Continue this for all the letters that you want to stretch. You can see the result below!
Want to learn more about Adobe Photoshop? Check out my other blogs or take a look at my YouTube channel.
To stay updated about new blogs and tutorials, follow me on Facebook!
Photoshop
Basics
Photo editing
Creative editing
Camera Raw
Neural filters
Text effects

