Published on July 29, 2022
Text behind subject with outline (stroke)
In this blog I’ll show you how to place a text behind a subject with a transparent text with an outline over your subject in Adobe Photoshop.
Would you rather watch the video with instructions? Then click here or scroll down to the end of this page.
If you want to download the photo I used, click here. Let’s get started!
Step 1: Cut out subject
Open the photo you want to edit. Use the quick selection tool to select your subject.
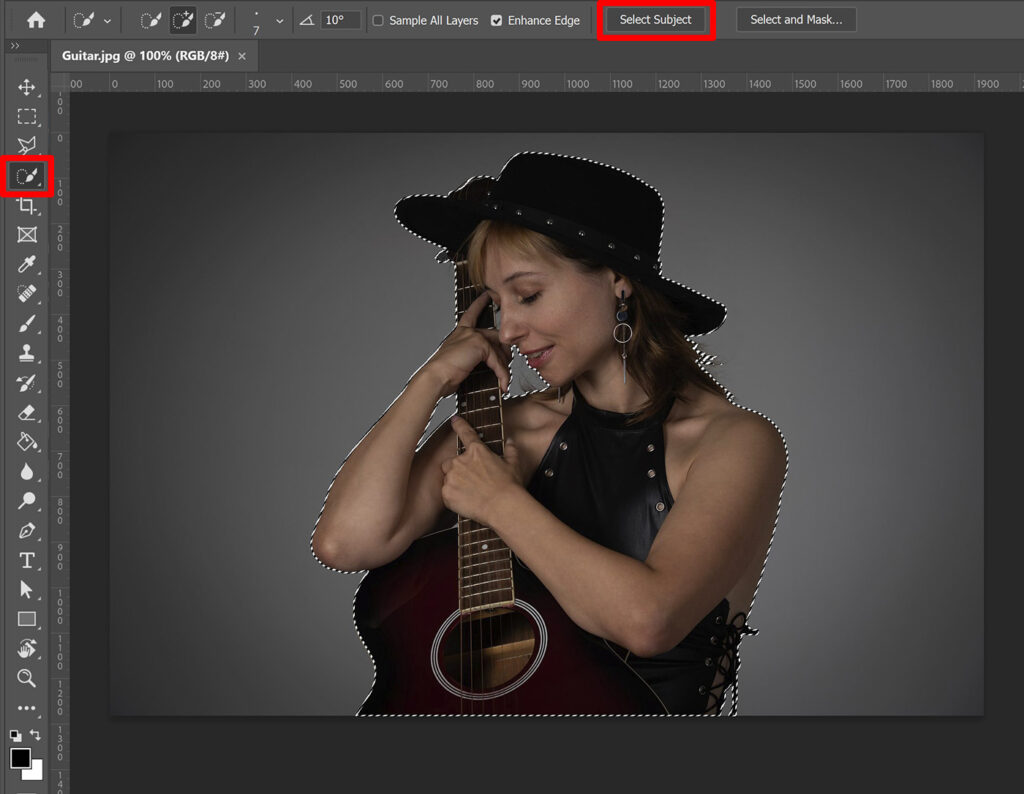
Then press CTRL+J to duplicate the selected area. You now have a new layer with your subject and a transparent background. I rename this layer ‘subject’.

Step 2: Create text
Select the horizontal type tool. Pick a font and color you like and type your text.
Then select the move tool and press CTRL+T to activate free transform. You can now resize your text and pick the correct placement. You can still change the size and placement of the text later on, so this doesn’t have to be perfect right away.
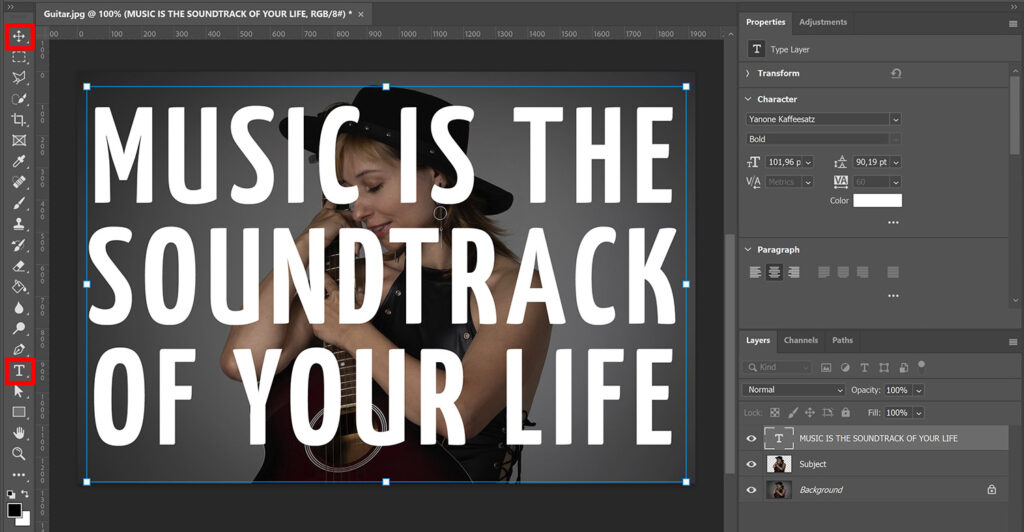
Step 3: Text behind subject with outline
Place your text layer below the subject layer. The text is now behind your subject.
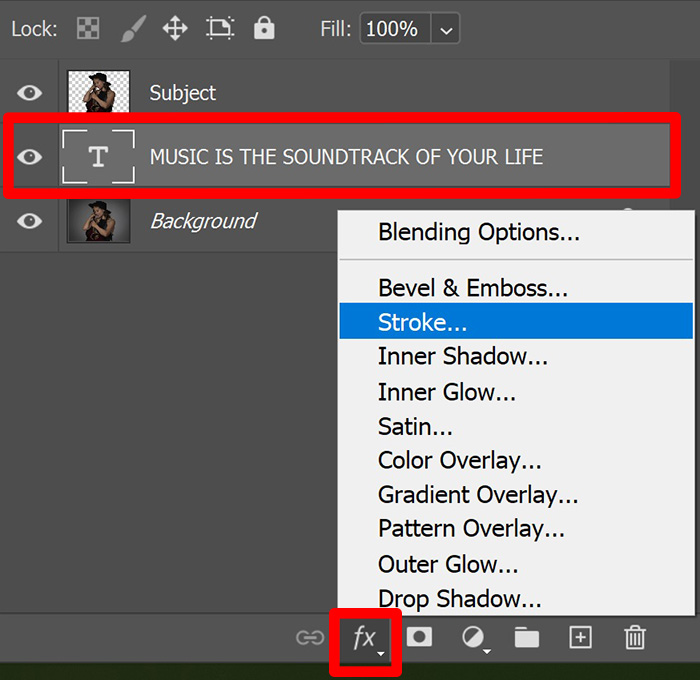
Select the text layer and click on the fx icon, then select ‘stroke‘.
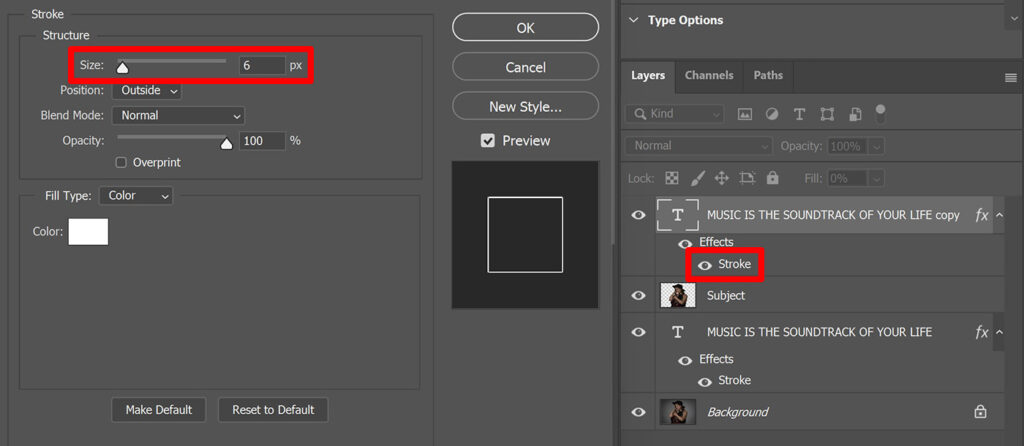
You can find the settings I used in the image below. Copy all these settings, except the color. The stroke needs to have the same color as your text. My text is white, so my stroke is white too. Make the stroke the same color as your text.
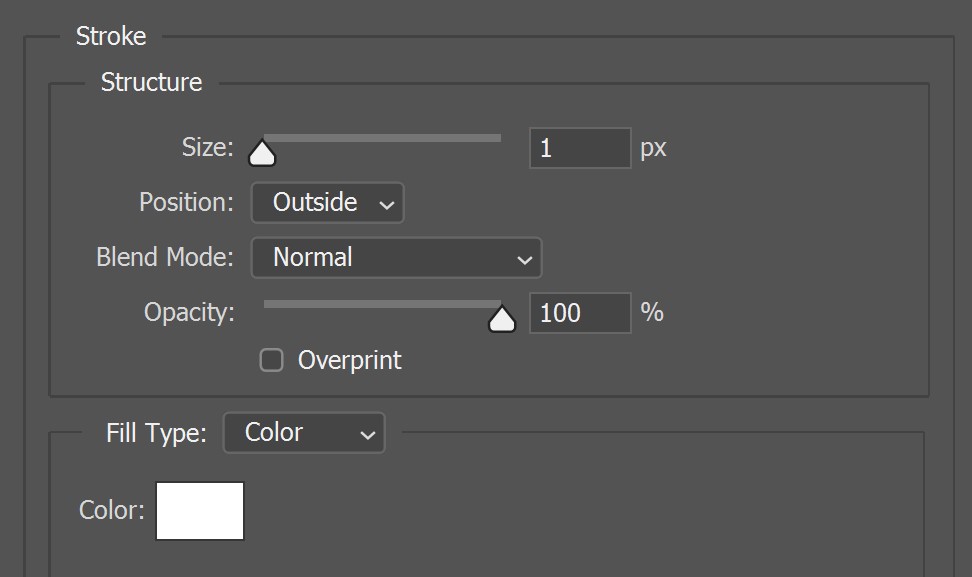
Click OK to apply the adjustments. Press CTRL+J to duplicate the text layer. You now have 2 text layers, both with a stroke. Place the text layer copy above the subject layer.
Lower the fill of this layer to 0%. You’ll now see the outline effect.

The outline is very thin now. To make it thicker, double click on the stroke layer below the top text layer. You can now a adjust the size to make the outline thicker.
Step 4: Adjust size and placement
If you want to change the placement of the text, select both text layers and the move tool. You can now move the text. This won’t affect the transparent effect of the text.
To adjust the size of the text, also select both text layers and the move tool. Then press CTRL+T to activate free transform, you can now resize the text. This won’t affect the transparent effect of the text either.
And that’s how you place a text behind a subject with a transparent outlined effect in Adobe Photoshop. You can see the result below!

Do you want to learn more about editing in Adobe Photoshop? Then check out my other blogs or take a look at my YouTube channel.
Follow me on Facebook to stay updated! You can find the tutorial below.
Photoshop
Basics
Photo editing
Creative editing
Camera Raw
Neural filters
Text effects

