Published on June 6, 2022
Create a wavy text effect
In this blog I’ll show you a very fast and simple method to create a wavy text effect in Adobe Photoshop!
Step 1: Create file and text
First create a new file. It doesn’t matter what size your file is.
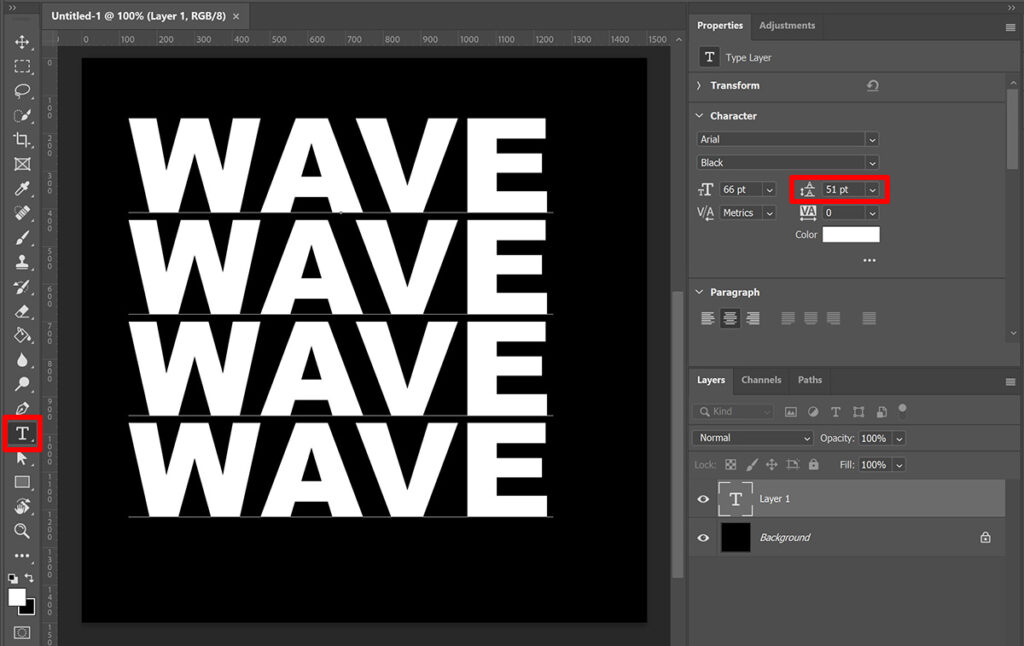
Then select the horizontal type tool and pick a font you like. Pick a color for the text and type your text.
I type multiple lines below eachother, so you can see the wave effect better. To adjust the space between the lines, select the entire text (press CTRL+A) and set the leading. To do that, click on the number next to it and use the arrow up and down keys to adjust the amount. This way you can easily pick the correct space between the lines.
Step 2: Wavy text
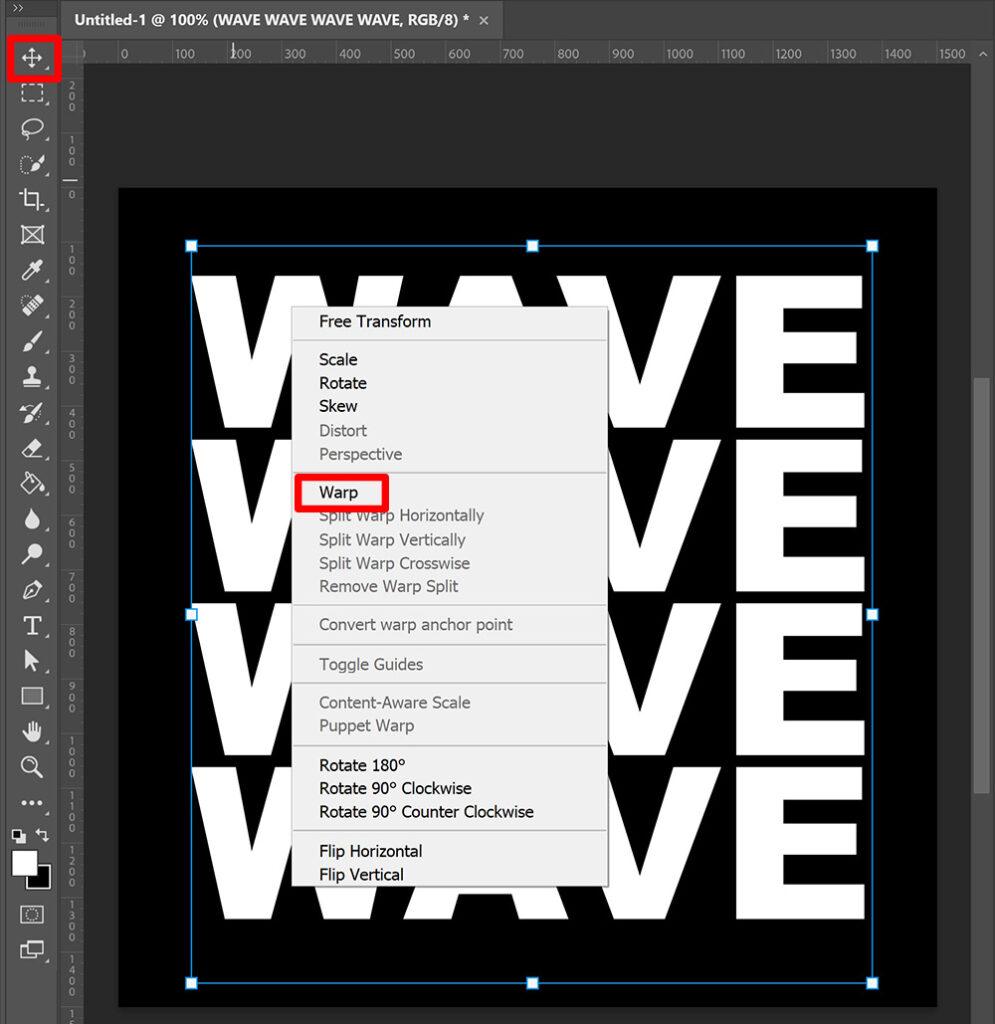
Make sure you’ve selected your text layer. Select the move tool and press CTRL+T to activate free transform. You can now adjust the size of your text and pick the correct placement.
With free transform activated, right click on the text and select warp.
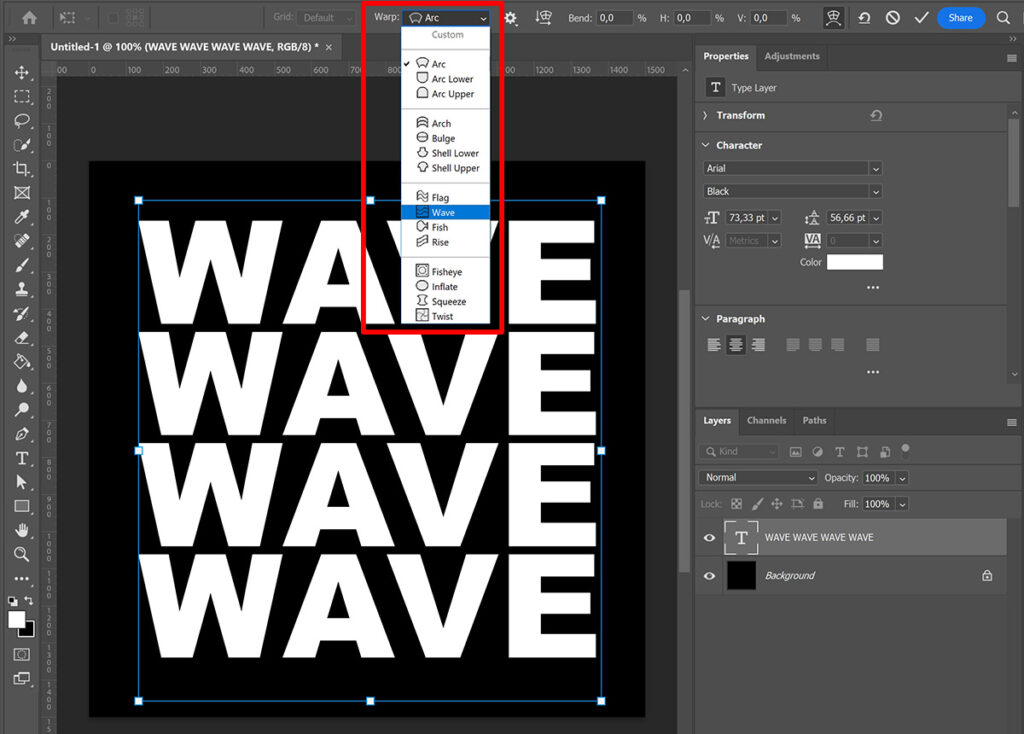
Then change the type of warp to wave.
You can change the warp orientation to adjust the direction of the wave. Click on the icon shown in the image below to change the orientation, click on it again to change it back.
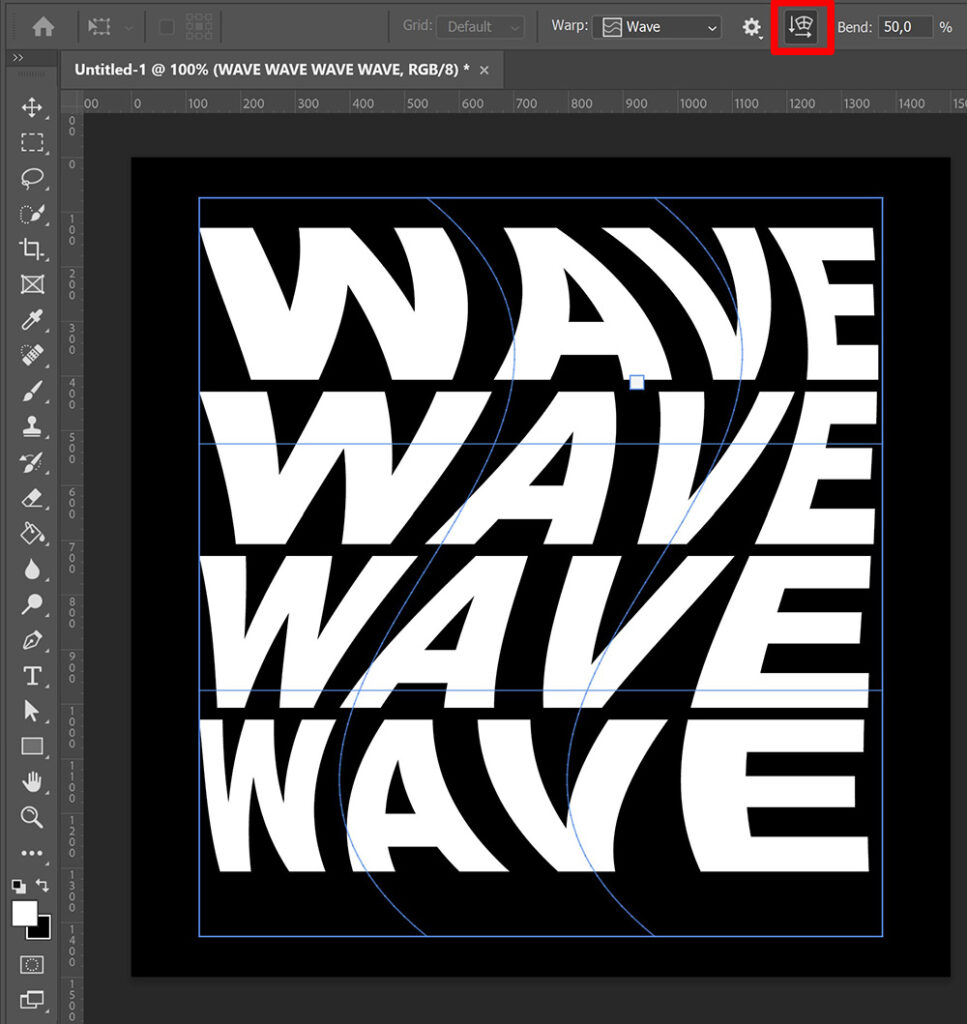
Click on the ✓ icon to apply the changes. If you want to adjust the warp, press CTRL+T to activate free transform again. Right click on the text and select warp again. You can now adjust the warp.
If the text is too close together or too far apart, you can still adjust this. Select the horizontal type tool and select your text. Again select the entire text (CTRL+A) and adjust the leading as described in step 1.
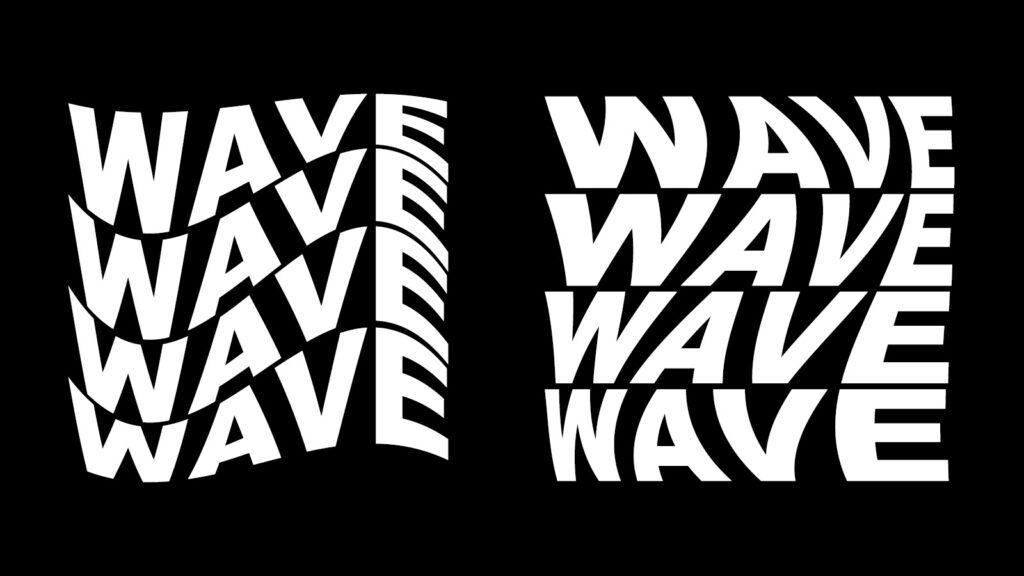
And that’s how you can quickly create a wavy text effect in Adobe Photoshop. You can see the result for both warp orientations below!
Learn more about Photoshop
Want to learn more about editing in Adobe Photoshop? Check out my other blogs or take a look at my YouTube channel.
Follow me on Facebook to stay updated!
Photoshop
Basics
Photo editing
Creative editing
Camera Raw
Neural filters
Text effects

