Published on September 28, 2022
Photo inside polaroid frame
I’ll show you how to place your own photos inside polaroid frames in Adobe Photoshop!
Rather watch the video with instructions? Click here or scroll down to the end of this page.
You can use any image/photo with polaroid frames that you like. You can download the one I used here.
Step 1: Select frame
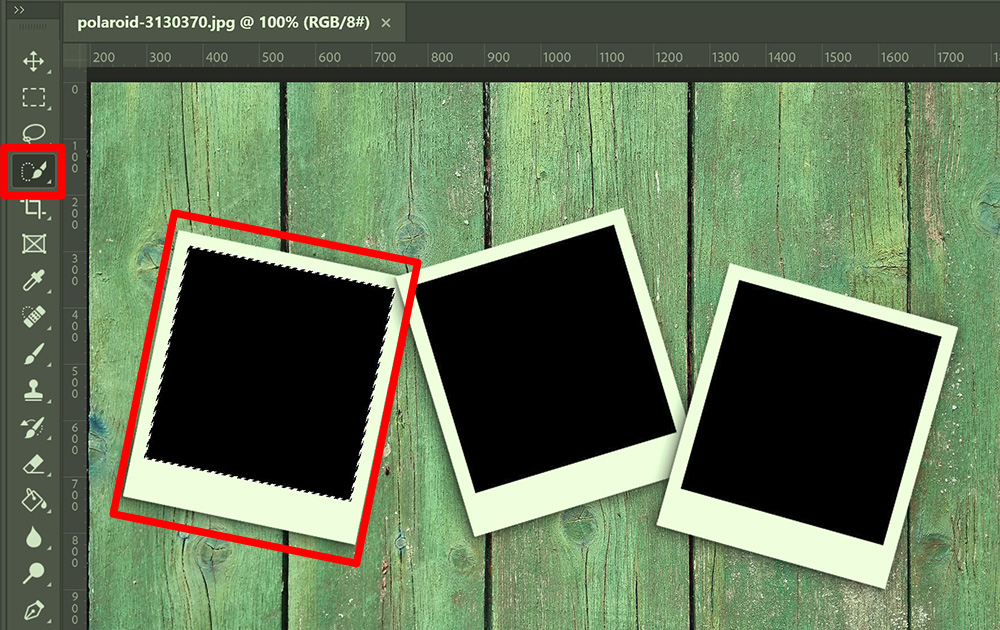
The file I’m using has empty black frames that I want to replace with my own photos. To do that, you need to select one of the frames first. I use the quick selection tool to do that.

Press CTRL+J to duplicate the selected area. You now have a new layer with only the selected frame and a transparent background. I name this layer ‘left’, this way I know what layer belongs to what frame.

Step 2: Photo inside polaroid
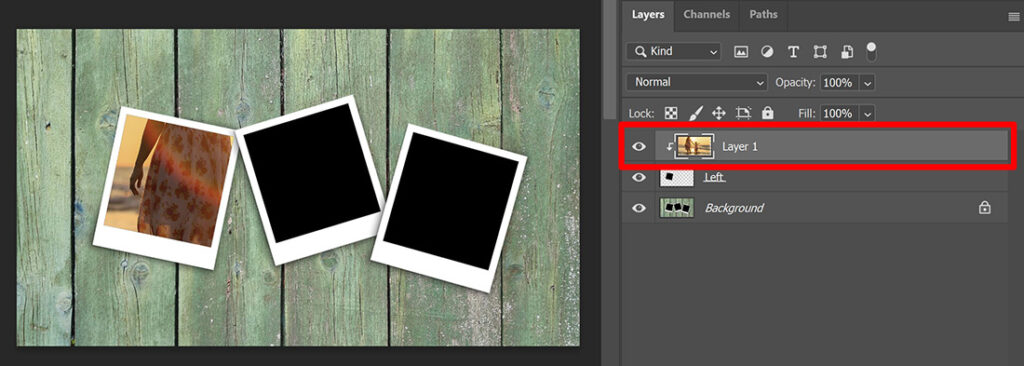
Now open the photo you want to place inside of the frame. Select the move tool and drag this photo towards the file with the polaroids. Place it over the polaroids.
Make sure the layer with the photo is directly above the layer with the frame you want to place it in. Then press ALT+CTRL+G to create a clipping mask. The photo is now clipped to the layer below it (which is the polaroid frame, in this case). You can tell by the arrow icon.

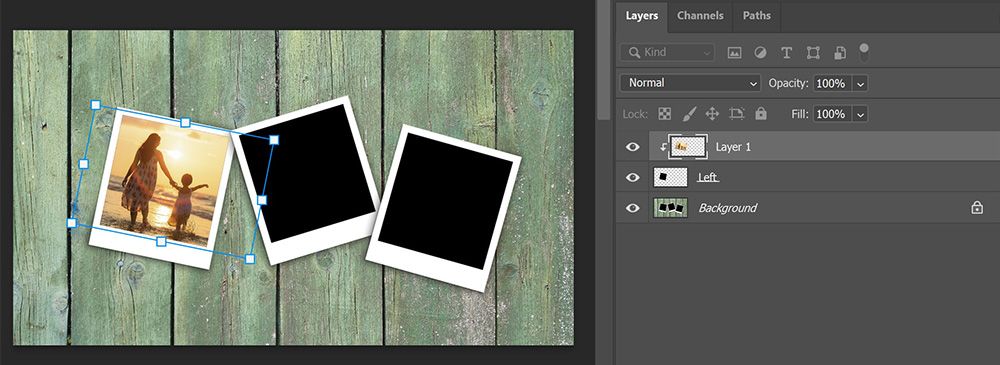
The photo is now inside of the polaroid frame, but it doesn’t fit correctly. To fix that, press CTRL+T to activate free transform. You can now resize and rotate the photo until it fits inside of the frame.

When you’re done, click on the ✓ icon. You have now placed your photo inside the first polaroid frame.
By creating a new layer for the frame and by using a clipping mask, you make sure that the photos never overlap. If you would just remove the area inside of the frame and place the photo behind it, the photos inside of the frames might overlap if the frames are too close together or if the photos are too wide. So by using this method, you make sure the photo is only inside of the frame it needs to be in.
Another benefit of using this method, it that you can adjust the size and position of the photo at any point. I’ll tell you more about that later.
Step 3: Fill other frames
To fill the other frames, you need to repeat this process. Select the background layer and use the quick selection tool to select the next frame.
Press CTRL+J to duplicate the selected area. Rename this layer (it’s the middle frame, so I name this layer middle). Then open the second photo you want to use and select the move tool. Again drag this photo towards the polaroid file you’re working on.
Make sure the layer with this second photo is directly above the layer with the frame you want to place it in. Then press ALT+CTRL+G to create the clipping mask. Press CTRL+T to resize the photo and pick the correct position inside of the frame.
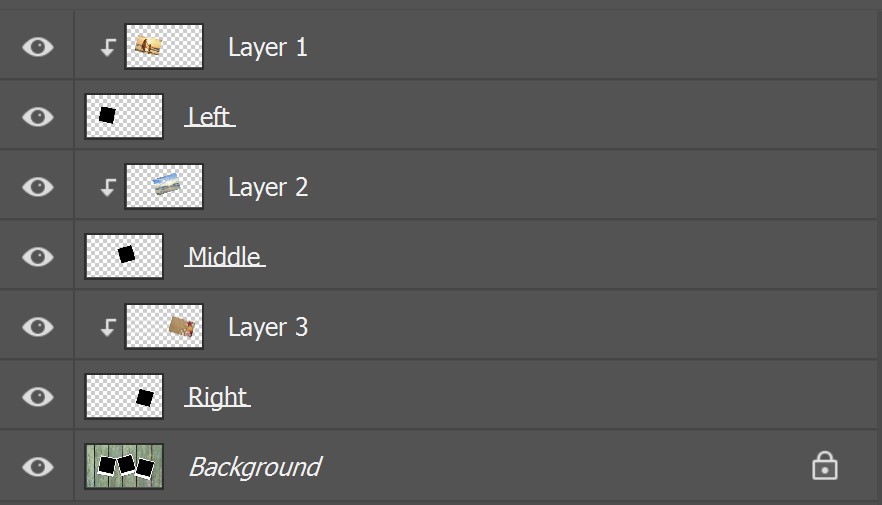
Continue this until all the frames are filled with your photos. Your layer panel should then look similar to the one below.

If you want to adjust the position of one of the photos, select that layer. Make sure you select the layer above the frame (the one with the arrow icon next to it) and not the frame layer itself. Press CTRL+T to activate free transform again. You can now adjust the size and position of the photo inside of the frame.
And that’s how you place your photo inside a polaroid frame in Adobe Photoshop!

Want to learn more about editing in Adobe Photoshop? Check out my other blogs or take a look at my YouTube channel.
Follow me on Facebook to stay updated! You can find the video with instructions below.
Photoshop
Basics
Photo editing
Creative editing
Camera Raw
Neural filters
Text effects

