Published on May 9, 2023
Abstract gradient swirl
In this blog I’ll show you how to create this abstract gradient swirl in Adobe Photoshop!
Rather watch the video with instructions? Click here to watch the tutorial or scroll down to the end of this page.
Step 1: Create file and gradient
First create a new square file. It doesn’t matter what size the file is, as long as it’s square. My file is 3000 x 3000 pixels (resolution 300).
Then create a gradient layer.
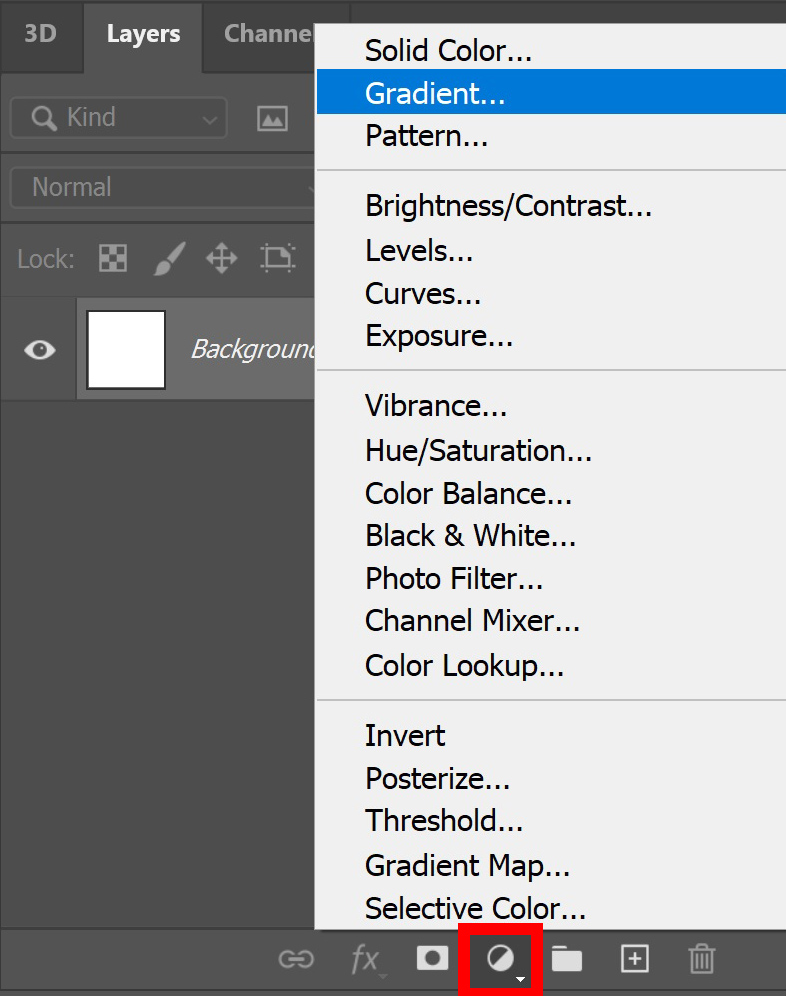
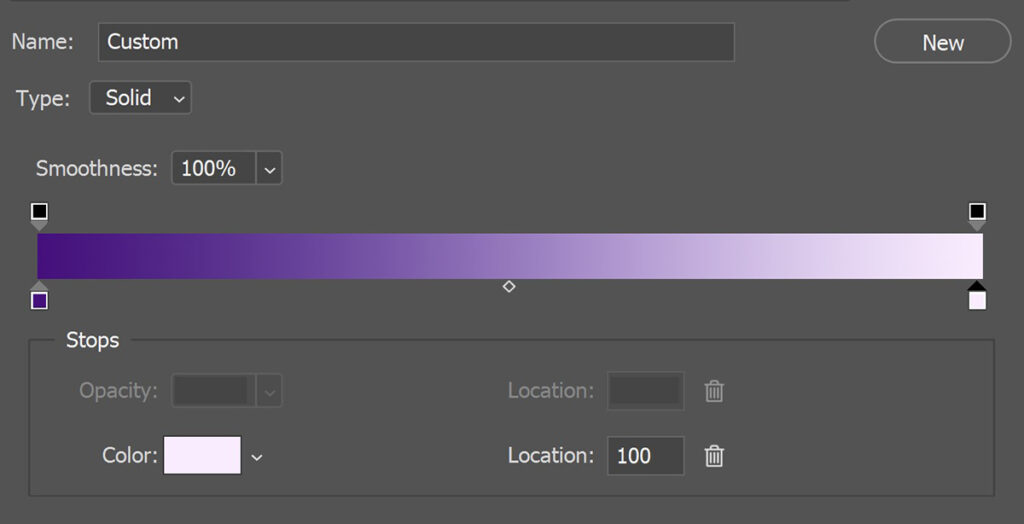
Create a gradient with two colors. Pick a dark color for one side and a light color for the other side. You can use any color you like.
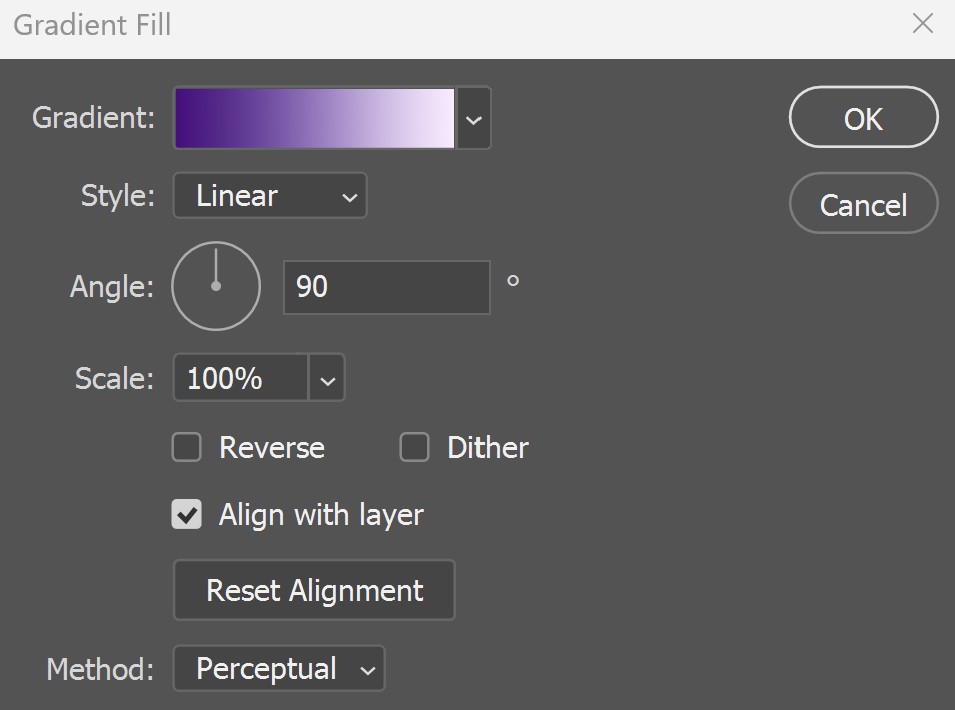
You can find the rest of the settings I used in the image below. Copy these settings.
Step 2: Gradient swirl
Right click on the gradient fill layer and select ‘flatten image‘. You now have one layer left, the background layer (with the gradient).
Unlock the background layer (click on the lock icon).
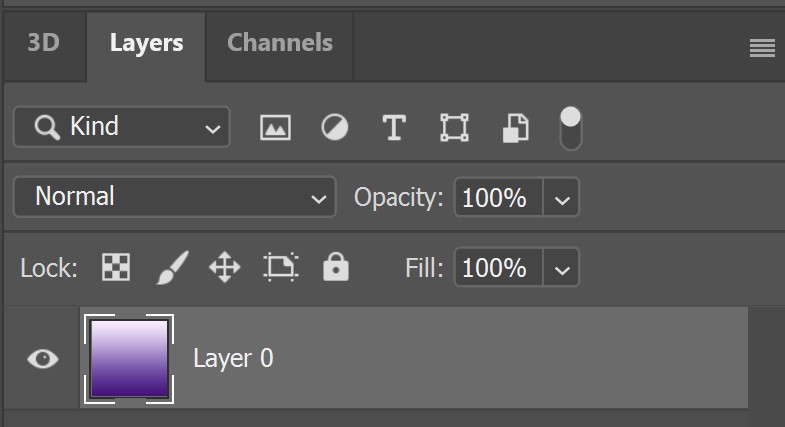
Press CTRL+J to duplicate this layer. Then press CTRL+T to activate free transform.
Connect the width and height (with the chain icon). Lower the width to 95%. Because you connected the width and height, the height should be 95% too now.
Then rotate the layer 3°. Click on the ✓ icon when you’re done.
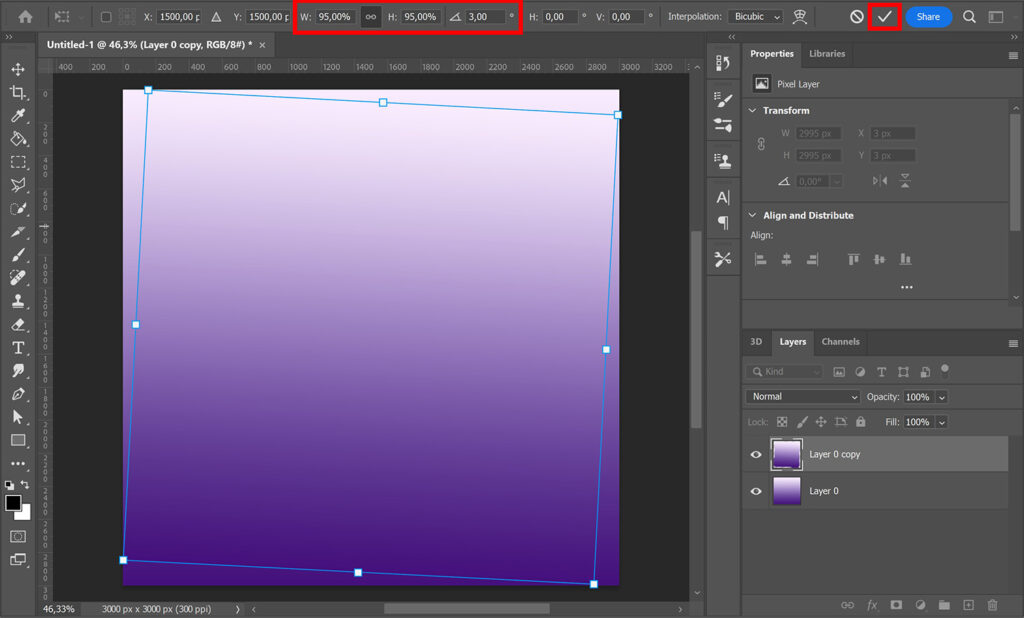
Press CTRL+ALT+SHIFT+T to repeat the last action (rotating and resizing the layer) in a new layer.
Keep pressing CTRL+ALT+SHIFT+T until the gradient swirl is finished. I ended up with 80 layer copies.
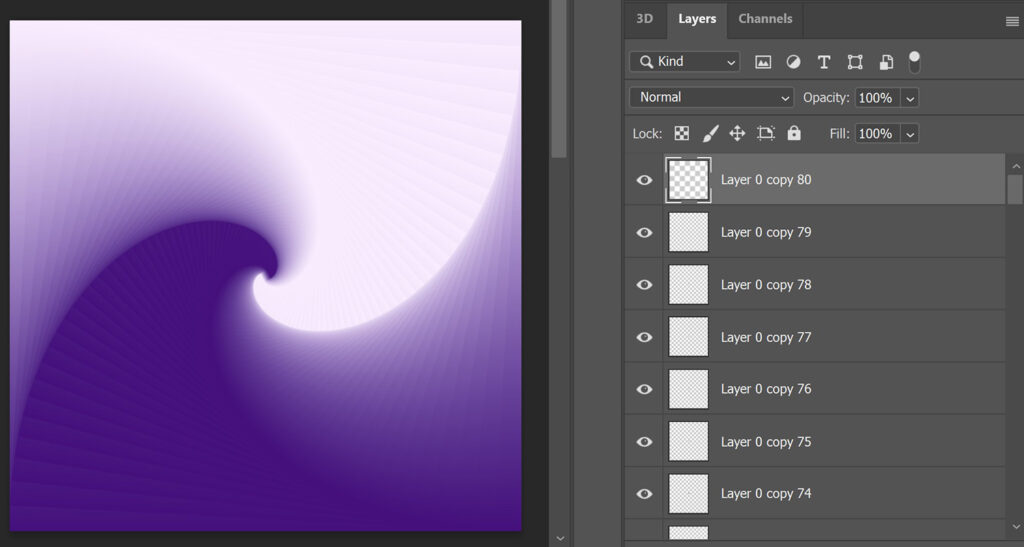
Select all the layers and navigate to ‘Layer > Group layers‘ (or press CTRL+G). All the gradient layers are now in this group.
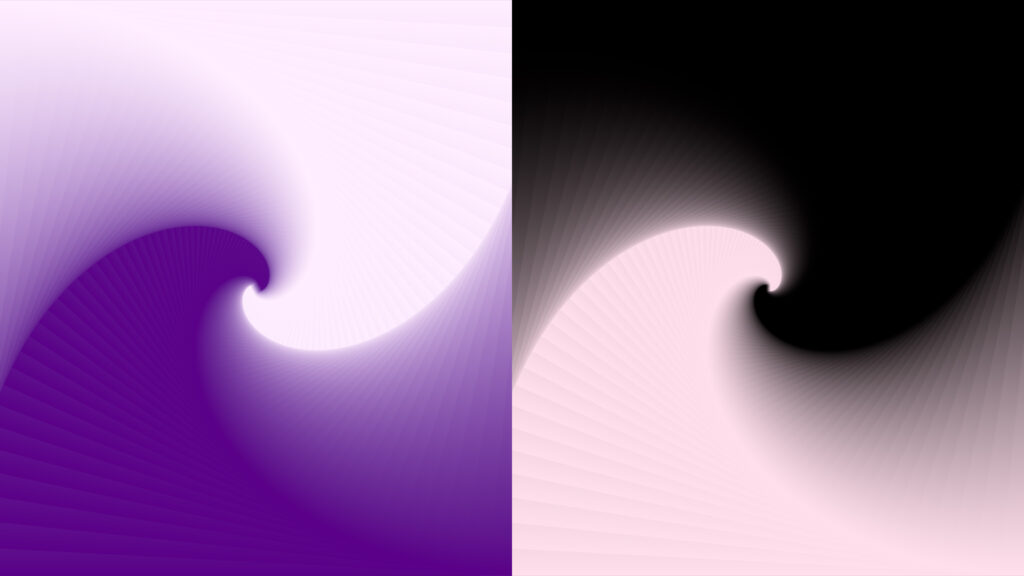
And that’s how you create this gradient swirl in Adobe Photoshop! I’ve created two swirls with different colors.
Learn more about editing in Photoshop
Check out my other blogs or my YouTube channel if you want to learn more about Adobe Photoshop!
Follow me on Facebook to stay updated about new blogs and tutorials! You can find the tutorial video below.
Photoshop
Basics
Photo editing
Creative editing
Camera Raw
Neural filters
Text effects

