

Published on January 8, 2022
Color grading
When you’re color grading in Adobe Lightroom, you can just move the dot in the middle of your color spectrum to change the hue and saturation. It might be quite difficult to get both the hue and saturation right if you’re using this method though.
In this blog I’ll show you 2 methods to color grade more precisely.
Method 1
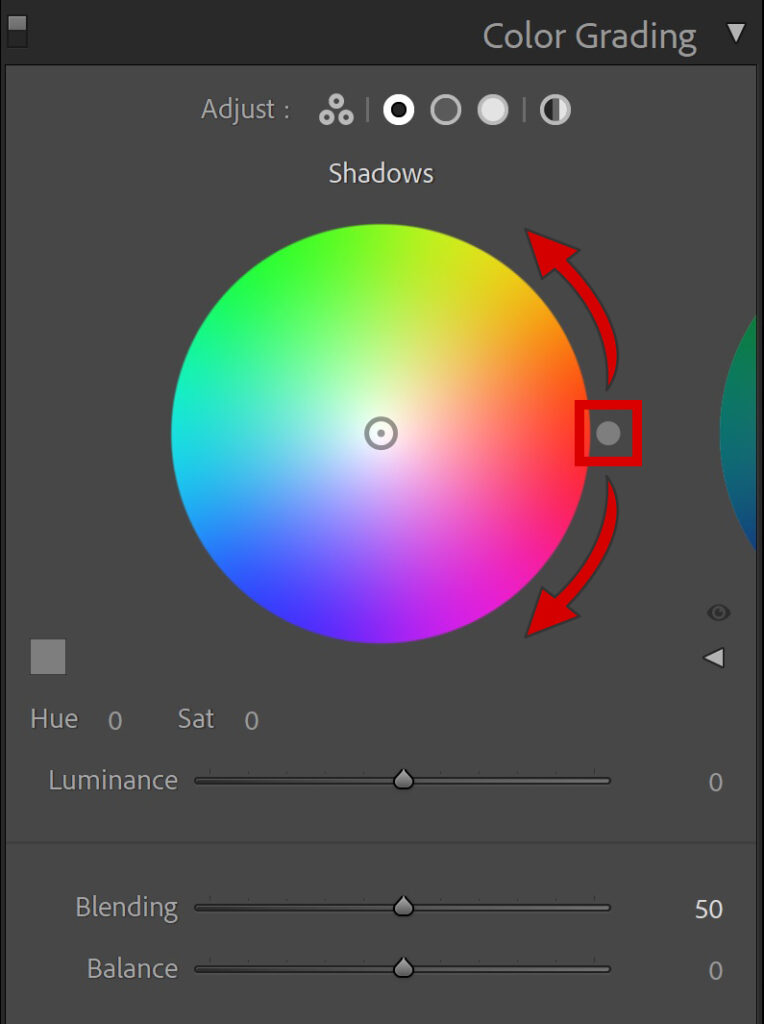
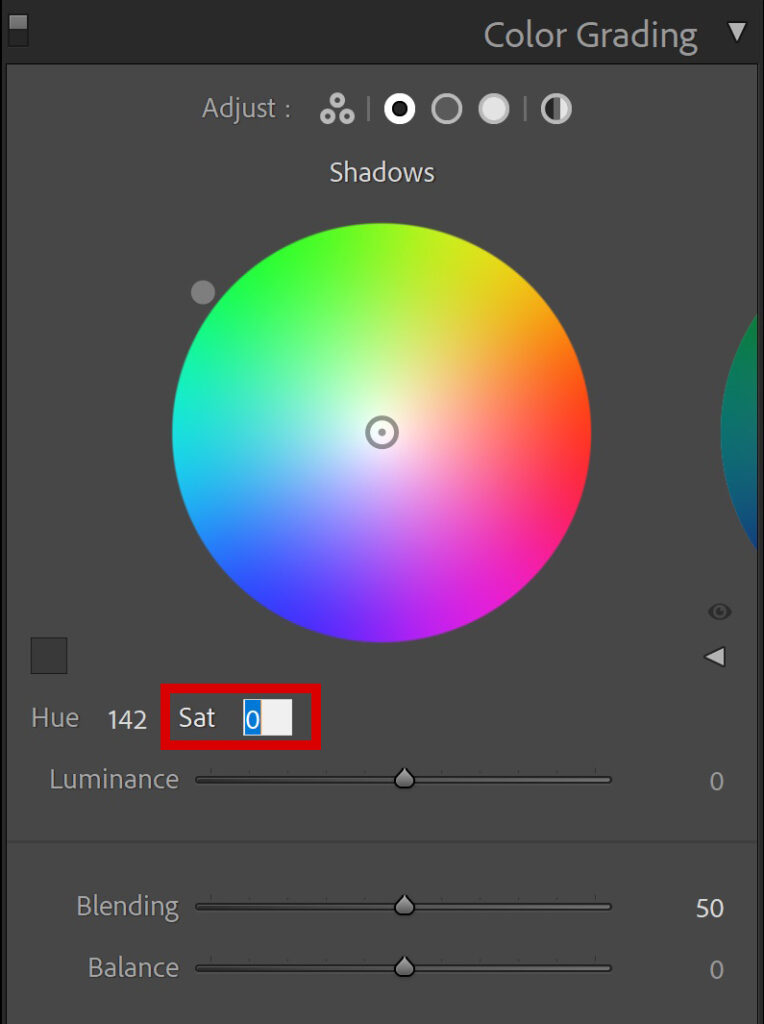
You’ll see a dot outside of your color spectrum (see image below). You can move this dot around and this will only affect your hue. This way you can adjust the hue without changing the saturation.
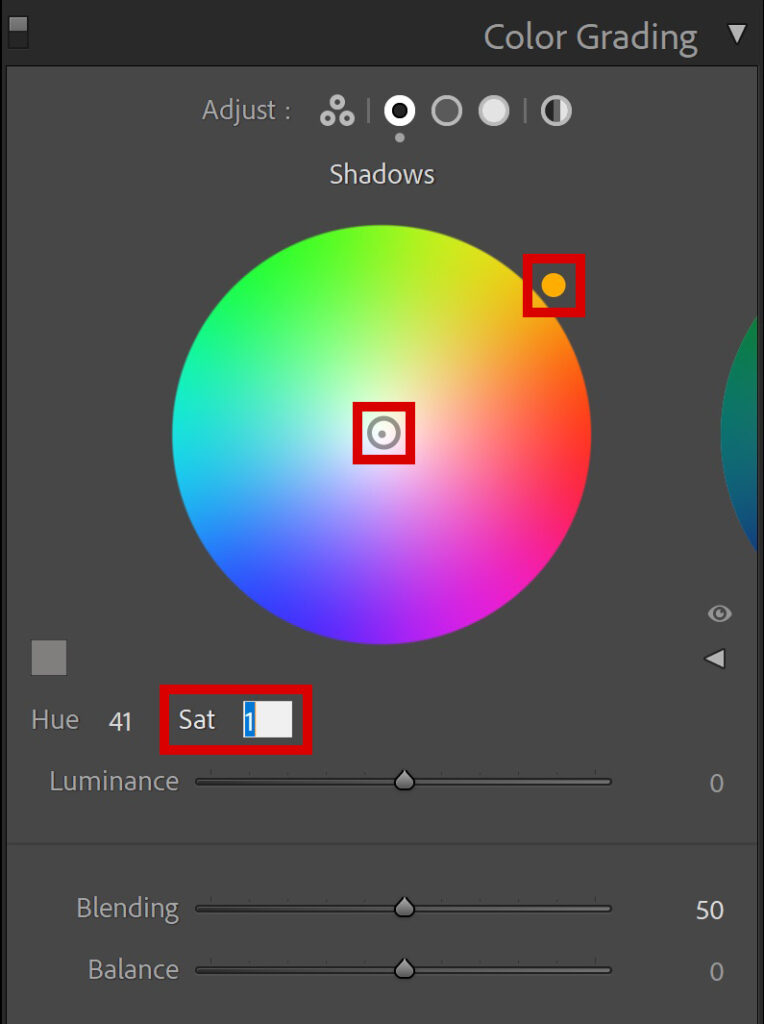
Once you picked the hue, it’s time to change the saturation. Increase the saturation to 1. You can do this by just typing in the amound next to ‘Sat’. The color picker in the middle of your color spectrum has now moved a little bit.
If you click on the color picker now and you hold it, you’ll see a line appear. You can now move your color picker over this line and it will only affect the saturation. This line won’t show up if the saturation is 0, that’s why I changed it to 1 in the previous step.
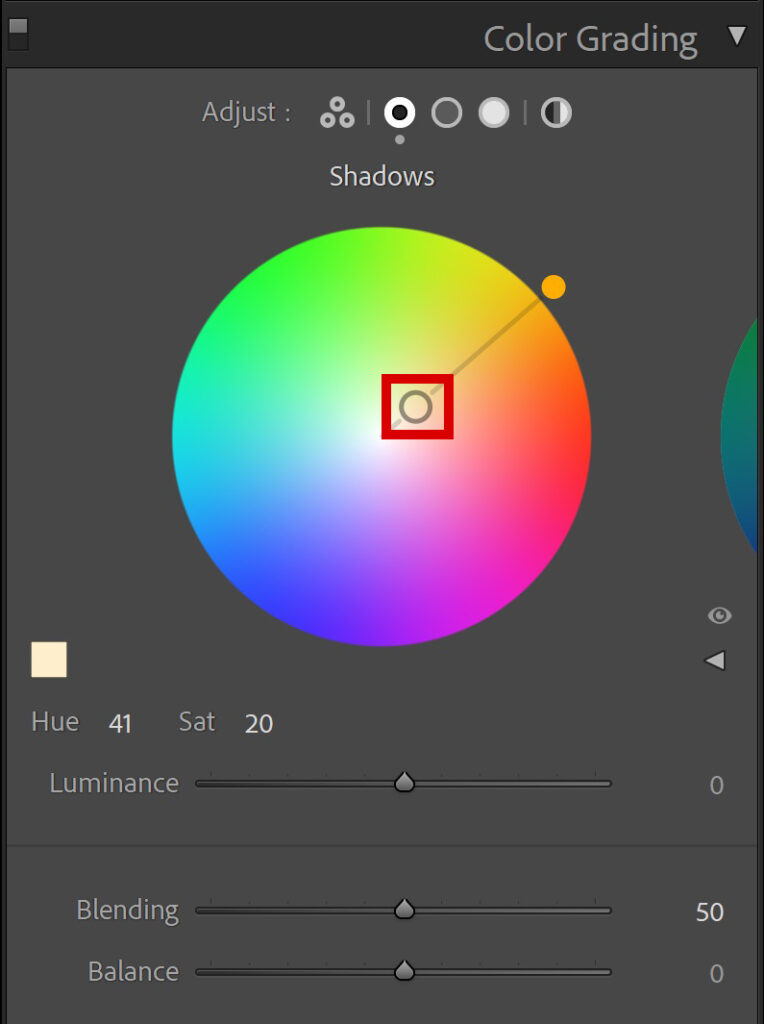
And that’s the first method to color grade more precisely. If you want to change the hue, move the dot outside of your color spectrum (the saturation will stay the same). To change the saturation, move the color picker over the line (the hue will stay the same).
I’m now using this method in the desktop version (Lightroom Classic), but you can also use this method in the Lightroom mobile app.
Method 2
To change the hue, click on the number next to ‘Hue’. You can use your arrow up and down keys to adjust the amount. If you press the arrow up key, the amount will increase and the dot outside of your color spectrum will move around (counter clockwise).
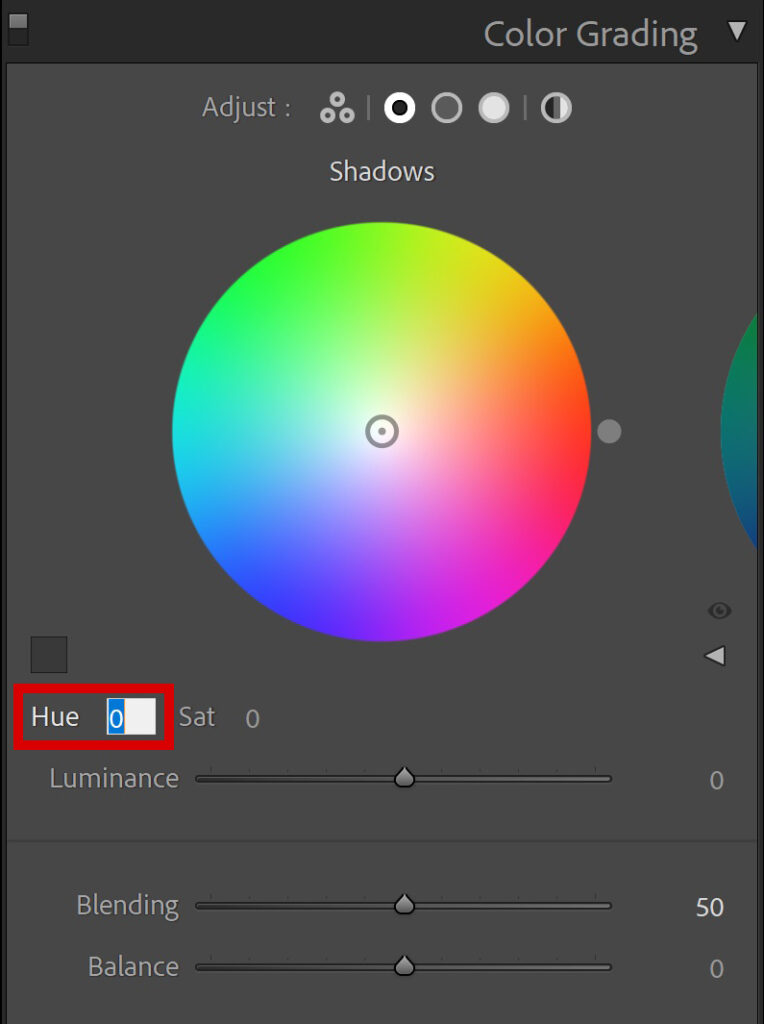
Do the same for the saturation. Use the arrow up key to increase the saturation and the arrow down key to decrease it. The color picker in the middle will now move.
And that’s the second method to color grade more precisely. Changing the hue and saturation separately makes it easier to pick the correct amount, instead of changing them both at once.
Want to learn more about editing in Adobe Lightroom? Check out my other blogs or take a look at my YouTube Channel.
To stay updated, also follow me on Facebook!
Photoshop
Basics
Photo editing
Creative editing
Camera Raw
Neural filters
Text effects