
Published on January 6, 2022
How to create a water reflection in Photoshop?
I’ll show you how to create a water reflection in Adobe Photoshop!
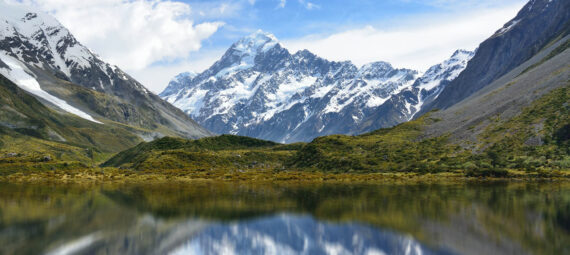
If you’d rather watch the video tutorial of this process, click here or scroll down to the end of this page. Want to download the image I’m using? Click here.
Step 1: Selection
Open the image you want to use. Select the rectangular marquee tool and select the area that you want to use as the reflection.
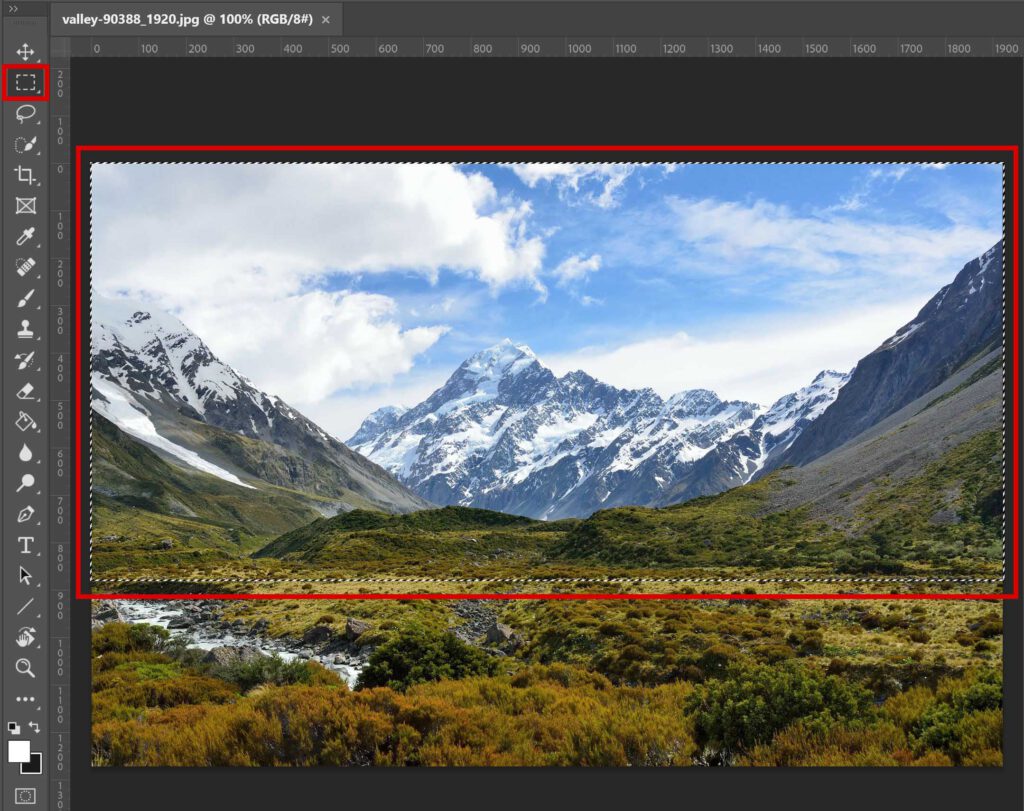
Press CTRL+J. You’ll now have a new layer with only the selected area in it. Select the move tool and press CTRL+T. Right click on the selected part of your image and pick ‘flip vertical‘.
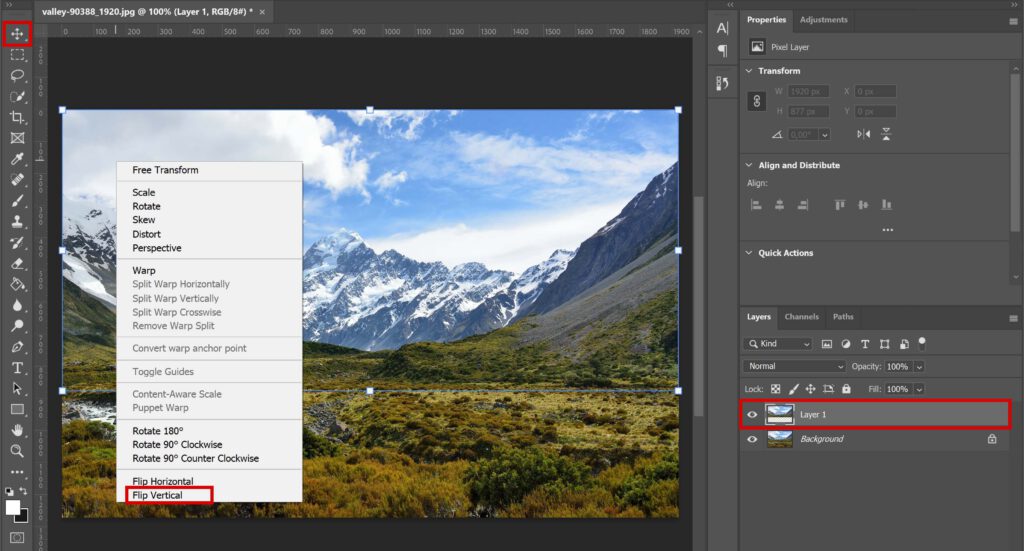
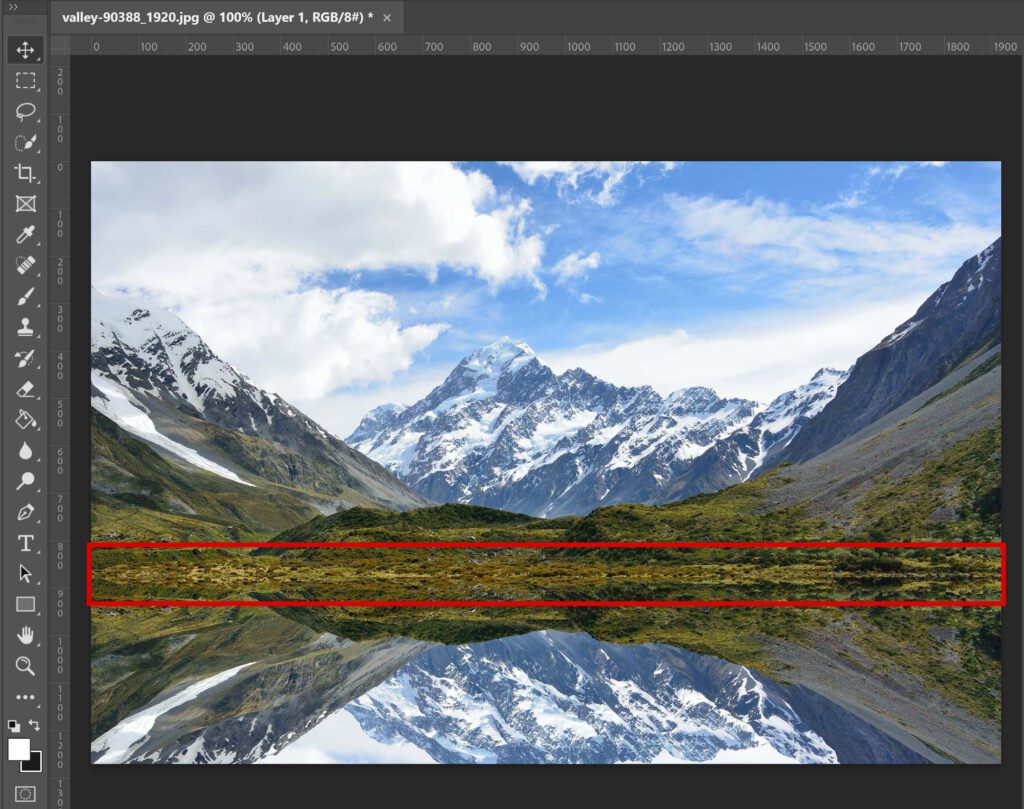
Now drag your layer into place. You can use your arrow keys to pick the exact right position. Make sure they realistically ‘meet’ in the middle.
Step 2: Edit reflection
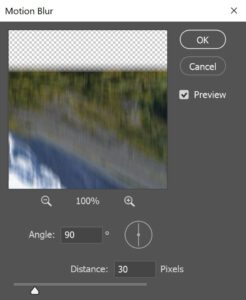
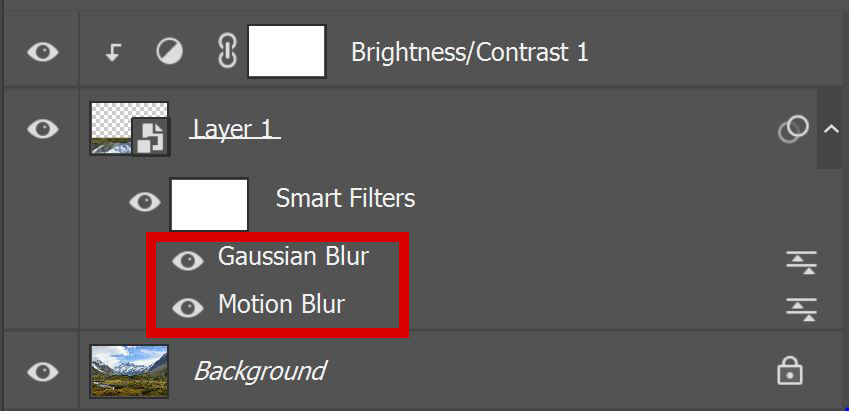
Right click on ‘Layer 1’ (the one with the reflection) and convert to smart object. Then navigate to ‘Filter > Blur > Motion blur‘.
I use an angle of 90 degrees and a distance of 30 pixels. You can also use a different distance. If you check the ‘preview’ box, you can see what it looks like right away and then pick an amount that looks good.
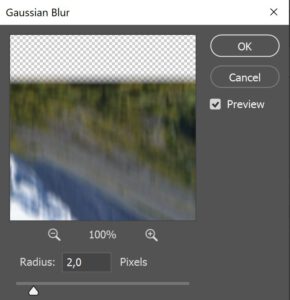
Then navigate to ‘Filter > Blur > Gaussian blur‘. I use a radius of 2,0 pixels. Again you can pick a different amount, if you check the ‘preview’ box you can pick an amount that you think looks good.
Add a ‘Brightness/contrast‘ adjustment layer.
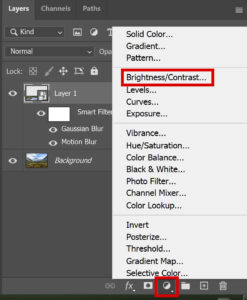
If you adjust the brightness and/or contrast now, it affects the entire image. It should only affect the reflection though. Add a clipping mask. The adjustments will now only apply to the layer that’s directly below your adjustment layer (the reflection, in this case).
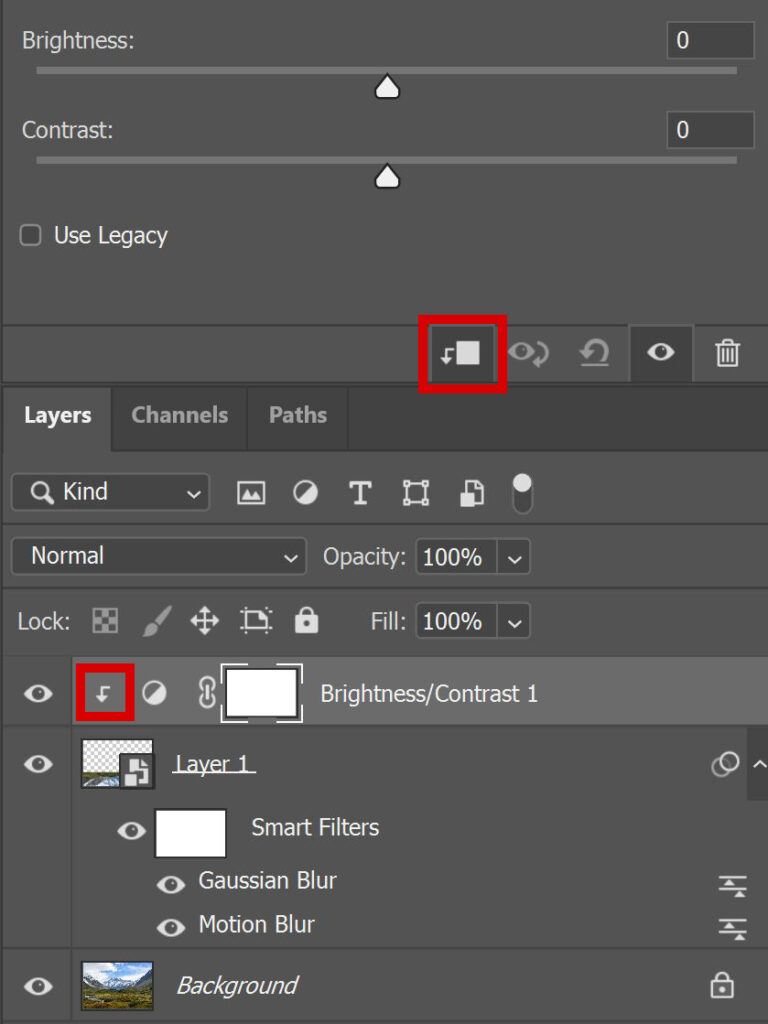
I decrease the brightness to -5 and I increase the contrast to 20. You can use different settings, just see what looks good on your image.
Because you converted the layer into a smart object, you can still adjust the amount of blur in your reflection. Double click on the filter you want to adjust in your layer panel if you want to make changes.
Optional
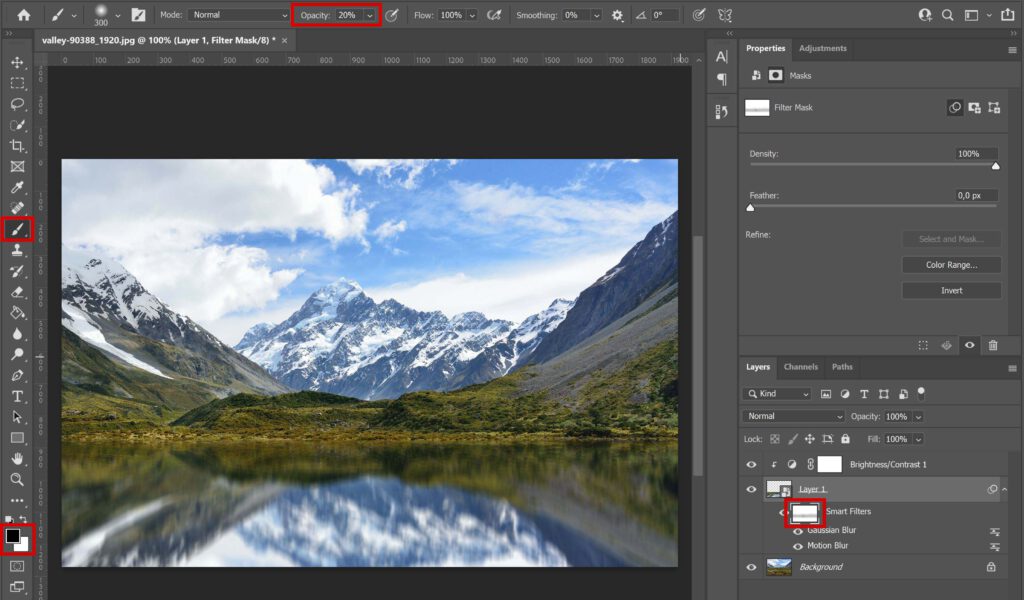
If the transition from land to water is too abrupt, select the smart filter layer mask. Select the brush tool, I used a soft round brush. Lower the opacity to 20% and make the foreground color black.
Now brush over the edge of the water (where it meets the land). By doing this, you make the edge of the water a little less blurry. This will make the transition more realistic.
If you want to undo the changes, press CTRL+Z to undo your last action or brush over it again with white as the foreground color (this will bring the blur back).
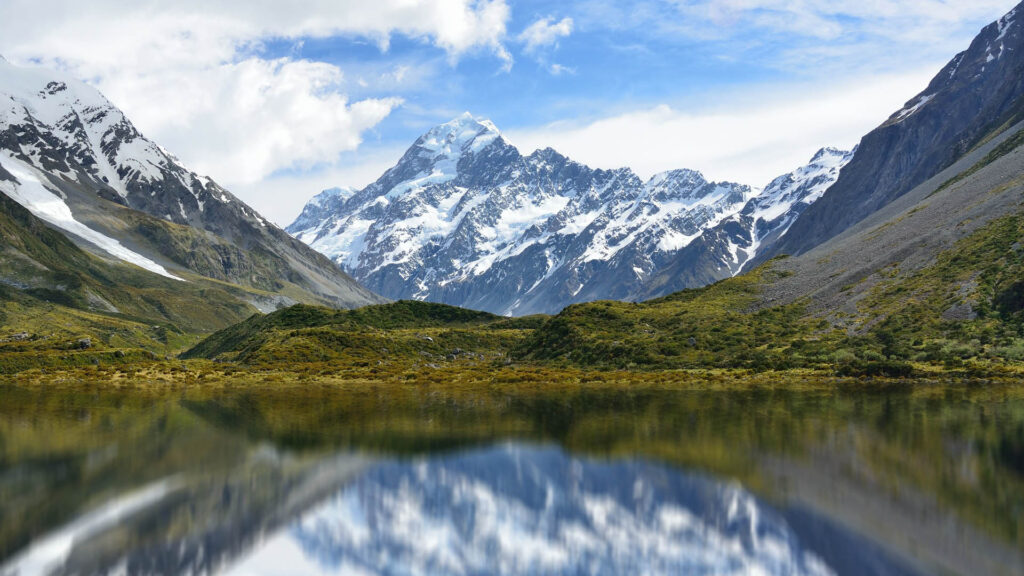
And that’s how you create a water reflection in Adobe Photoshop. You can see the result below!
Want to learn more about Adobe Photoshop? Check out my other blogs or take a look at my YouTube channel.
Follow me on Facebook to stay updated! You can find the YouTube video with instructions below.
Photoshop
Basics
Photo editing
Creative editing
Camera Raw
Neural filters
Text effects