
Published on January 4, 2022
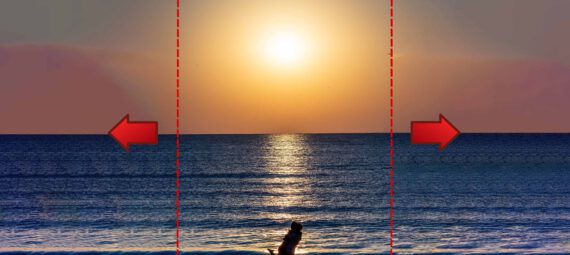
I’ll show you how to stretch an image in Adobe Photoshop. You can use this if you want to turn a vertical image into a horizontal image, for example.
This method works best if your image doesn’t contain too much details (like people, detailed buildings, etc.). If you want to download the image I’m using, click here.
Step 1: Stretch image
Open the image you want to stretch and select the crop tool. Uncheck ‘delete cropped pixels‘ and check ‘content-aware‘.
If you want to determine the ratio of your new image yourself, pick ‘W x H x Resolution‘.
Tip: Hold ALT while adjusting the ratio to add an equal amount to both sides.
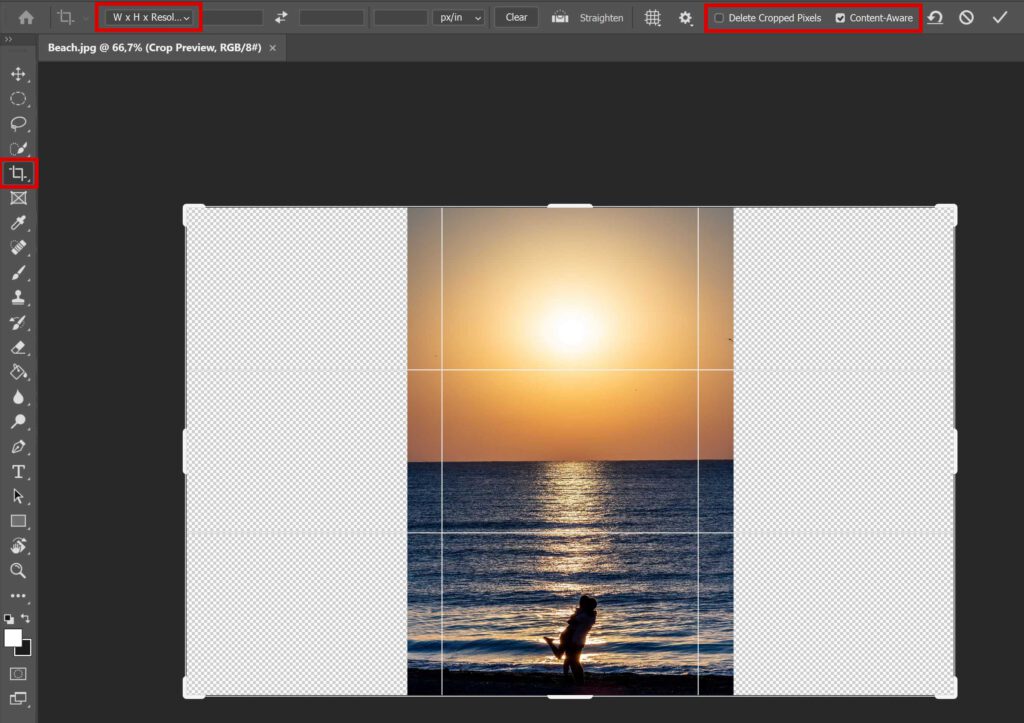
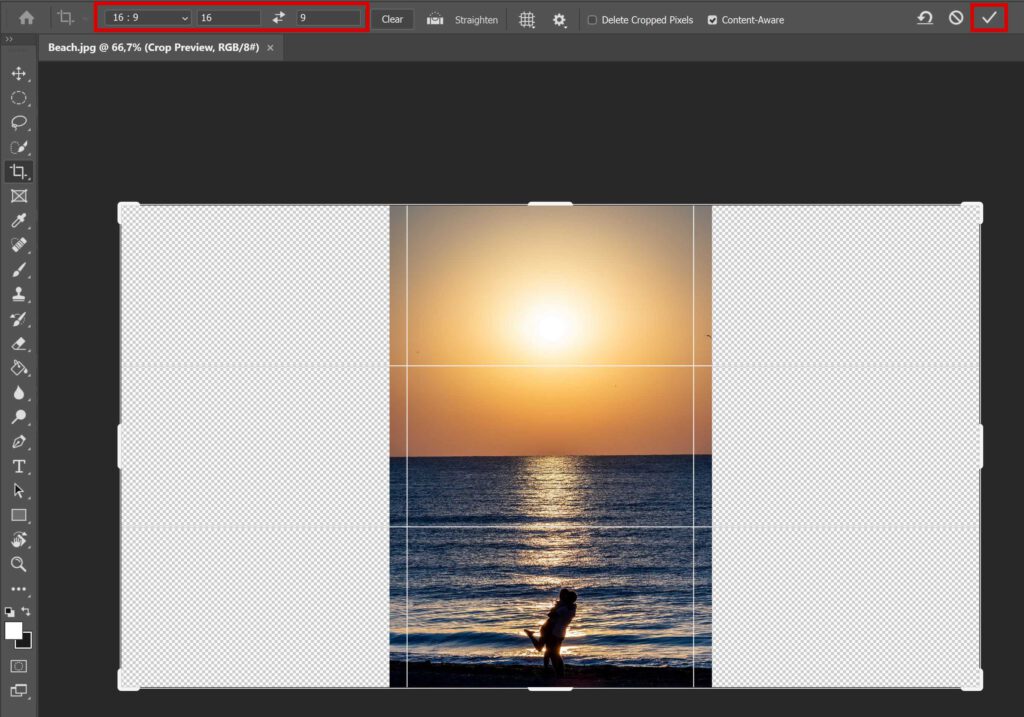
If you want another ratio, select that. You can try to go from your original image to the new ratio in one go, but this might not work out well. If you want to add too much at once, content-aware might not be able to fill the empty areas correctly.
Click on the ✓ icon to apply the adjustments. Photoshop will now fill the empty areas.
If Photoshop doesn’t fil the areas correctly, press CTRL+Z to undo or go a step back in your history panel. Try it again with a different ratio. If you need a certain ratio, you can also do this in 2 steps. First add a little bit with the ‘W x H x Resolution’ option and click the ✓ icon. Then select the ratio you need and add a little bit more. This might work better than adding a large area in one go.
Step 2: Fix imperfections
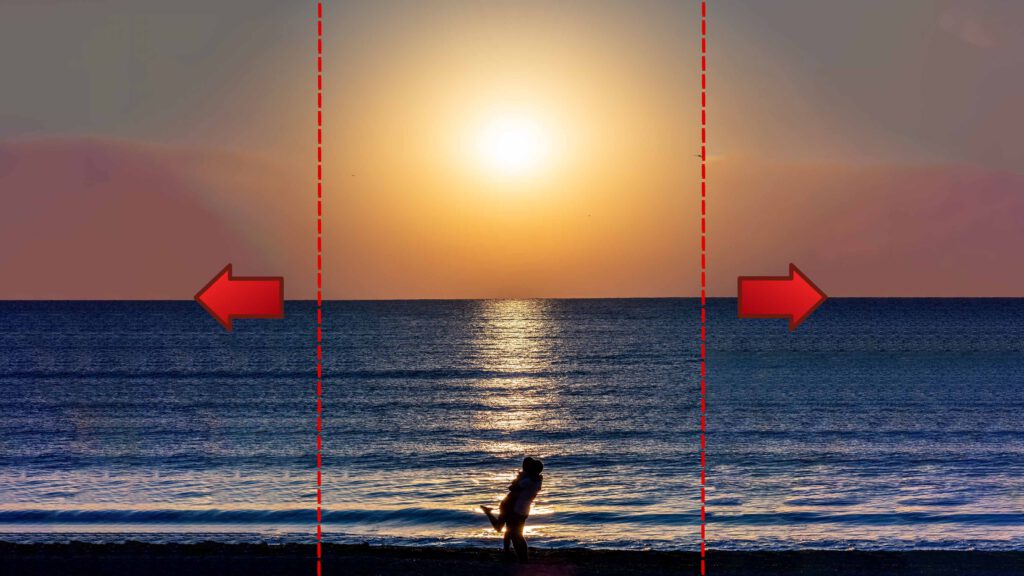
I made the image below in 2 steps to get to the 16×9 ratio. As you can see, there are still some imperfections.
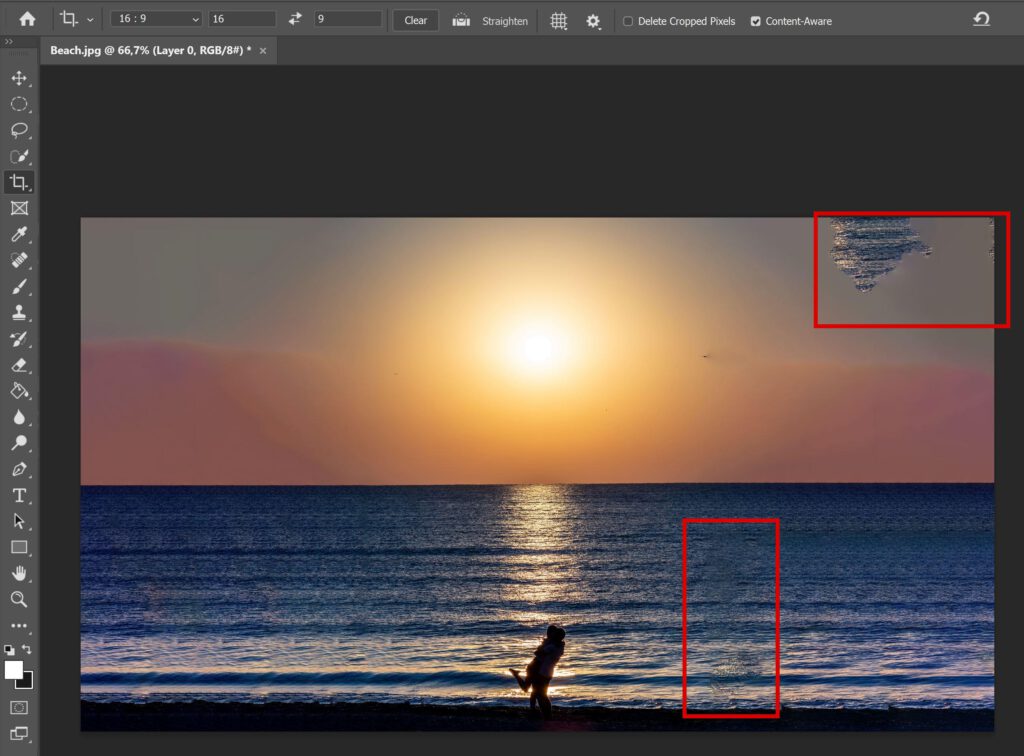
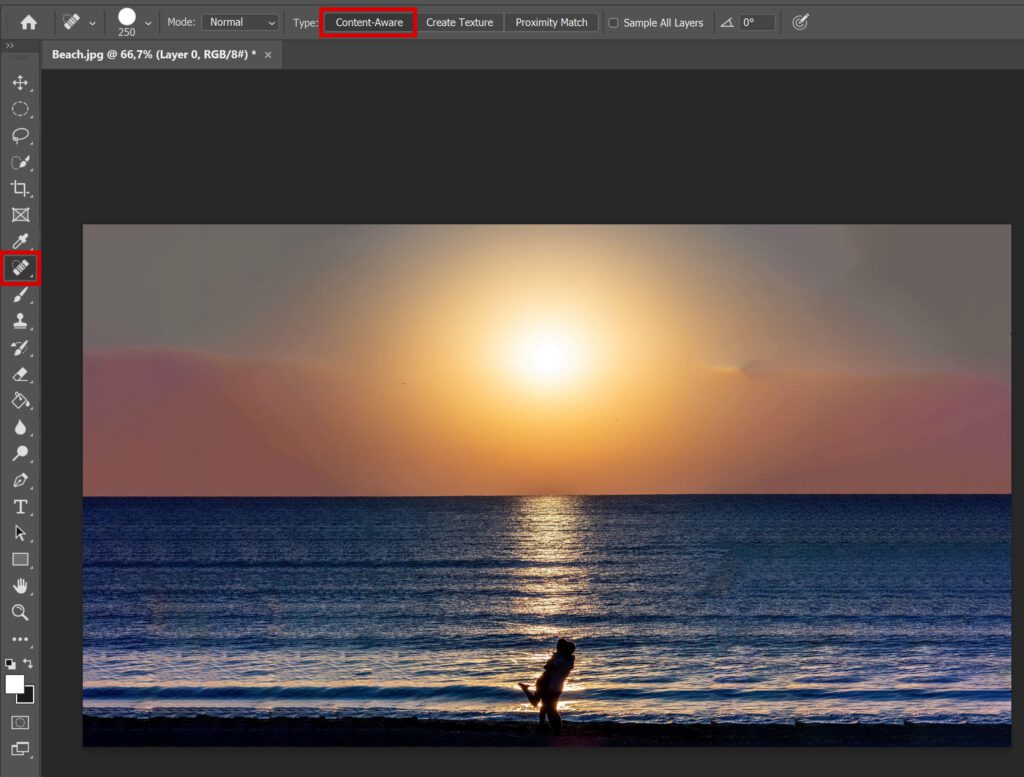
There are a couple ways to fix this. You can use the spot healing brush tool. Select content-aware and brush over the areas that you want to fix. If you don’t like the way Photoshop changes the selected areas, just press CTRL+Z to undo the last action.
Tip: Use the [ and ] keys to adjust the brush size.
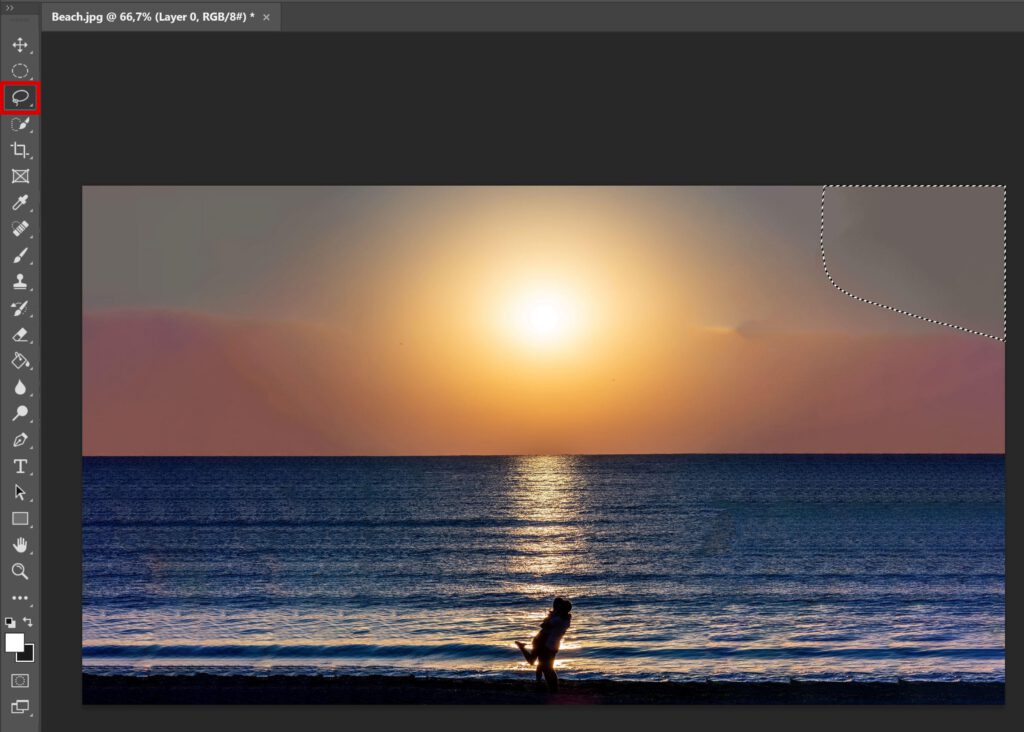
You can also use the lasso tool to select the area that you want to change. I don’t like how some areas of the sky look, so I select that. Navigate to ‘Edit > Content-Aware Fill‘. Check the preview to see if you like the changes Photoshop wants to make. If you do, press OK to apply the adjustments.
As you can see in the images above, it’s pretty difficult to make your photo look good if you stretch it too much. In this case, going from a vertical image to a 16:9 ratio was a bit too much. I would suggest not stretching your image too much to get the best result. You can see my result in the image below.
And that’s how you stretch an image in Adobe Photoshop!
Instead of using this method, you can also use content-aware scale to stretch a photo. If you want to know more about that, check out this blog.
Want to learn more about Photoshop? Check out my other blogs or take a look at my YouTube channel.
To stay updated, also follow me on Facebook!
Photoshop
Basics
Photo editing
Creative editing
Camera Raw
Neural filters
Text effects