
Published on January 2, 2022
Fisheye lens effect in Photoshop
In this blog I’ll show you how to create a fisheye lens effect in Adobe Photoshop.
If you’d rather watch the video tutorial of this process, click here or scroll down to the end of this page. Click here if you want to download the image I’m using.
Step 1: Selection
Select the elliptical marquee tool and make a round selection. To make a perfectly round selection, hold SHIFT while making the selection. Then use the arrow keys to move this selection, place it over the area that you want to use.
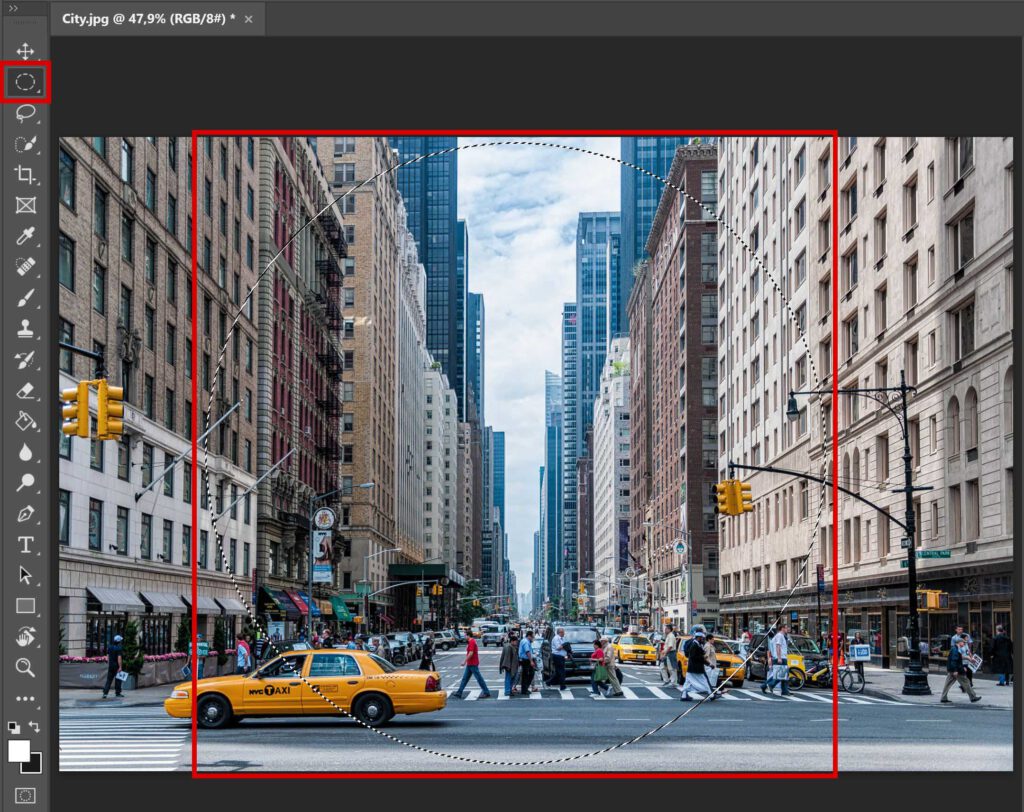
Press CTRL+J to create a new layer. Only the area inside of your selection will be used for this new layer.

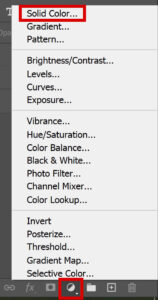
Step 2: Background
We’ll now pick a background color. Add a new ‘solid color‘ fill/adjustment layer. I want the background to be black, but you can also use a different color if you want.
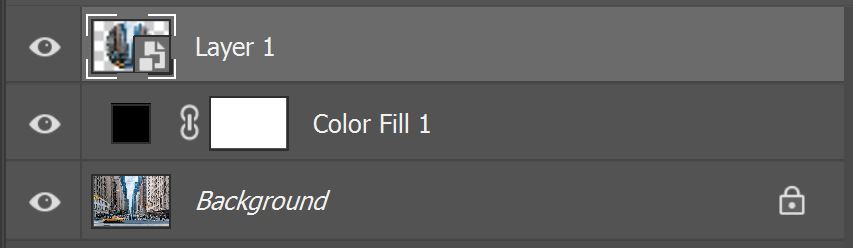
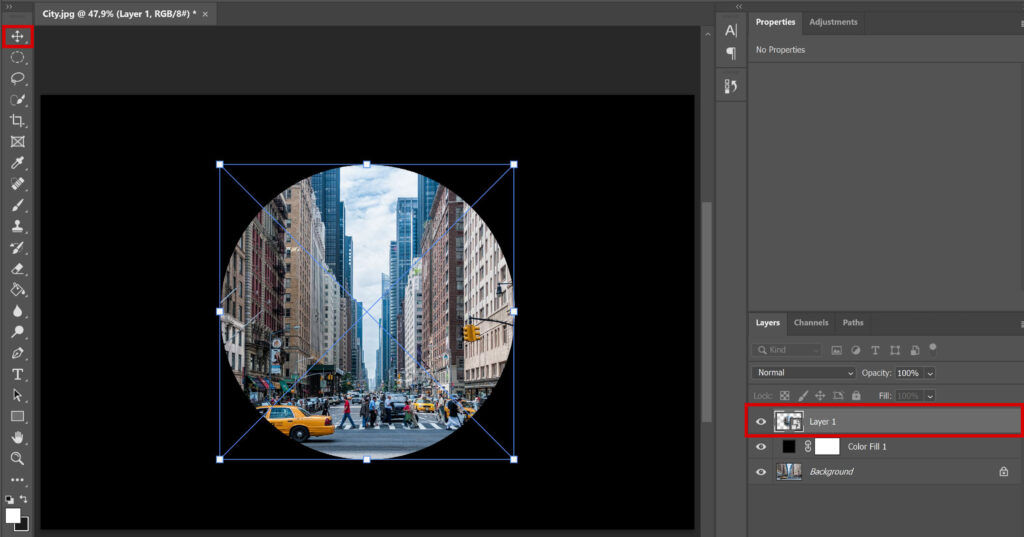
Drag your Color Fill layer below Layer 1. Right click on Layer 1 (the layer with the round selection you created) and convert to smart object. Your layer panel should now look similar to the one below.
Step 3: Fisheye lens effect
Select Layer 1 and select the move tool. Press CTRL+T. Make your circle smaller and place it in the middle. Photoshop will stretch the circle while creating the fisheye effect, so you need enough space around your circle.
Navigate to ‘Filter > Distort > Spherize‘. Amount 100%, mode: normal.

If you want to make the fisheye effect more extreme, repeat this step (Filter > Distort > Spherize).
Because you converted this layer to a smart object, you can adjust the amount by double clicking ‘spherize’ in your layer panel.
Your circle is no longer round after these adjustments, it’s oval. To make it round again, you need to rasterize your layer. If you do this, you can no longer adjust the spherize effect. So make sure it’s good before you do this.
Right click on Layer 1 (the one with the circle) and select ‘rasterize layer‘. Then select this layer.
Open the properties panel. If you can’t find it, click ‘window’ in the top menu bar and make sure ‘properties’ is selected. Open the transform tab. Make sure the width and height are not connected, you only want to change the width. Decrease the amount of pixels for the width. I’m not picking the exact same amount as the height, I’ll just see what looks good instead of making it perfectly round.
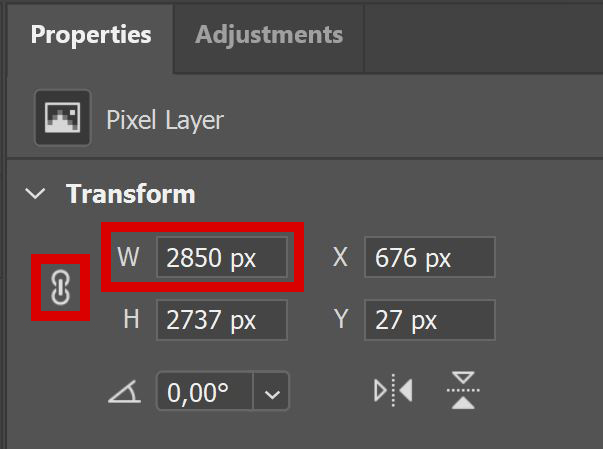
Now select the move tool to place your circle back in the middle. If you want to change the size, connect the width and height first (click the chain icon shown in the image above). Then press CTRL+T and adjust the size.
Step 4: Add shadow
Select Layer 1. Click on the ‘fx‘ icon and select ‘blending options‘.
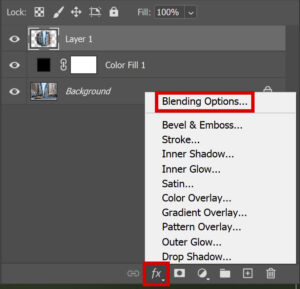
Select ‘inner glow‘. You can find the settings I used in the image below. If your background color isn’t black, click on the color box and pick that color instead of black.

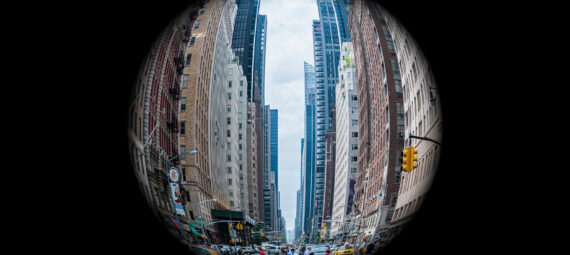
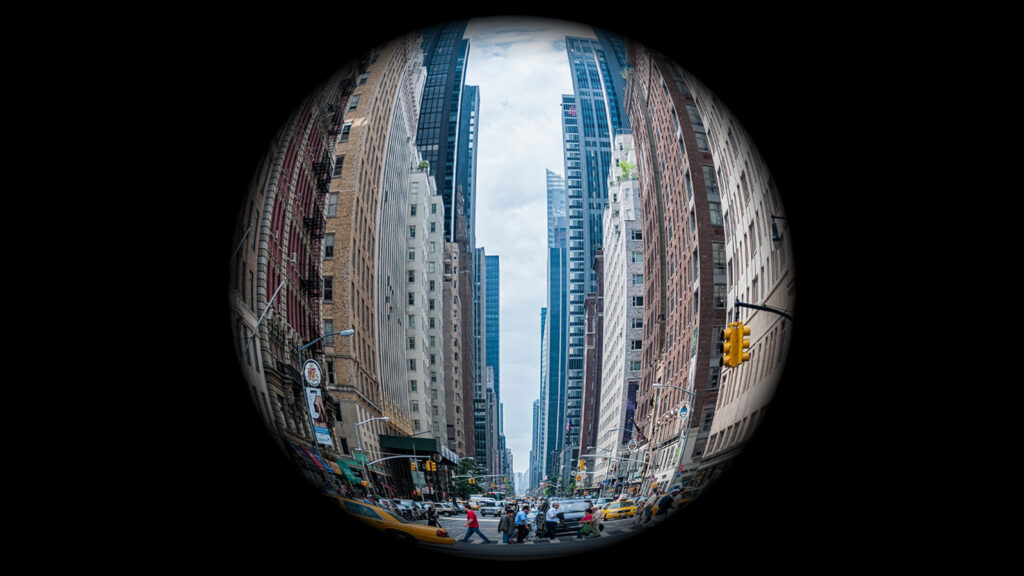
And that’s how you create a fisheye lens effect in Adobe Photoshop! You can see the result below.
There’s also a quicker method to create a fisheye lens effect. Read this blog I wrote about that for more information!
Want to learn more about Adobe Photoshop? Check out my other blogs or take a look at my YouTube channel. You can find the tutorial below!
Photoshop
Basics
Photo editing
Creative editing
Camera Raw
Neural filters
Text effects