

Published on January 10, 2022
Watercolor portrait in Photoshop
In this blog I’ll explain how you can create a watercolor portrait effect in Adobe Photoshop.
If you’d rather watch the video tutorial of this process, click here or scroll down to the end of this page.
Download the images I used:
Portrait
Watercolor
Step 1: Threshold
Open the image you want to edit, then press CTRL+J to duplicate the background layer.
After you did that, add a Threshold adjustment layer.
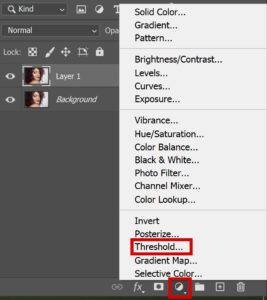
Adjust it to a point where all facial features are clearly visible and recognizable, but don’t make it too dark.
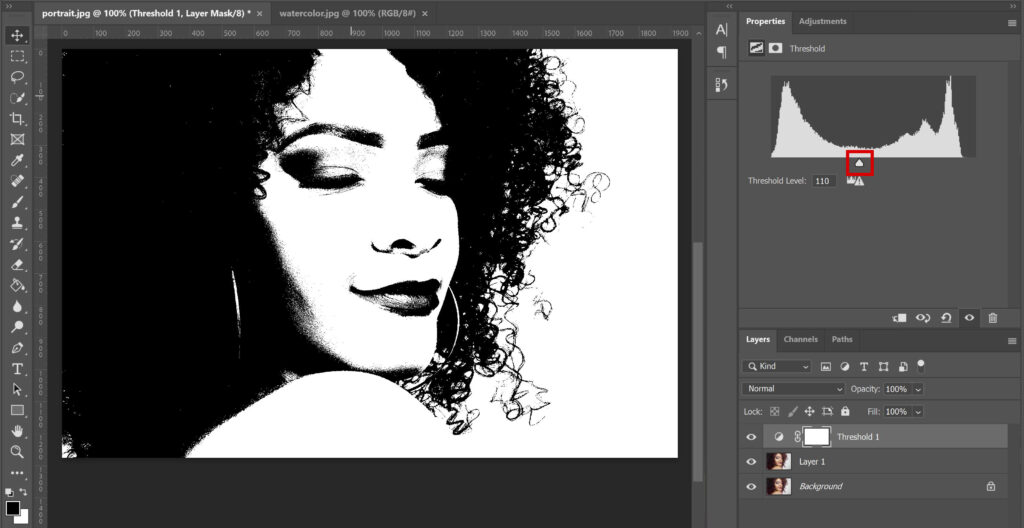
When you’re done adjusting the threshold level, select both the threshold layer and layer 1. Right click on it and ‘merge layers‘.
You now have your background layer and the threshold layer. If there are some black spots around your subject, select the threshold layer and pick the brush tool. Brush over it with white to remove the black spots. My image doesn’t have these spots, so I can skip that step.
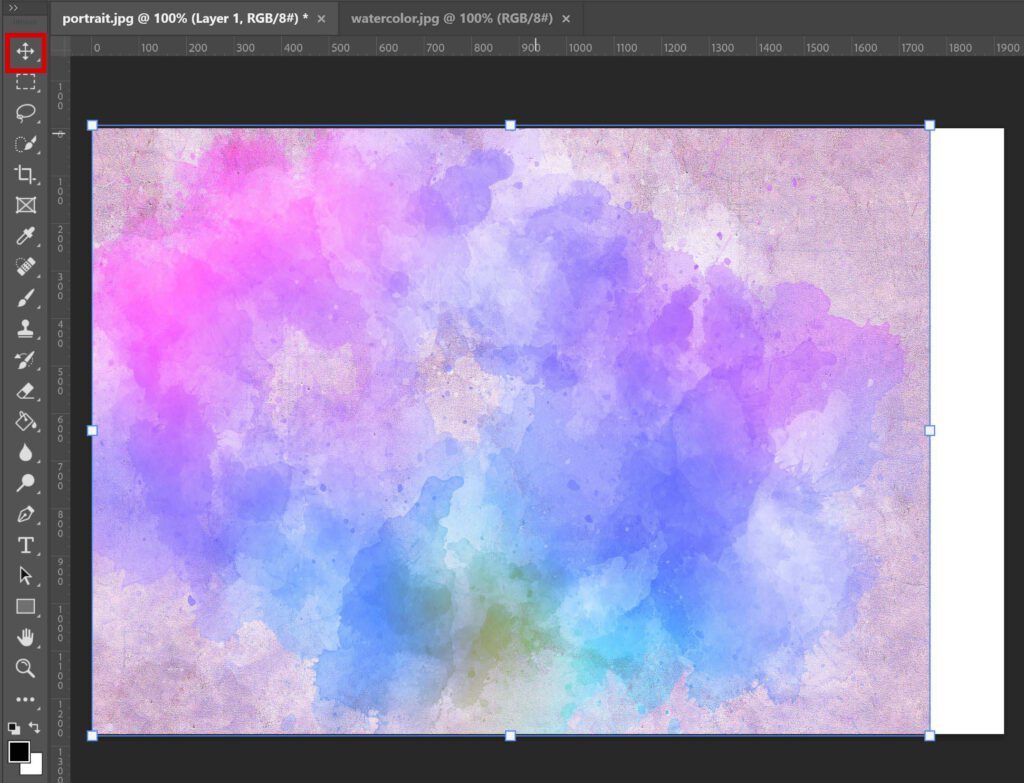
Step 2: Watercolor portrait
Select the move tool and open your watercolor image. Drag the image to your portrait file and place it over your image.
Press CTRL+T to resize and move your watercolor layer. Make sure it completely covers the portrait behind it.
If you hold the CTRL key, you can move the corners and edges of the watercolor layer individually. This way you can make it fit your portrait perfectly.
Then change the blend mode of the watercolor layer to lighten or screen (whatever you like best). Now add a layer mask to the watercolor layer.
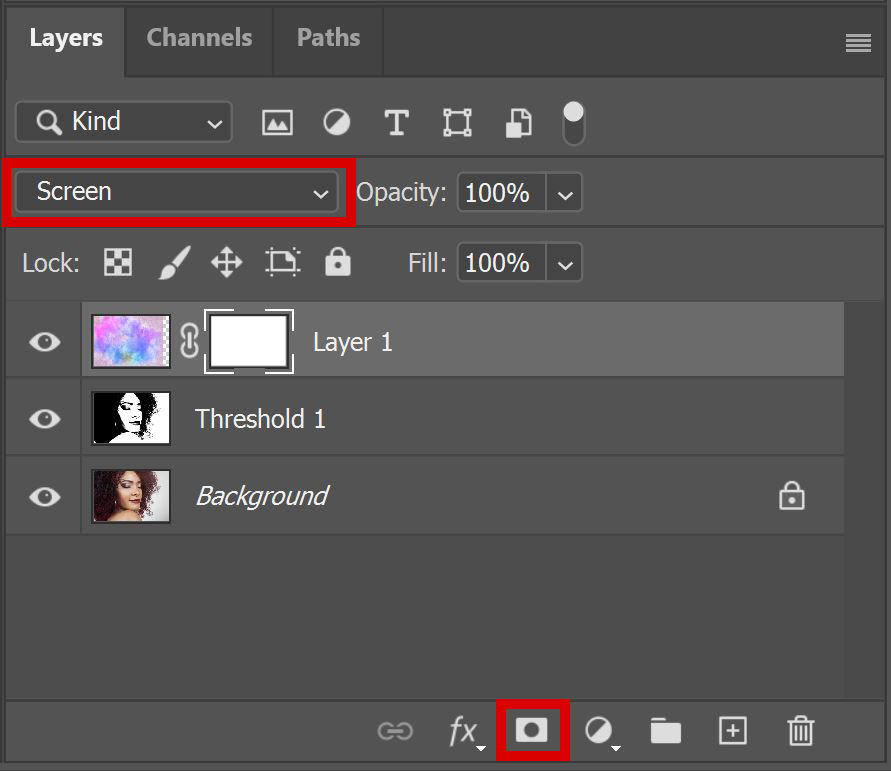
Select your layer mask and then select the brush tool. I use a soft round brush. Lower the opacity to 20% and change the foreground color to black.
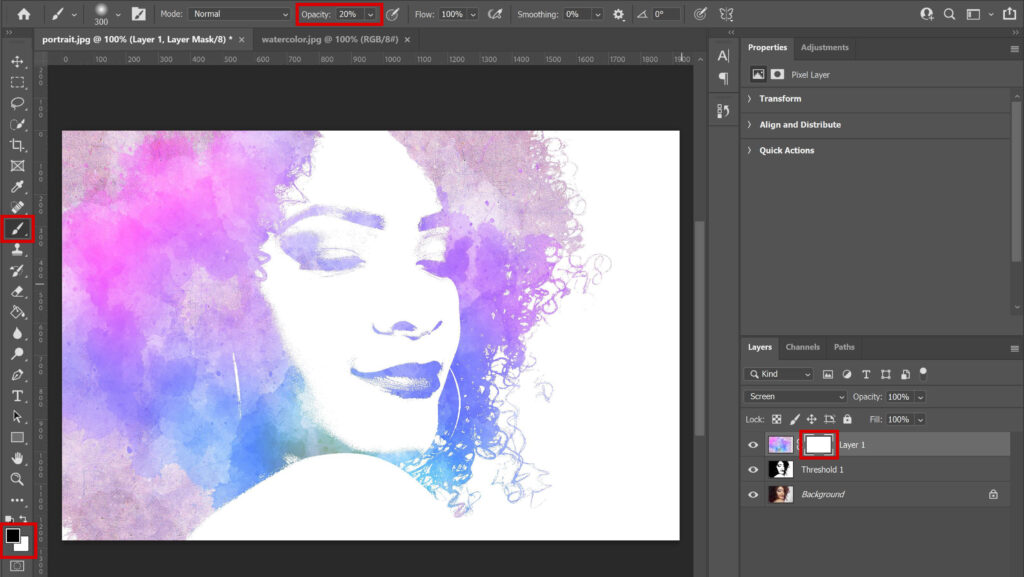
Brush over the face. The areas you brush over will get darker, this gives the face more definition (especially when your watercolor image contains light colors).
You can brush over the same area multiple times to make it even darker. When you want to make it lighter again (or if you brushed over the wrong area), brush over it with white as the foreground color.
And that’s how you create a watercolor portrait in Adobe Photoshop. You can see the result below!

Want to learn more about Adobe Photoshop? Check out my other blogs or take a look at my YouTube channel.
To stay updated about new blogs and tutorials, follow me on Facebook! You can find the video tutorial below!
Photoshop
Basics
Photo editing
Creative editing
Camera Raw
Neural filters
Text effects