
Published on December 9, 2021
How to create a custom vignette in Lightroom?
In this blog I’ll show you how to create a custom vignette in Adobe Lightroom.
I’m using some features that were added in the latest big Lightroom update. I also have a video tutorial showing how to create a custom vignette in older versions of Lightroom. To watch it, click here or scroll down to the end of this page.
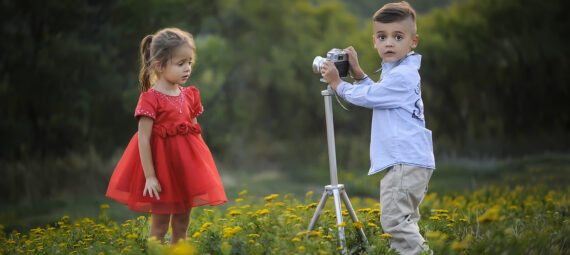
If you want to download the photo I’m using, click here. Now, let’s start!
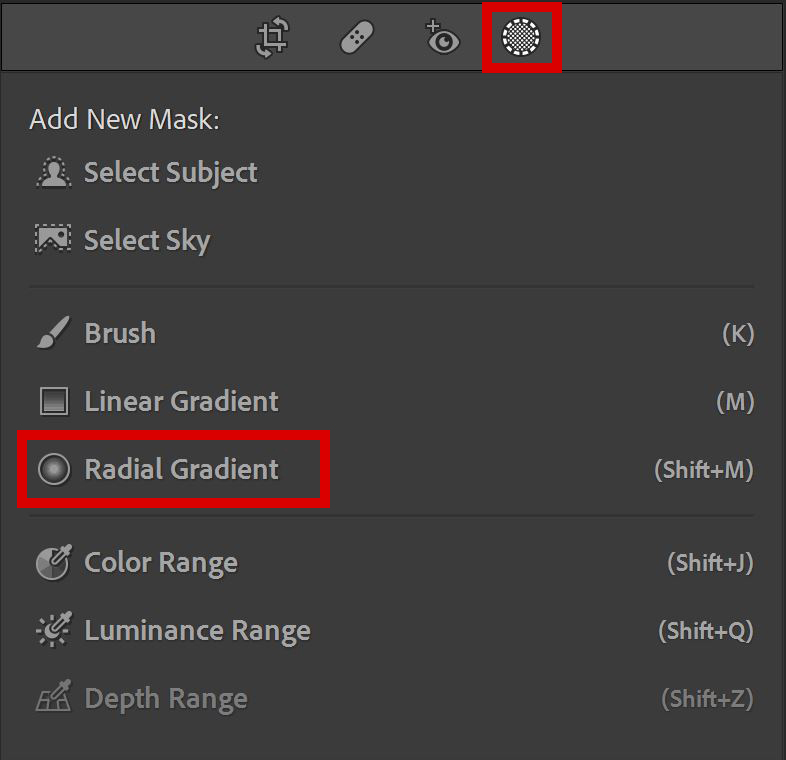
Step 1: Masking
First select ‘masking‘ and then select ‘radial gradient‘.
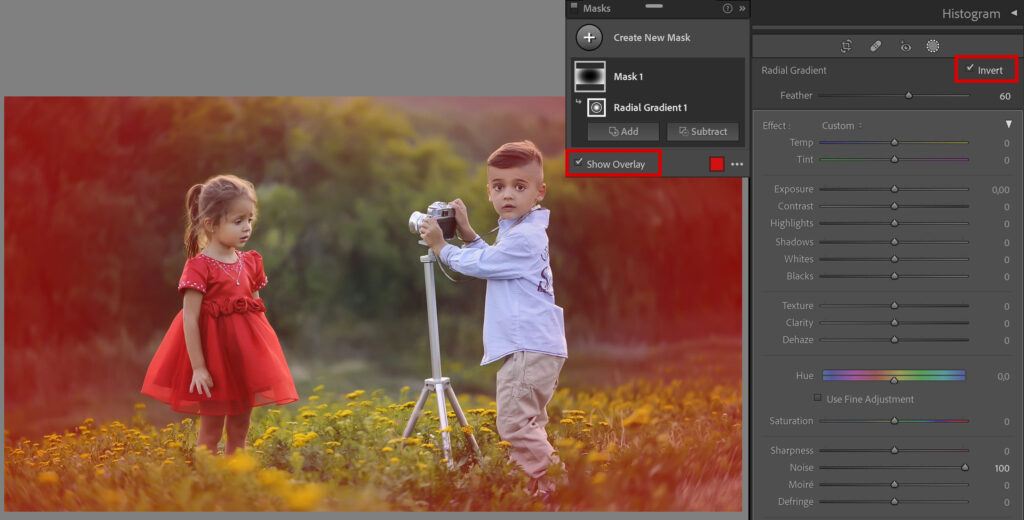
Make the radial gradient. Check ‘show overlay‘ to see which areas are masked (selected). Select ‘invert‘, now the outside of the circle is masked. If you make any adjustments now, they will only apply to the masked areas.
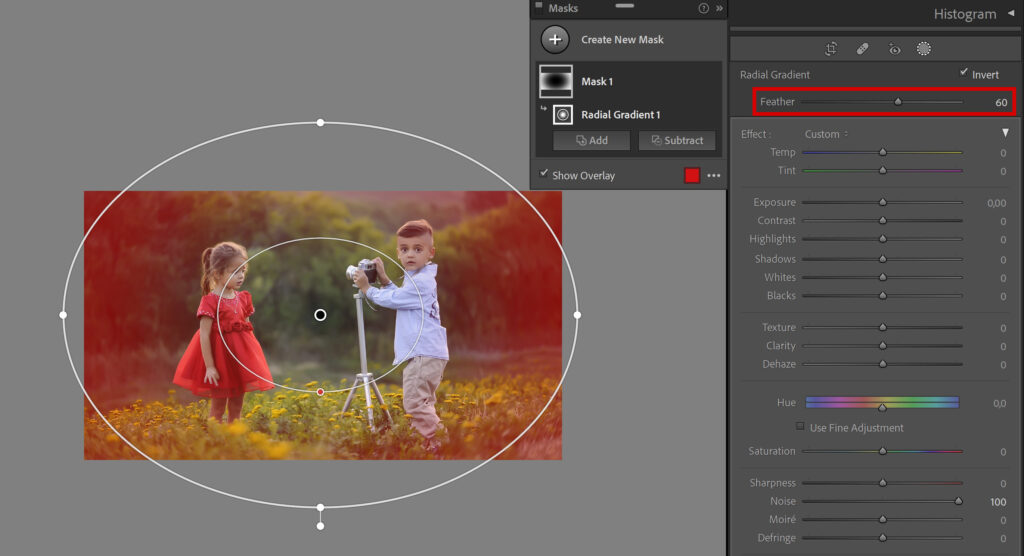
If you want to zoom out, press the CTRL and – key. This way you can make the circles larger, so only the edges of the photo are masked.
To make the edges of the masked area smoother or sharper, adjust the feather. Lowering the feather makes the edges hard and sharp, increasing it makes them smoother. I personally wouldn’t lower the feather, because hard edges or transitions might look unrealistic.
As you can see in the image above, parts of the children are masked too. To create a vignette, we need to darken the masked areas. I don’t want to darken the children though, so I need to unmask them. To do that, select ‘subtract‘ and then select ‘brush‘.
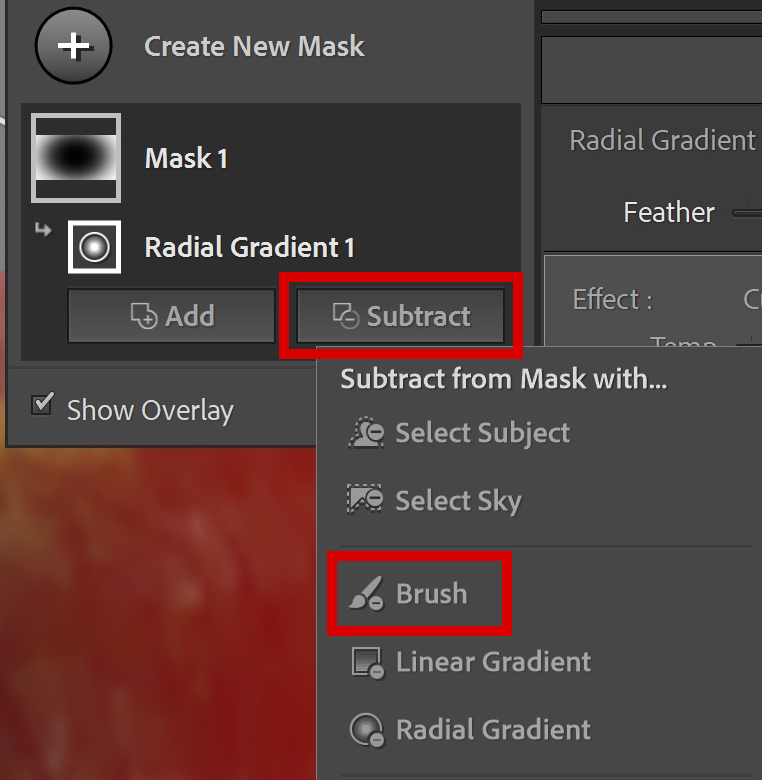
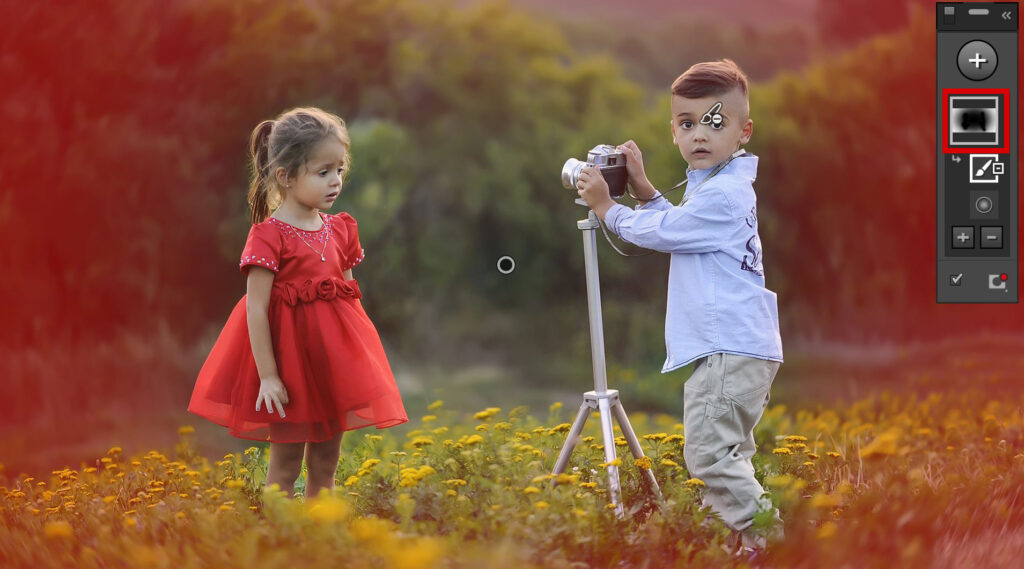
With this subtract feature, you can erase areas from your selection. Since I picked the brush for this, I can now brush over the children to deselect (unmask) them. In the image below you can see that the children are now no longer part of the mask. You can also see this in the mask settings (on the right). The masked areas are white and the unmasked areas are black.
Step 2: The adjustments
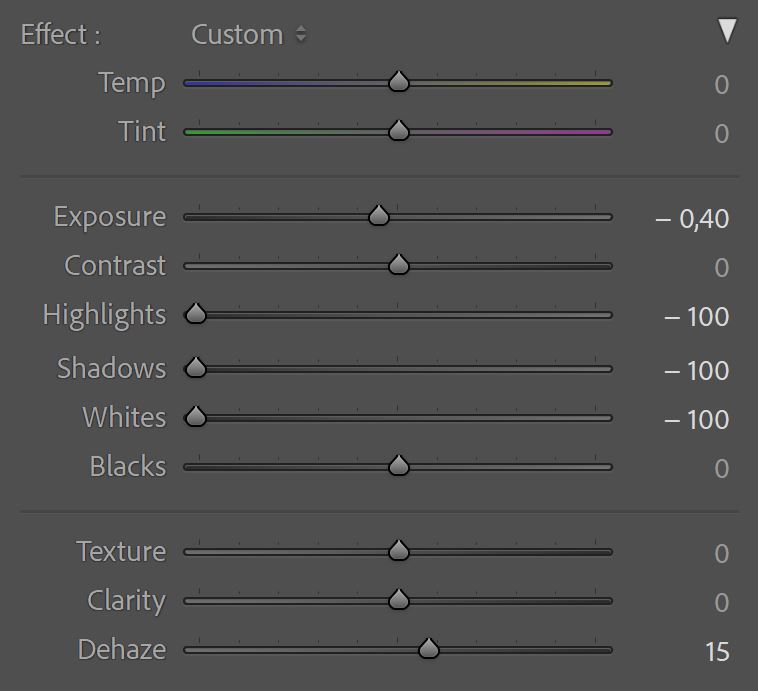
Now we can start adjusting. Again, the adjustments you make now will only apply to the masked areas (in my case the red area).
I’m creating a dark vignette. If you want to create a light vignette, just do the opposite of what I’m doing. The settings you need to use depend on your image and personal preference. You can see the settings I used in the image below.
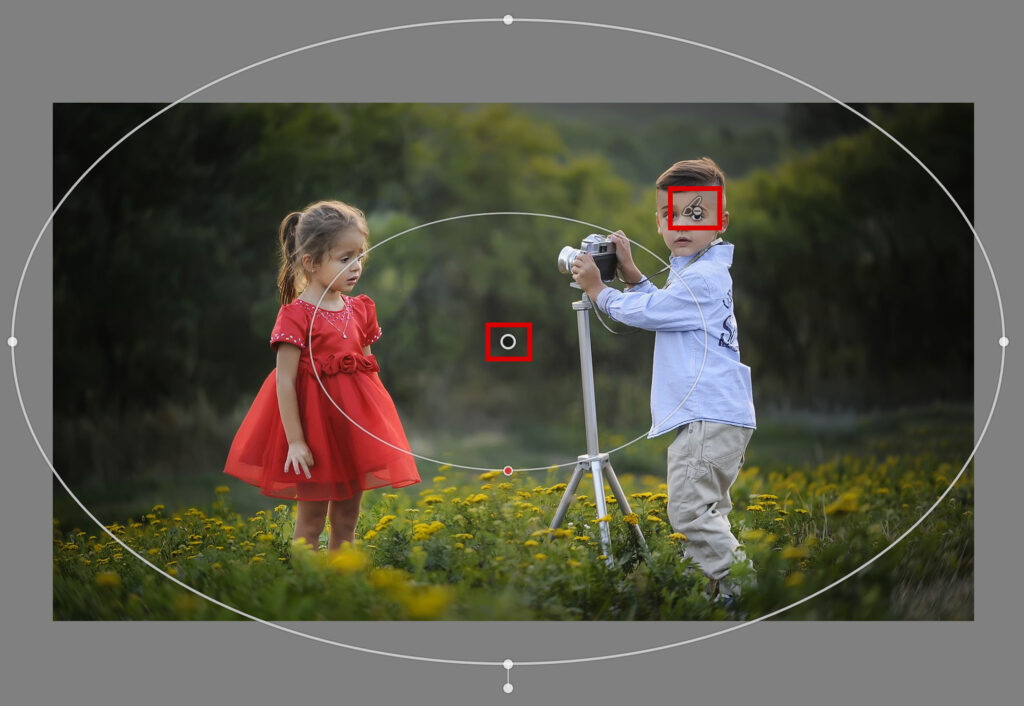
Tip: You can still adjust the size and shape of the radial gradient. Select the radial gradient (the point in the middle) and make the circles larger/smaller or change the shape of them. This won’t effect the areas that you unmasked earlier. The brush icon shows the unmasked areas, these will stay unchanged (so the children still won’t be part of the mask, even if you adjust the radial gradient).
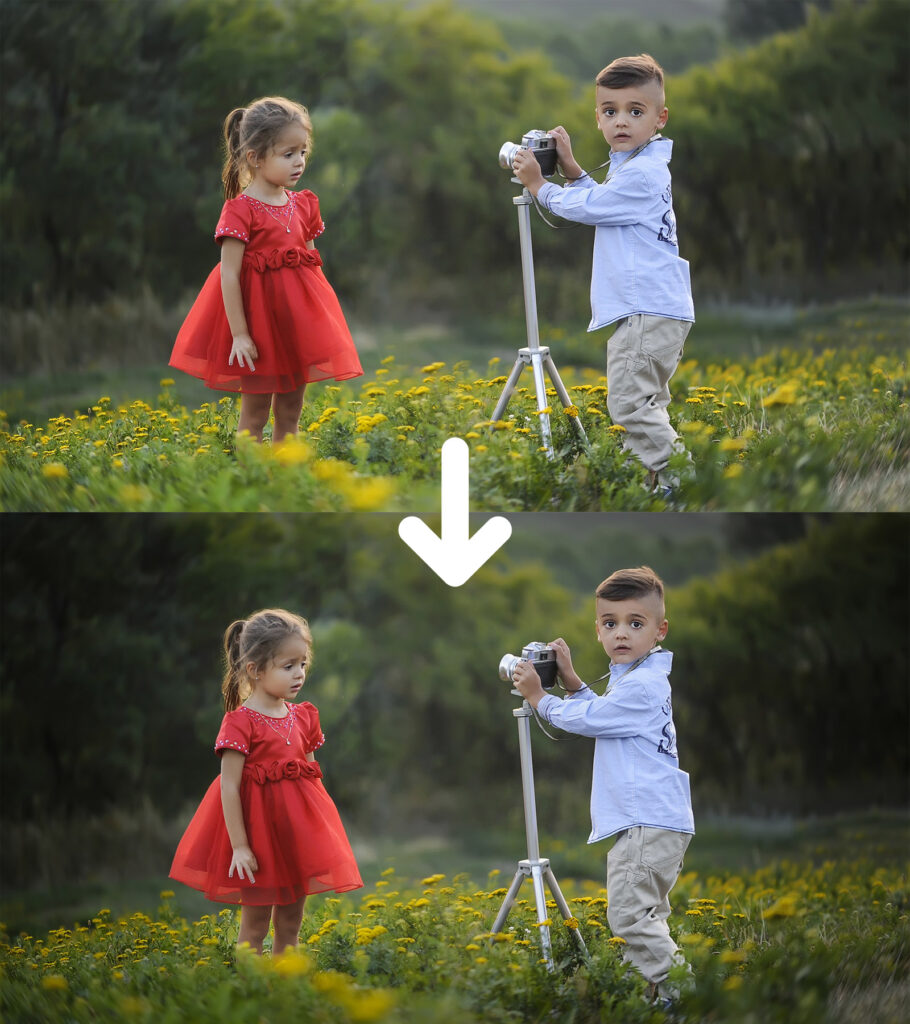
And that’s how you create a custom vignette! If you want to keep it realistic, don’t overdo it. Don’t make the vignette too dark (or light), but keep it subtle. You can see my before and after image below.
I have now showed you how to create a custom vignette in Lightroom, but you can also create a custom vignette in Photoshop. Want to know how? Then read this blog I wrote about that!
Want to learn more about editing in Adobe Lightroom? Check out my other blogs or take a look at my YouTube Channel. The video below shows how to create a custom vignette in older versions of Lightroom.
Photoshop
Basics
Photo editing
Creative editing
Camera Raw
Neural filters
Text effects