
Published on July 10, 2022
Create a custom vignette
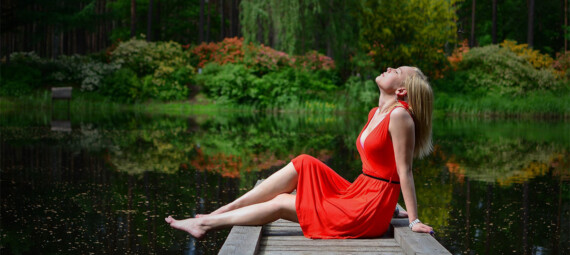
In this blog I’ll show you how to create a custom vignette in Adobe Photoshop. Adding a vignette to a photo is a good way to draw the attention to your subject.
Rather watch the video with instructions? Then click here or scroll down to the end of this page!
Click here if you want to download the photo I used. Now, let’s get started!
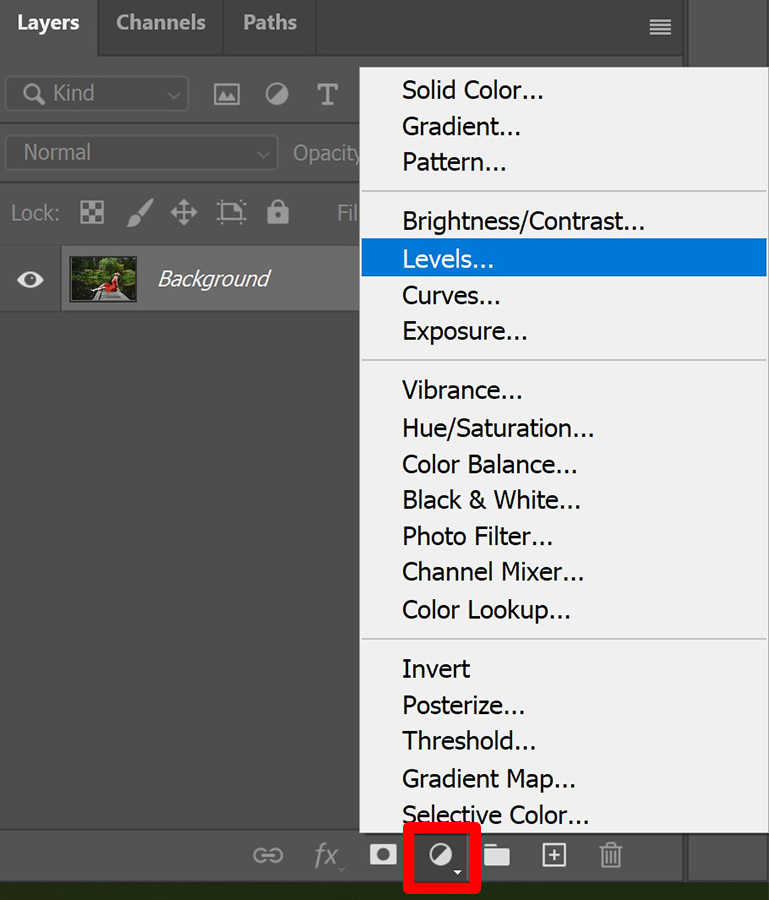
Step 1: Darken photo
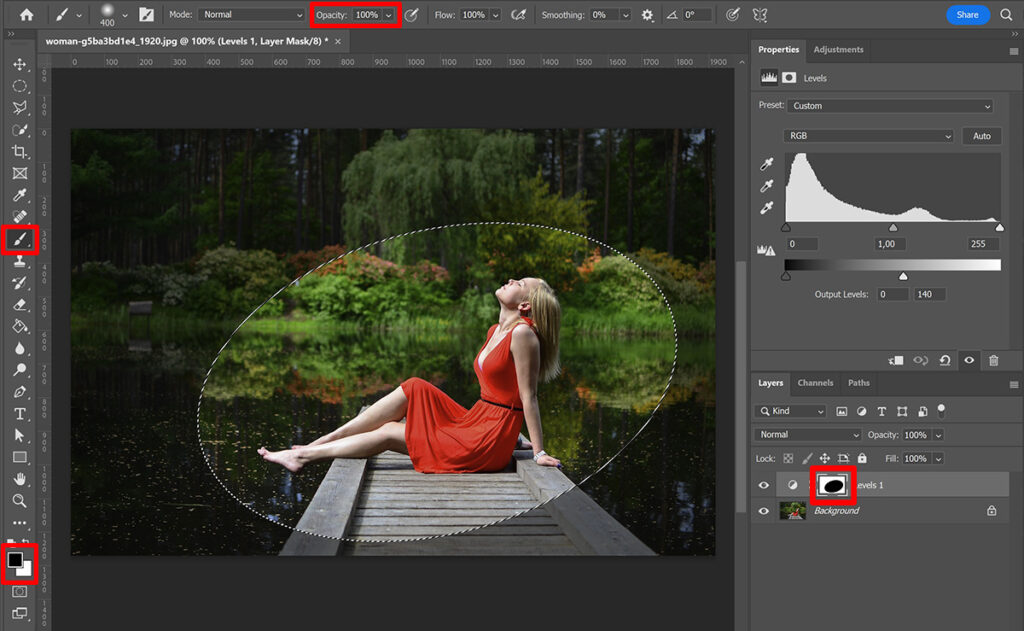
Open the photo you want to add the vignette to. First we’re going to darken the photo. To do that, create a levels adjustment layer.
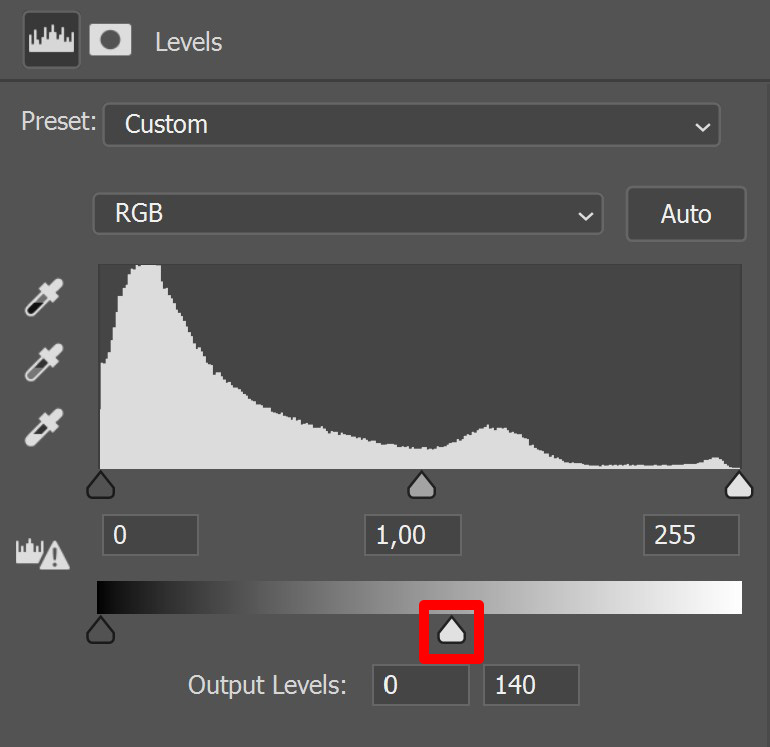
Drag the right point towards the middle to darken the photo. This will now affect the entire photo, but we’ll change that in the next step.
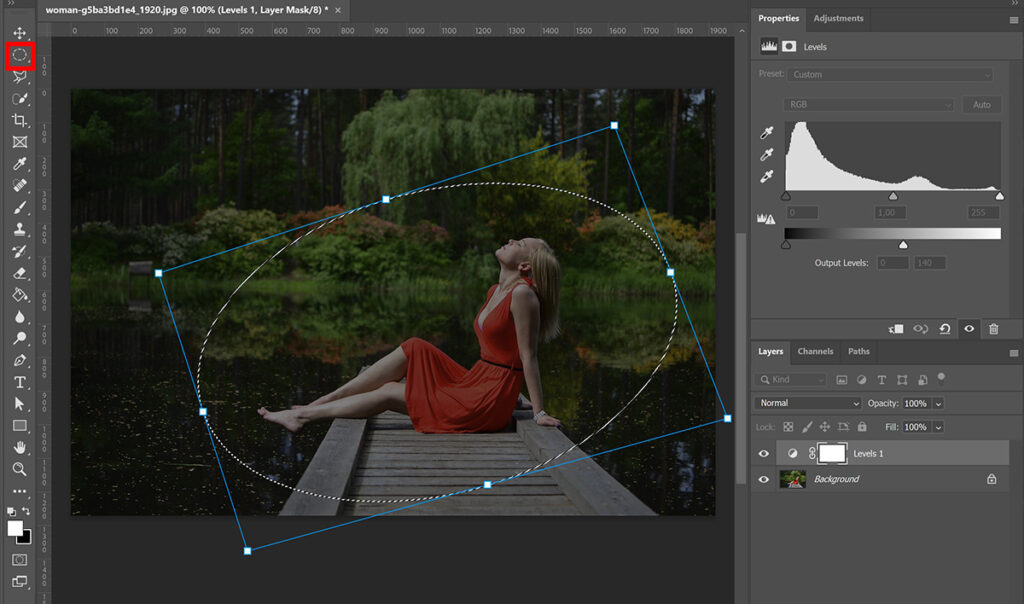
Step 2: Make selection and create vignette
Select the elliptical marquee tool and make a selection around your subject. Then press CTRL+T to activate free transform. You can now adjust the size and shape of the selection. Everything outside of the selection will be dark and the areas inside of the selection will be light, so keep that in mind.
If you hold CTRL, you can move the individual anchor points to change the shape of the selection. Make sure your subject fits inside of the selection. When you’re done, press enter.
Select the layer mask of the levels layer. Then select the brush tool. Make sure the foreground color is black and the brush opacity is at 100%. Brush over the area inside of the selection. This area will now become lighter, because it removes the changes you made with levels.
When you’re done, press CTRL+D to deselect.
Step 3: Smoothen vignette
The transition from dark to light is now very hard. This isn’t looking good, so you need to change that. To do that, select the layer mask and adjust the feather. The higher the amount of pixels you use for the feather, the softer the transition from light to dark.
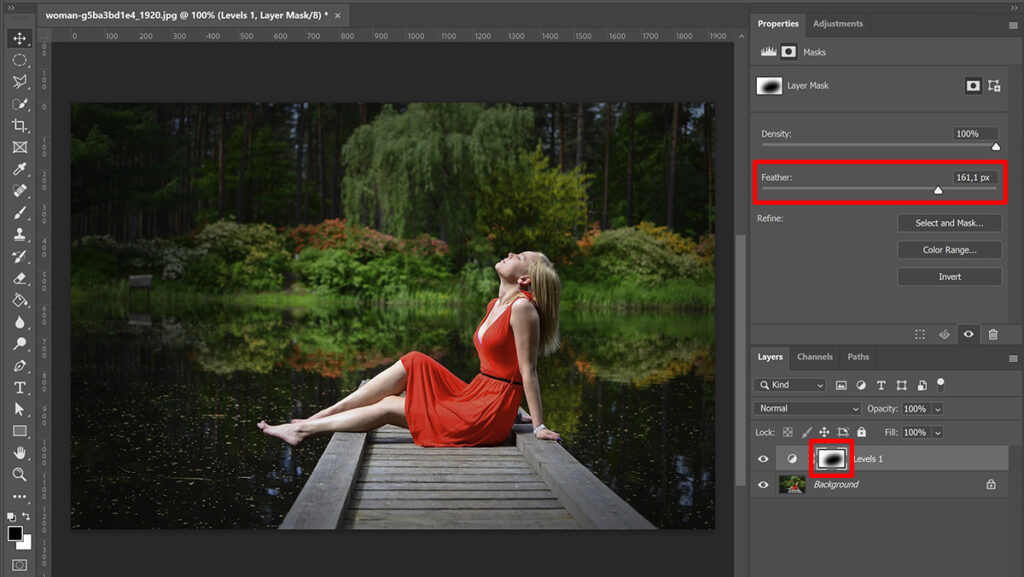
If you select the levels layer, you can adjust how dark the vignette is. To do that, use the same slider you used in step 1. If this gives you the effect you’re looking for, you can stop now. In the next step, I’ll show you how to lighten certain areas.
Step 4: Lighten areas
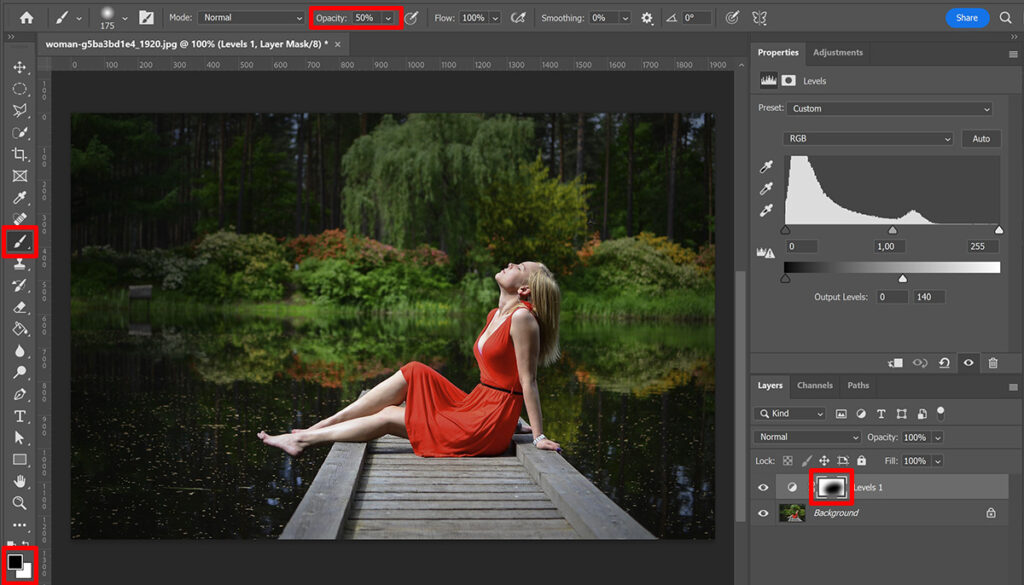
Maybe the vignette covers some areas that you don’t want to darken. To adjust that, select the layer mask. Again select the brush tool and make sure the foreground color is still black. I lower the opacity of the brush to 50%, because I want to lighten these areas more subtly. I use a soft round brush.
Now brush over the areas that you want to lighten. I make the jetty the model is sitting on a bit lighter by brushing over it.
Tip: Use the [ and ] keys to change the brush size.
You can adjust how dark the vignette is at any point. To do that, select the levels layer and adjust the darkness (use the same slider you used to darken the photo in step 1). The same goes for the feather. To adjust that, select the layer mask.
I’d suggest you don’t make the vignette too dark, so it looks realistic. The vignette effect also looks better when there’s a subtle transition from light to dark (which you can achieve by adjusting the feather).
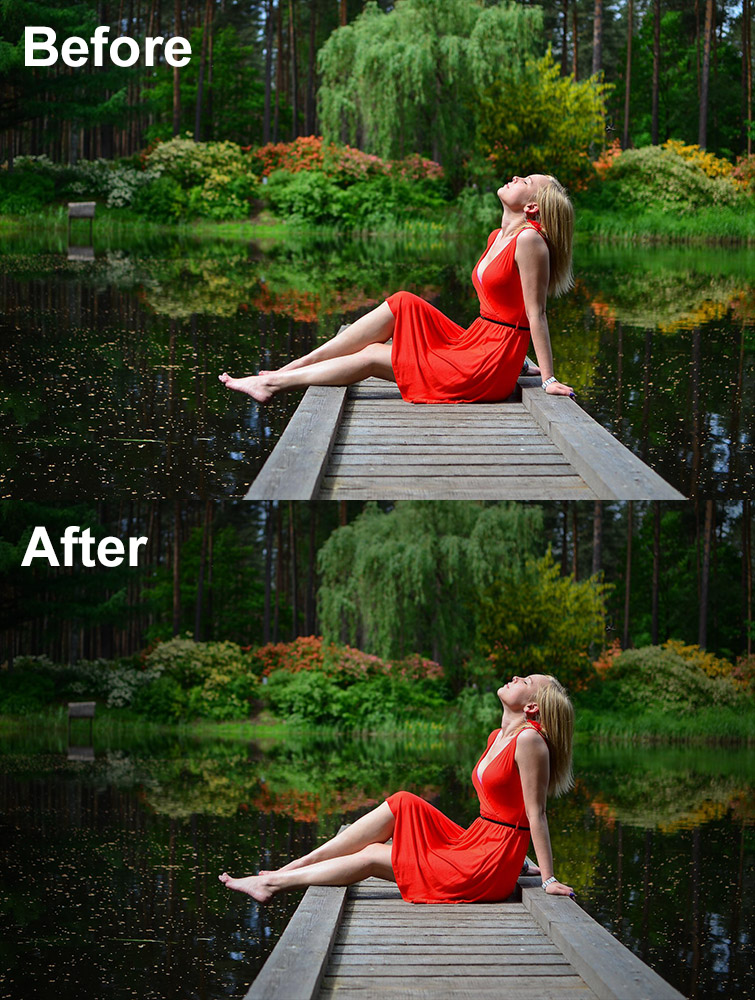
And that’s how you create a custom vignette in Adobe Photoshop. You can see the result in the image below!
I’ve now showed you how to create a custom vignette in Photoshop, but you can also create a custom vignette in Lightroom. Want to know how? Read this blog I wrote about that!
Want to learn more about editing in Adobe Photoshop? Check out my other blogs or take a look at my YouTube channel.
Follow me on Facebook to stay updated! You can find the video tutorial below.
Photoshop
Basics
Photo editing
Creative editing
Camera Raw
Neural filters
Text effects