

Published on May 13, 2022
Create a brush stroke effect
In this blog I’ll show you how to place a photo inside a brush stroke in Adobe Photoshop.
Rather watch the video with instructions? Click here or scroll down the the end of this page.
Download the photos I used:
Portrait
Brush strokes
Step 1: Select brush stroke
Open both the photo you want to edit and the file with the brush strokes. First select the file with the brush strokes.
The image with the brush strokes needs to have a transparent background. The image I’m using doesn’t have a transparent background, so I’ll show you how to remove a (solid) background first. You can skip this step if your image already has a transparent background.
Navigate to ‘Select > Color Range‘. Select ‘sampled colors‘ and click on the background of your image with your color picker to select it.
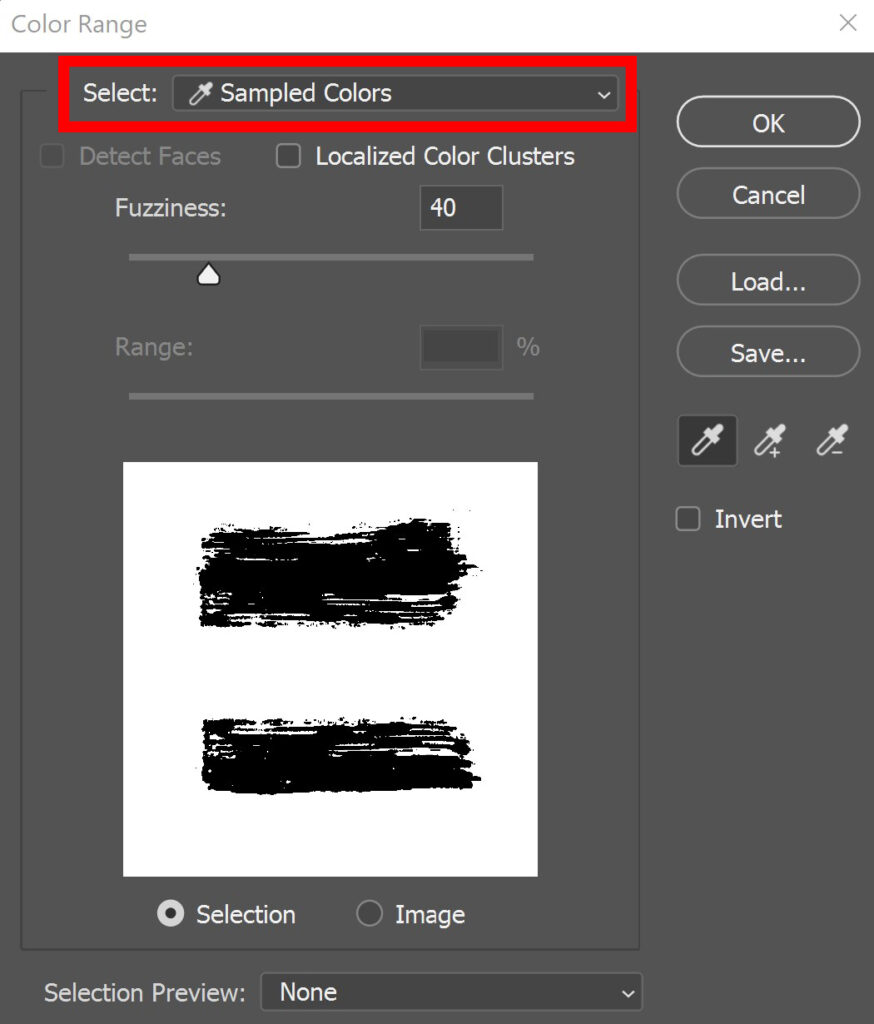
Click OK, the background is now selected. Press the backspace key to remove the background. Then press CTRL+D to deselect. You now have the brush strokes with a transparent background.
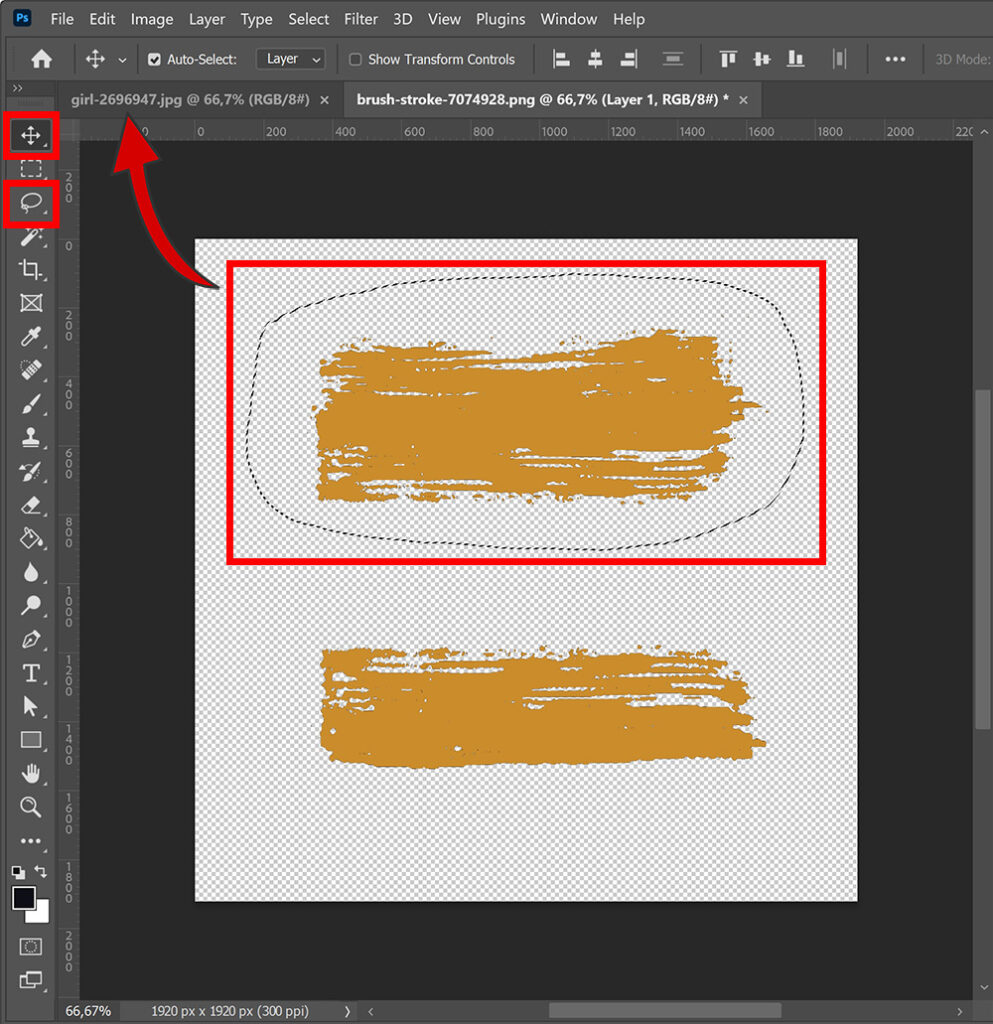
You only need one brush stroke, this image has two. So you need to select the one you want to use (you don’t have to select it if you’re using a different image with only one brush stroke). I use the lasso tool to do that. Make a rough selection around the brush stroke that you want to use.
Select the move tool and drag the (selected) brush stroke towards the image you want to edit. Place it over the photo.
Step 2: Photo inside brush stroke effect
Now that you placed the brush stroke over your image, you need to pick the correct placement. Select the brush stroke layer, then select the move tool and press CTRL+T to activate free transform.
You can now resize the brush stroke and pick the correct placement. To do that, you can lower the opacity of the brush stroke layer a little bit. This way you can see through it, this makes it easier to pick the correct placement.
We’ll place the area underneath the brush stroke inside the brush stroke, so keep that in mind.
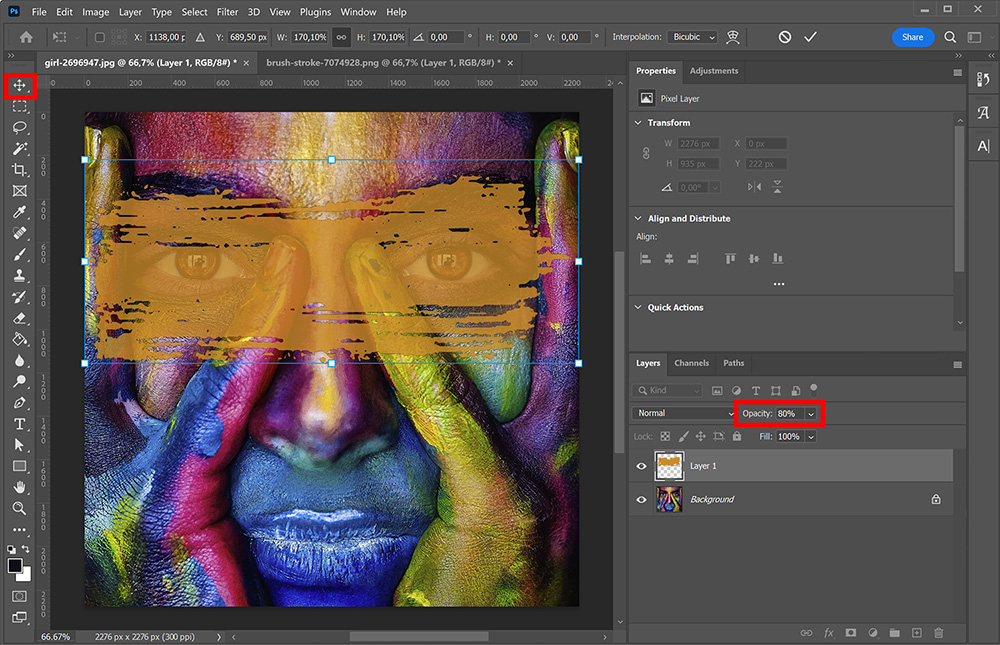
If the brush stroke is in the right place, bring the opacity of that layer back up to 100%.
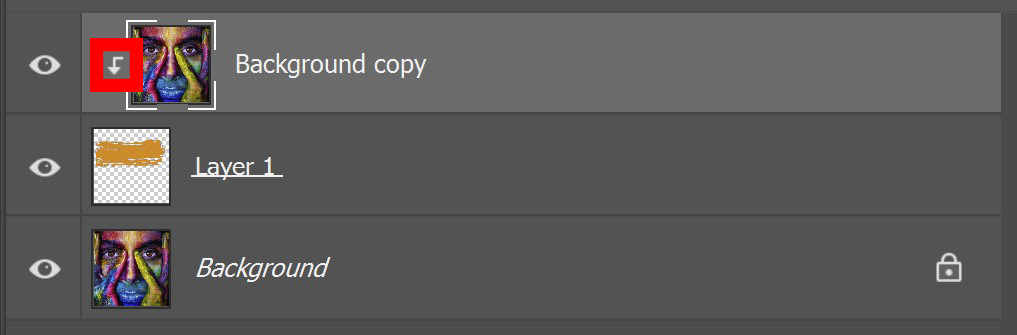
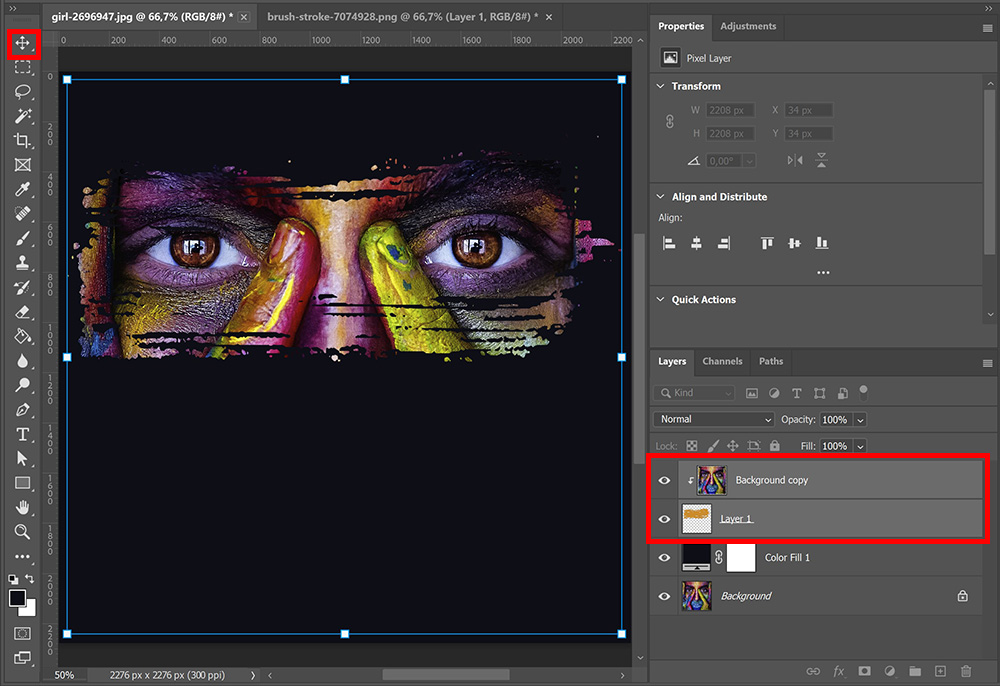
Now select the background layer and press CTRL+J to duplicate it. Drag the copy above the brush stroke layer.
Select the copy and navigate to ‘Layer > Create clipping mask‘ or press ALT+CTRL+G to create a clipping mask. You won’t see any changes, but you’ll see an arrow next to the layer copy. This means that this layer is clipped to the one below (the brush stroke). You will see the changes in the next step.
Step 3: Change background
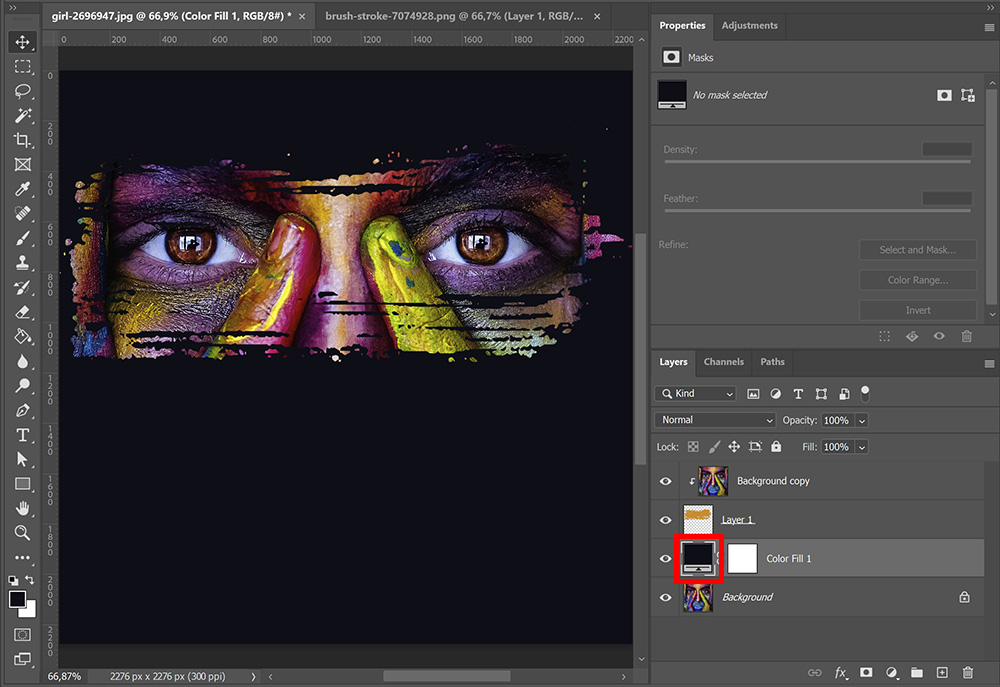
To see the brush stroke effect, you need to change the background. To do that, add a solid color fill layer.

Pick a color you like and click OK. Then drag the color fill layer below the brush stroke layer. You’ll now see the brush stroke effect!
To change the background color, double click on the thumbnail of the color fill layer. You can now pick a different color.
To adjust the size and/or placement of the brush stroke, select both the background copy layer and the brush stroke layer. Then select the move tool and press CTRL+T. You can now move and resize the brush stroke. You can also still change the placement of the photo inside the brush stroke. To do that, only select the background copy layer and move this layer with the move tool.
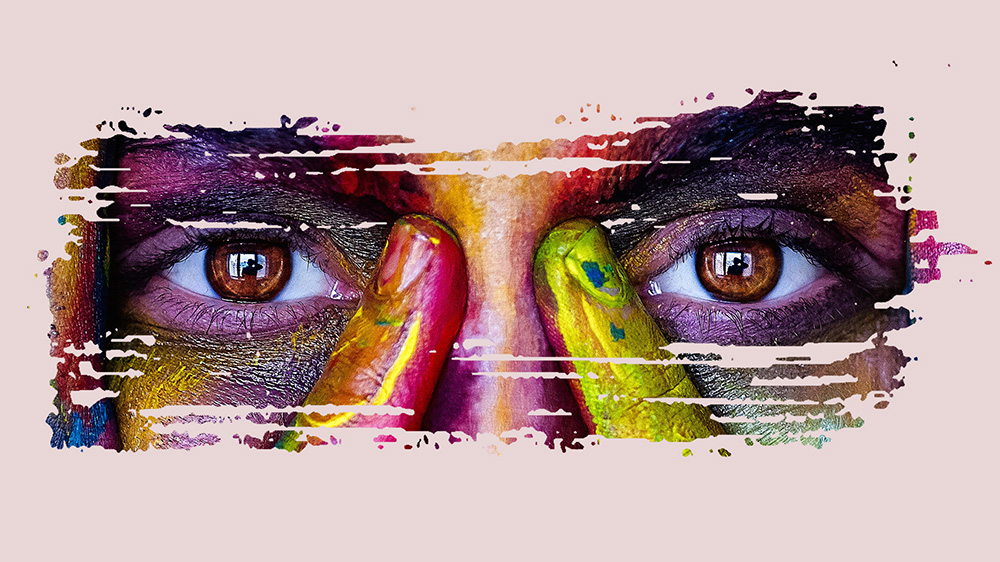
There’s a lot of empty space now, so I use the crop tool to crop the image. And that’s how you create a brush stroke effect in Adobe Photoshop. You can see the result below.
Learn more about Photoshop
Want to learn more about editing in Adobe Photoshop? Check out my other blogs or take a look at my YouTube channel.
Follow me on Facebook to stay updated! You can find the video tutorial below!
Photoshop
Basics
Photo editing
Creative editing
Camera Raw
Neural filters
Text effects