
Published on May 1, 2022
Type text in a circle
In this blog I’ll show you how to type text in a circle in Adobe Photoshop.
Rather watch the video with instructions? Click here or scroll down to the end of this page!
Step 1: Create circle
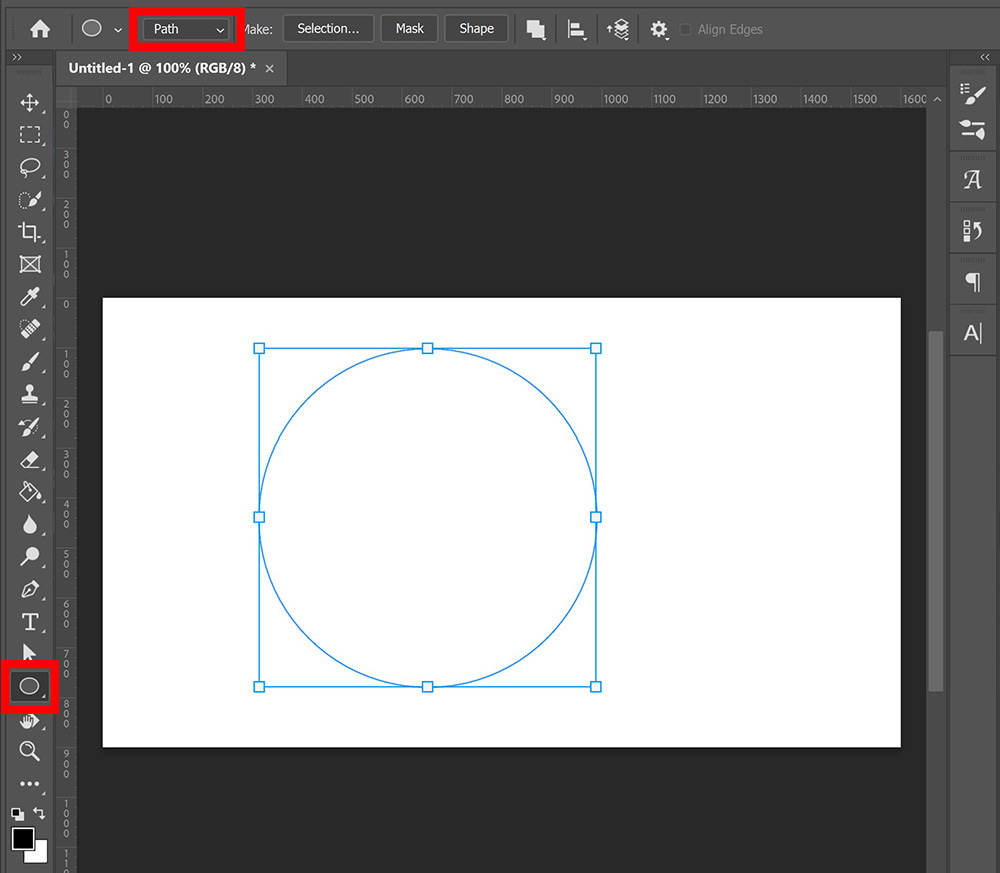
Create a new file. It doesn’t matter what size your file is. Then select the ellipse tool. Select ‘path‘ and create a circle. Hold your SHIFT key while creating the circle to make it perfectly round. It doesn’t matter if the circle isn’t in the middle, we’ll fix that in step 3.
Step 2: Text in a circle
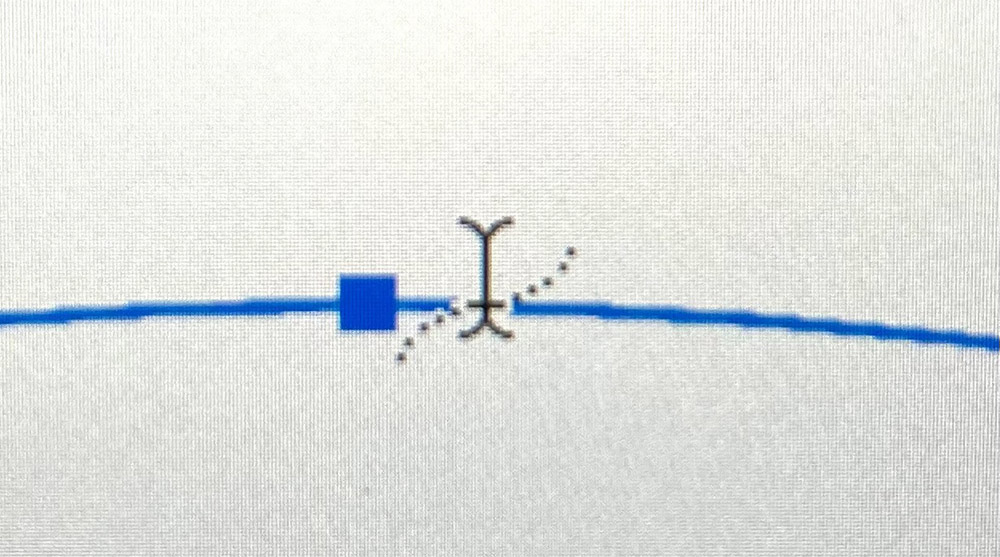
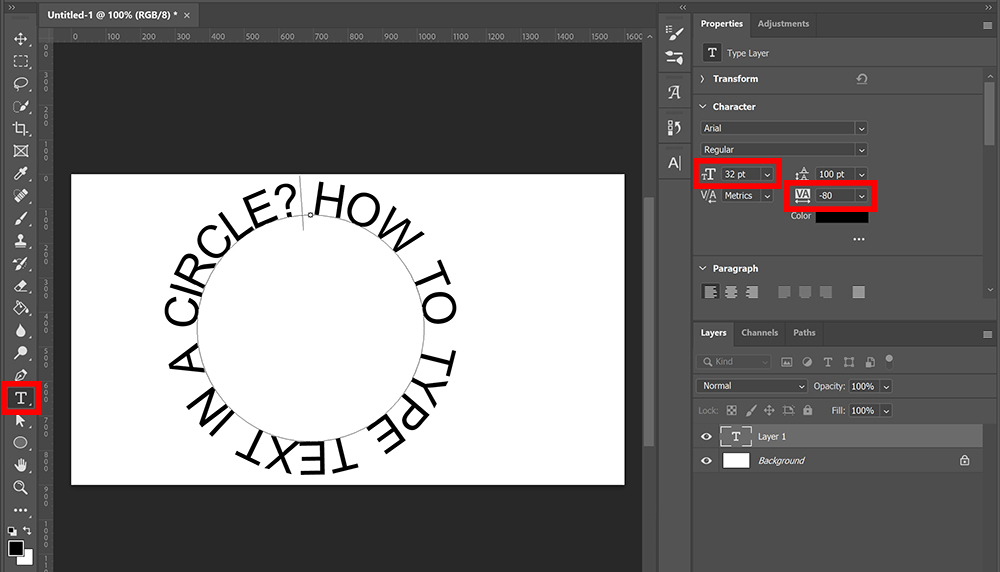
Select the horizontal type tool and pick a font you like. If you hover over your path, you’ll see that the cursor icon changes when you go over the circle. If you see the wave icon (see image below) next to your cursor, it means you’re on the path. Now click on the path to start typing your text. The point where you click is the start of your sentence, so keep that in mind.
You can now type your text. Then press CTRL+A to select your text. Change the tracking to place the letters closer together or further apart. If the words are too close together to read them properly, add an extra space between the words.
Now change the font size to make the text larger or smaller.
Tip: You can click on the number next to the tracking and font size icon to select it. Then press the arrow up or arrow down key to adjust the amount. This way you can easily pick the correct amount. Adjust it until the end of your text meets the beginning, so the circle is closed.
Step 3: Move and resize
Select the move tool and press CTRL+T to activate free transform. You can now resize your text by dragging the points in the corner and you can pick the correct placement.
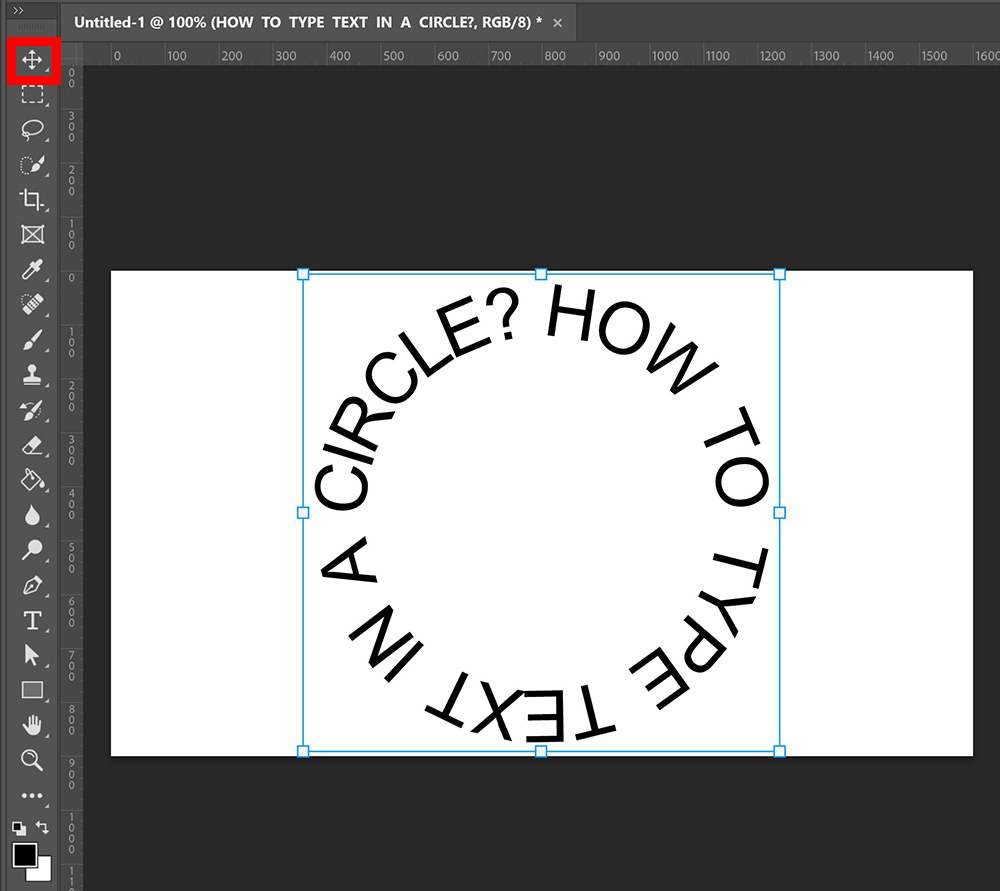
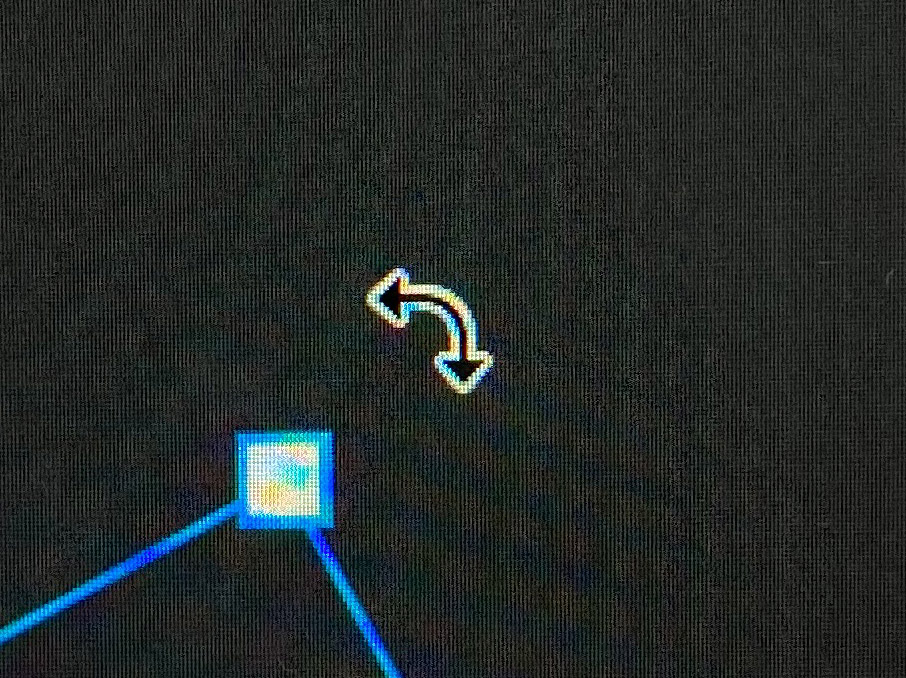
You can also rotate your text. Hover over the corners of your selection until you see the rotate icon (see image below). Then rotate the text.
If you want to change your font, font size or tracking, select the horizontal type tool and select your text. You can now make changes to it, until you’re happy with the result. You can also change the tracking of certain letters or words if these letters are too close together or too far apart, instead of changing it for the entire text. Just select the letters or words that you want to adjust, select the amount next to the tracking icon and use the arrow up and down keys to adjust.
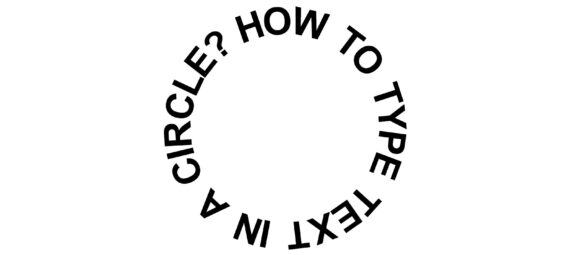
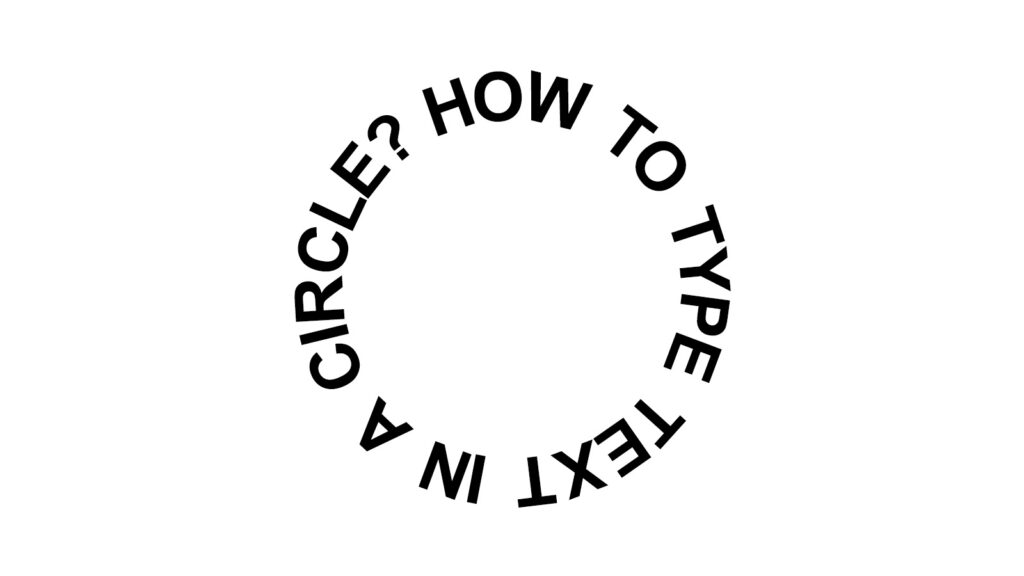
And that’s how you type text in a circle in Adobe Photoshop! You can see the result in the image below.
Want to learn more about editing in Adobe Photoshop? Check out my other blogs or take a look at my YouTube channel.
Follow me on Facebook to stay updated! You can find the video tutorial below!
Photoshop
Basics
Photo editing
Creative editing
Camera Raw
Neural filters
Text effects