
Published on May 21, 2022
How do I mask and edit individual objects?
In this blog I’ll show you a super fast and simple method to mask and edit individual objects in Adobe Photoshop!
Rather watch the video with instructions? Click here or scroll down to the end of this page.
Click here to download the image I used.
Step 1: Mask objects
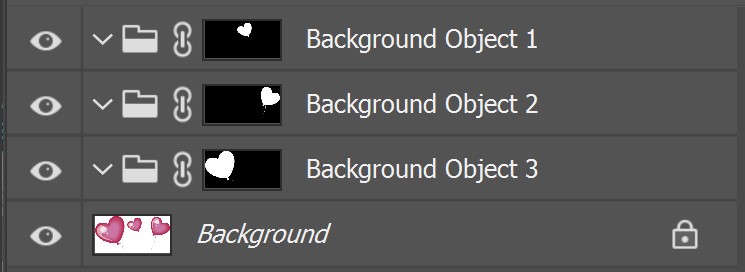
Open the image you want to edit. Right click on the layer with the objects you want to mask (the background layer, in this case) and select ‘mask all objects‘.
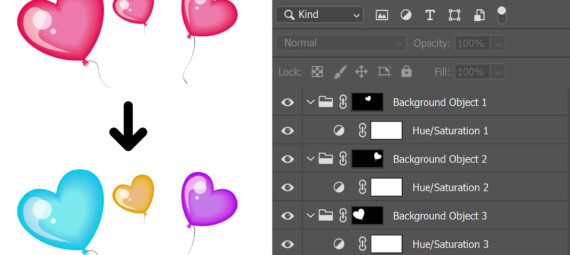
I now have 3 new layers with a mask, one for each balloon. If you look at the mask, you can see which layer belongs to which balloon.
Step 2: Edit objects
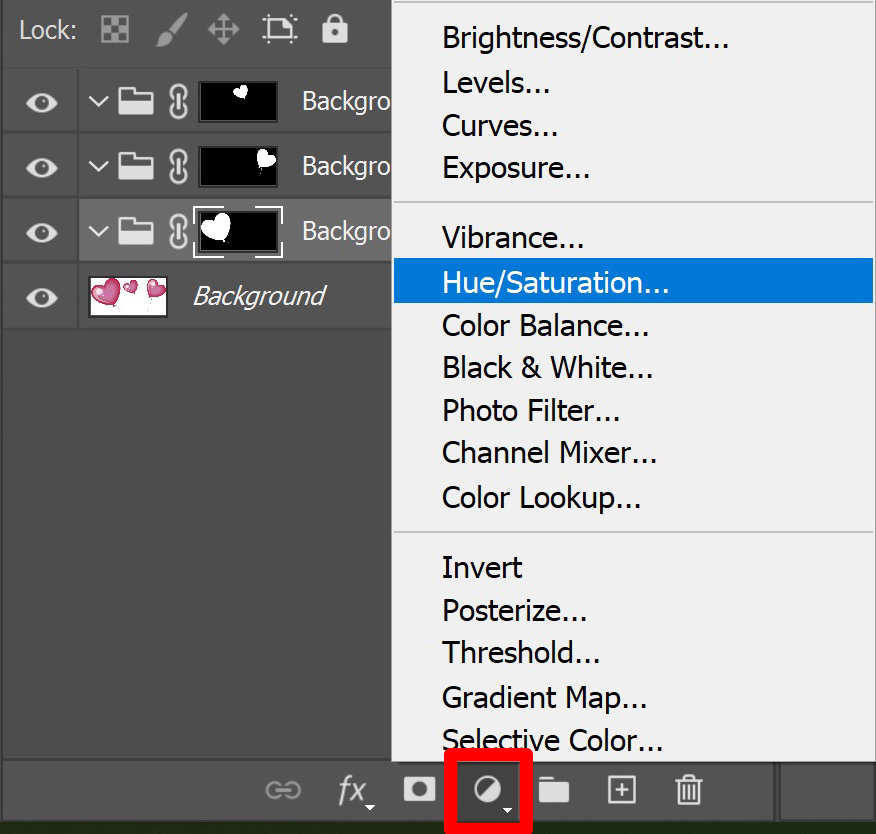
Now that you’ve masked the objects, you can edit them individually. Select the layer of the object you want to edit. You can now add an adjustment layer to edit it. I change the color by adding a hue/saturation adjustment layer.
You can now change the color by adjusting the hue. You can edit the other objects by selecting that layer (with the mask) and adding an adjustment layer too. I now used this to change the color of the individual objects, but you can use this for all kind of adjustments. You can apply all the adjustment layers to these masked objects.
In the image below you can see how I changed the color of each balloon in just a couple of clicks.

And that’s how you quickly mask and edit individual objects in Adobe Photoshop!
Want to learn more about editing in Photoshop? Check out my other blogs or take a look at my YouTube channel.
Follow me on Facebook to stay updated about new blogs and tutorials! You can find the video tutorial below!
Photoshop
Basics
Photo editing
Creative editing
Camera Raw
Neural filters
Text effects