Published on May 6, 2023
How do you convert an image to outlines?
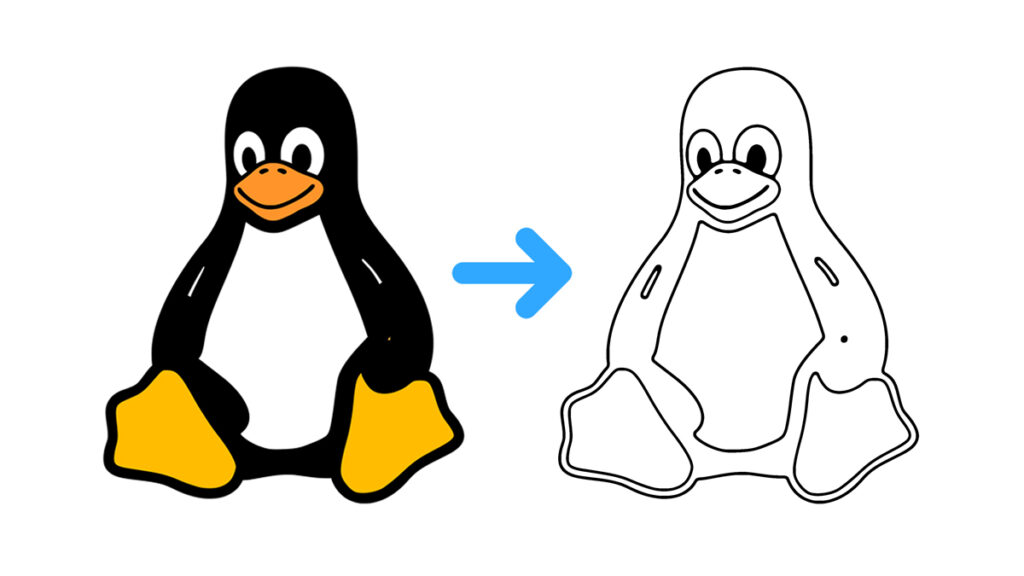
In this blog I’ll show you a simple method to convert an image to outlines in Adobe Photoshop.
Rather watch the video with instructions? Click here to open the video or scroll down to the end of this page.
You can download the image I used here. This is a PNG file with a transparent background. I added a white background (solid color layer) and saved it as a JPG.
Step 1: Prepare image
Open the image you want to edit. Navigate to ‘Image > Mode > Grayscale‘. When you see a notification, select ‘discard’.
Right click on the background layer and select ‘convert to smart object‘. By converting this layer to a smart object, you’ll be able the adjust the settings at any point.
Step 2: Image to outlines
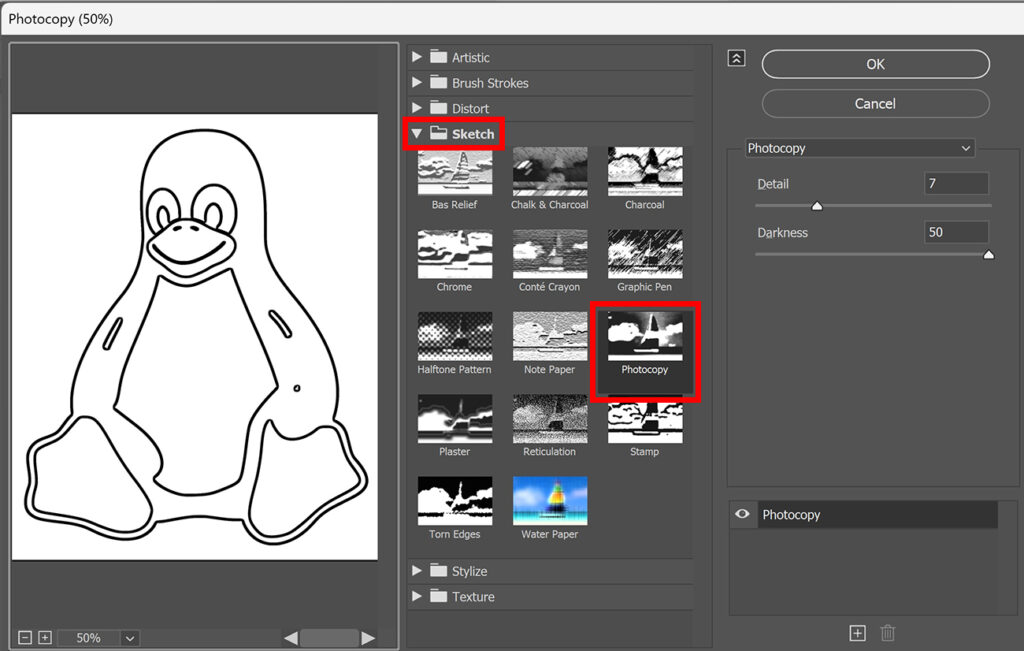
Now navigate to ‘Filter > Filter gallery‘. Under sketch, select ‘photocopy‘.
Adjust the settings until the outlines look good. You can find the settings I used for this image below.

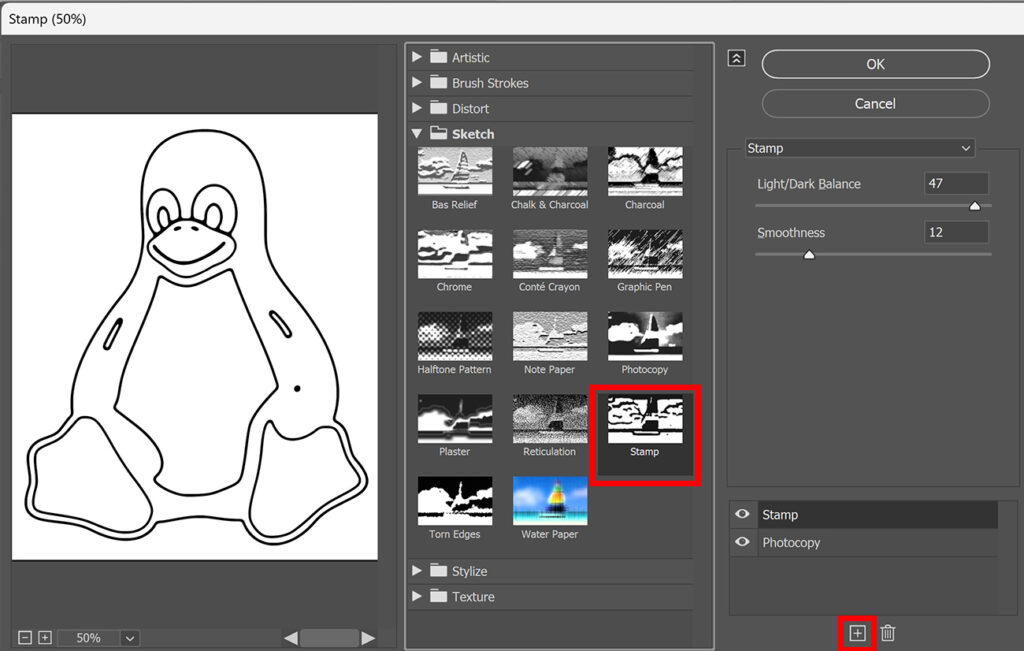
Then click on the + icon and select ‘stamp‘. Again adjust the settings until the outlines look good. You can find the settings I used in the image below. Zoom in when adjusting the smoothness. If the smoothness is too low, the outlines might look rough.

When you’re happy with the way the image looks, click OK. Because you converted the layer to a smart object, you can still adjust the settings. To do that, double click on the ‘filter gallery’ layer.
Step 3: Extra adjustments
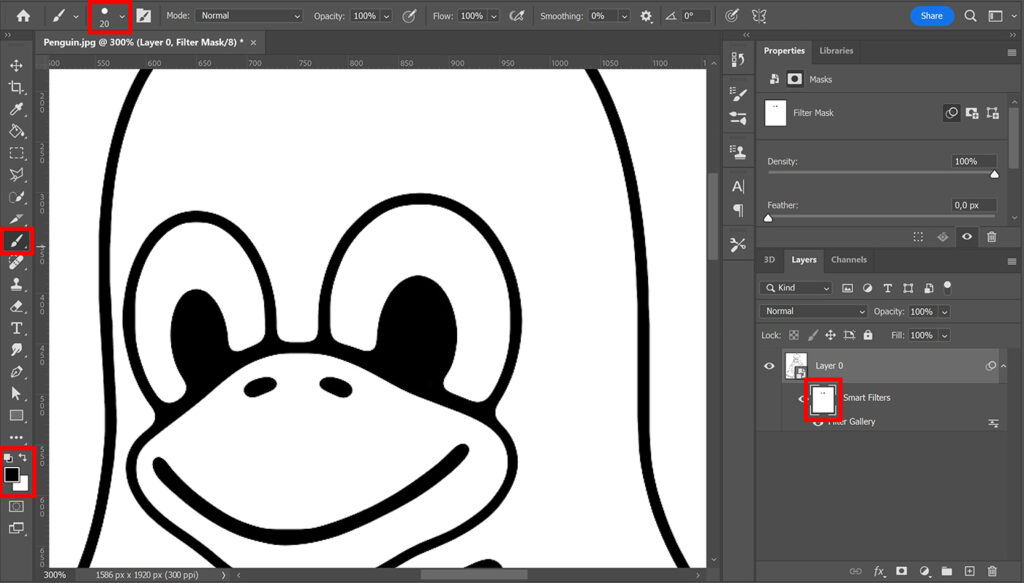
If you look at the image above, you’ll see that the eyes turned white too. I want to make them black again. To do that, select the layer mask of the smart filter.
Then select the brush tool, use a hard round brush. Make the foreground color black and brush over the area you want to make black again.
Tip: Use the [ and ] keys to adjust the size of the brush.

I now used this to make the eyes black again, but you can also use this to make other areas black again. As long as the area was black before adding the filters, you can fix it this way.
And that’s how you convert an image to outlines in Adobe Photoshop!

More methods to convert image to outlines
I now showed you how to convert an illustration to outlines with the filter gallery, but you can also use other methods:
- Use blending options > Read this blog.
- Change the blend mode and use a levels layer > Read this blog.
- Use a threshold layer > Read this blog.
Learn more about Photoshop
Check out my other blogs or my YouTube channel if you want to learn more about editing in Adobe Photoshop!
Follow me on Facebook if you want to stay updated about new blogs and tutorials! You can find the video with instructions below.
Photoshop
Basics
Photo editing
Creative editing
Camera Raw
Neural filters
Text effects

