
Published on May 26, 2022
Create a glowing neon shape
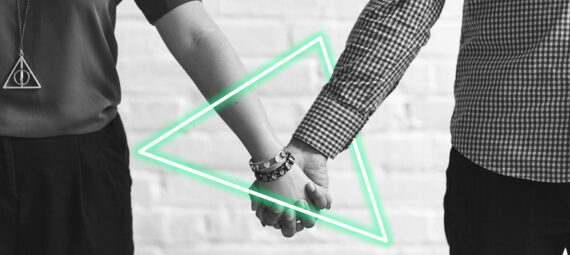
In this blog I’ll show you how to place a glowing neon shape behind an object or subject in Adobe Photoshop.
Click here to download the image I used.
Step 1: Select subject
Open the photo you want to add the glowing shape to. I convert the photo to black and white (press SHIFT+CTRL+U) because I like that in combination with the colored shape. You don’t have to do this if you want a colored image though.
Press CTRL+J to duplicate the background layer. Use the quick selection tool to select your subject.
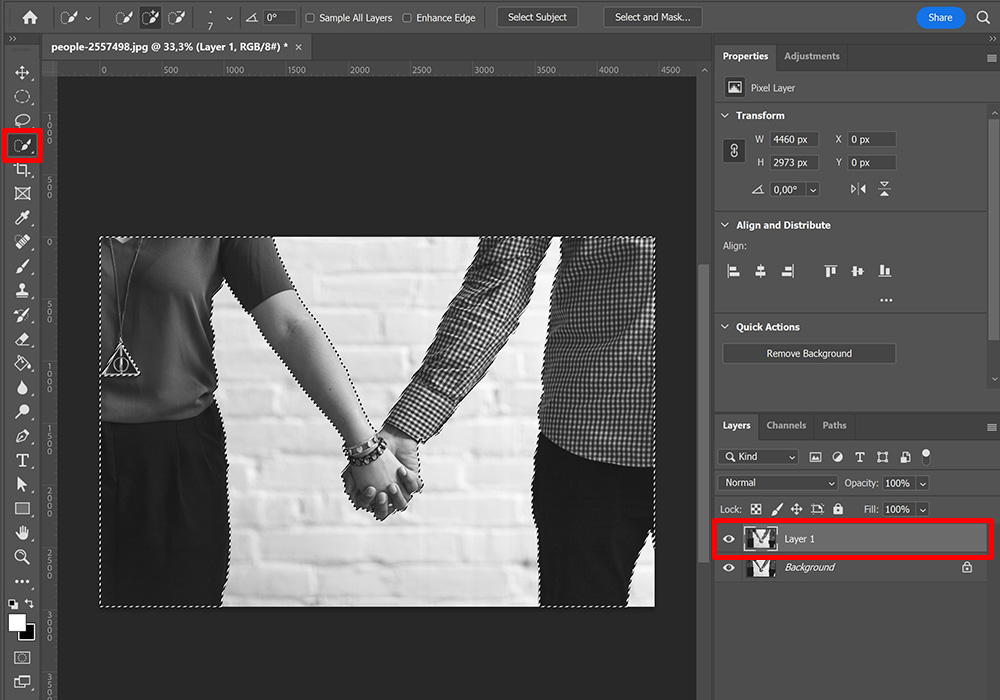
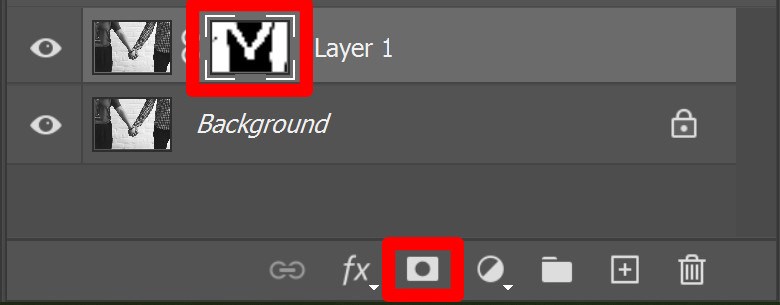
Add a layer mask to layer 1. You can see the subject you just selected is masked now.
Step 2: Create shape
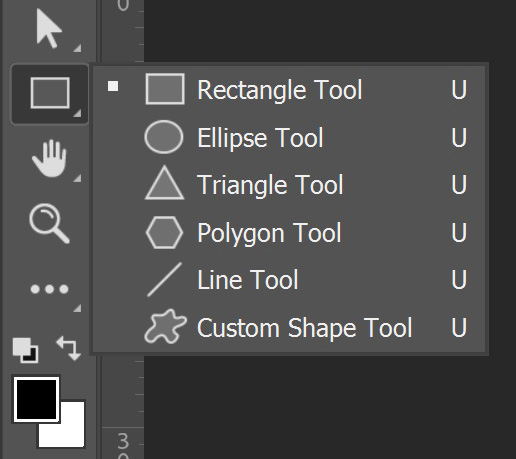
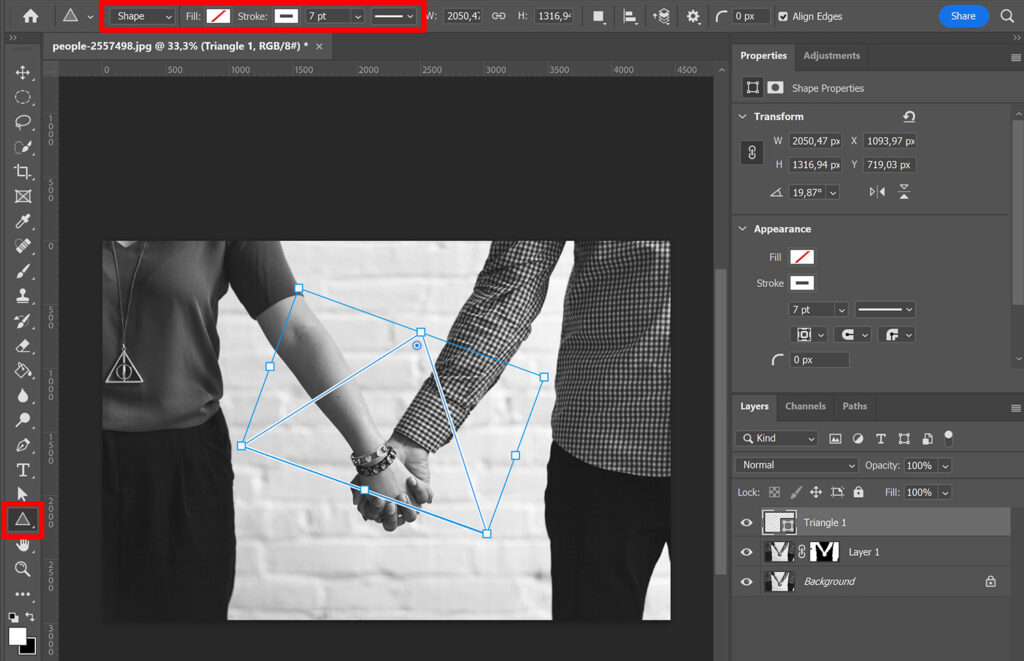
Depending on the shape you want to create, pick one of these tools. I want to create a triangle, so I use the triangle tool.
Change the tool mode to shape. Select ‘no color‘ for the shape fill and make the stroke color white.
I use a stroke width of 7 pixels. If you want a thinner line, use a lower amount of pixels. To create a thicker line, use a higher amount of pixels.
When your shape is done, right click on the shape layer and convert it to a smart object.
Step 3: Glowing neon shape
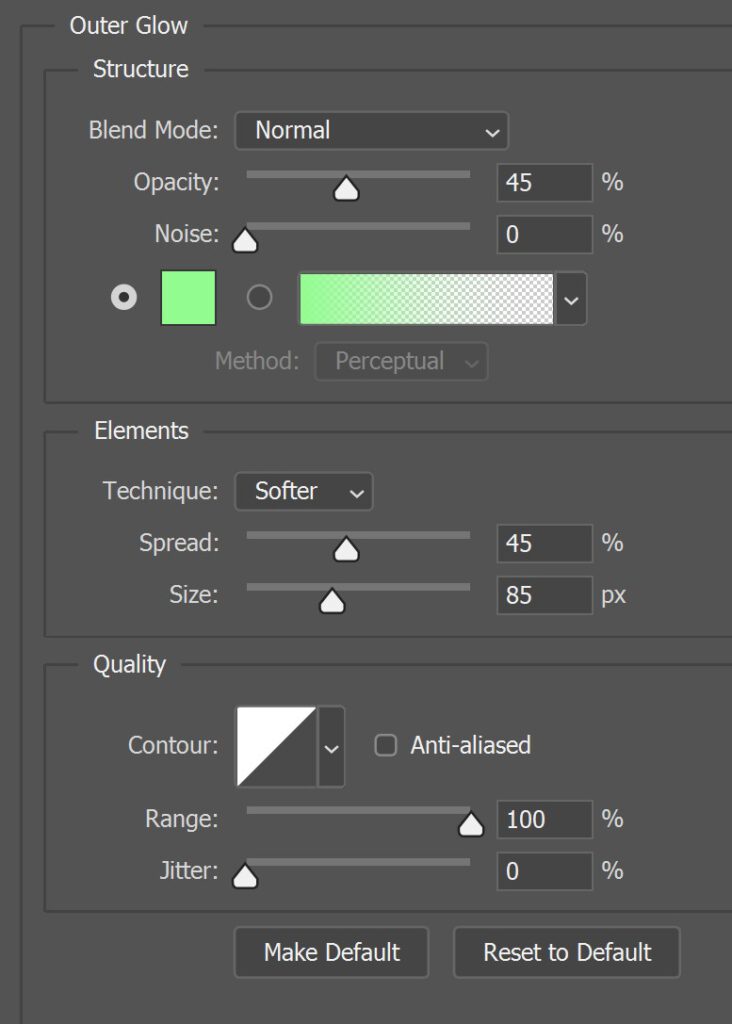
Select the shape layer. Then click on the fx icon below your layers and select ‘outer glow‘ (or double click on the shape layer to open the layer style panel and then select outer glow).
You can find the settings I used in the image below. You don’t have to use the exact same settings, try out what looks good on your image.
Step 4: Glowing neon shape behind subject
The shape is now in front of your subject. To place it behind the subject, drag the shape layer below the one with the layer mask.

Your shape is now fully behind your subject. If this is the effect you’re after, you’re done now. To make changes to the glow, double click ‘outer glow’ in your layer panel.
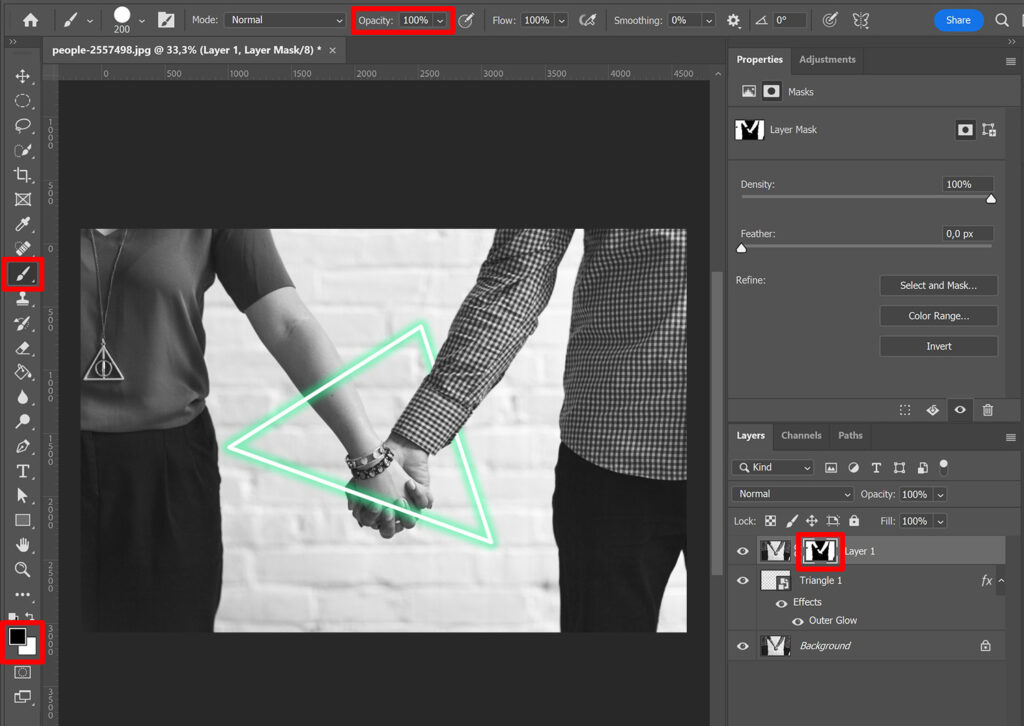
You can also partially place the shape in front of your subject. To do that, select the layer mask. Then select the brush tool and change the foreground color to black. The opacity of the brush should be 100%.
Then brush over the area where you want the shape to be in front of the subject. If you don’t like it, press CTRL+Z to undo.
And that’s how you create a glowing neon shape and (partially) place it behind your subject in Adobe Photoshop. You can see the result below!

Learn more about Photoshop
Want to learn more about editing in Adobe Photoshop? Check out my other blogs or take a look at my YouTube channel.
Follow me on Facebook to stay updated about new blogs and tutorials!
Photoshop
Basics
Photo editing
Creative editing
Camera Raw
Neural filters
Text effects