
Published on January 13, 2023
Create melting objects (liquify something)
In this blog I’ll show you how to liquify something to make it look like something is melting in Adobe Photoshop.
Rather watch the video with instructions? Click here or scroll down to the end of this page.
You can download the photo I used here.
Step 1: Select object
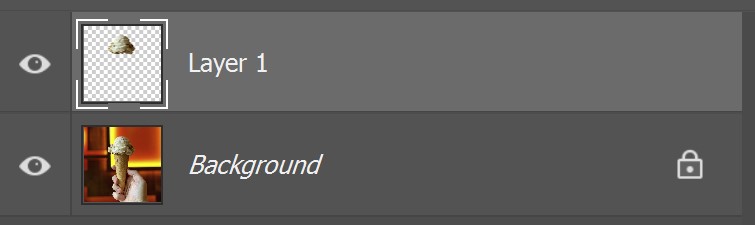
Open the photo that you want to edit. Then select the object that you want to liquify. I’m using the quick selection tool for that. If you prefer another tool or method to select it, that’s fine too! I want to make the scoop of ice cream melt, so I’m selecting that.
Once you’ve selected the object, press CTRL+J to duplicate the selected area. You now have a new layer with only the object and a transparent background.
Step 2: Liquify something
Select the new layer with only the object you want to liquify. Then navigate to ‘Filter > Liquify‘.
Select the forward warp tool. If you brush down from the top, this will also affect the top of the object. I only want to liquify the bottom of the object though (press CTRL+Z to undo if this happens).
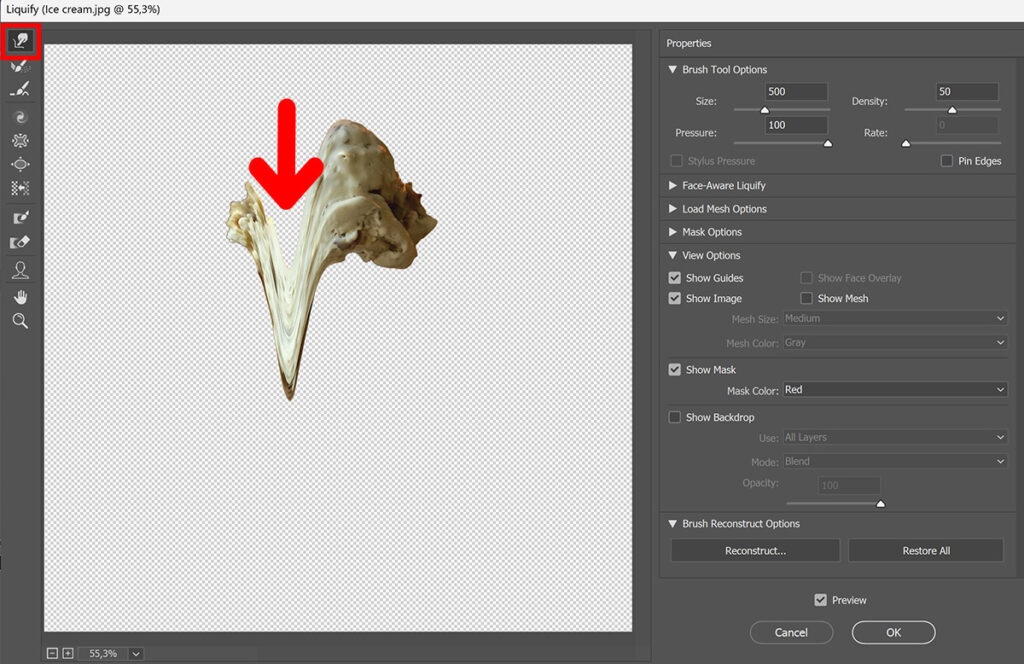
Instead brush down from the bottom of the object. Use different brush sizes for a different effect. A larger brush size creates a longer drip and a smaller brush size creates a small drip. You can use the [ and ] keys to adjust the brush size.
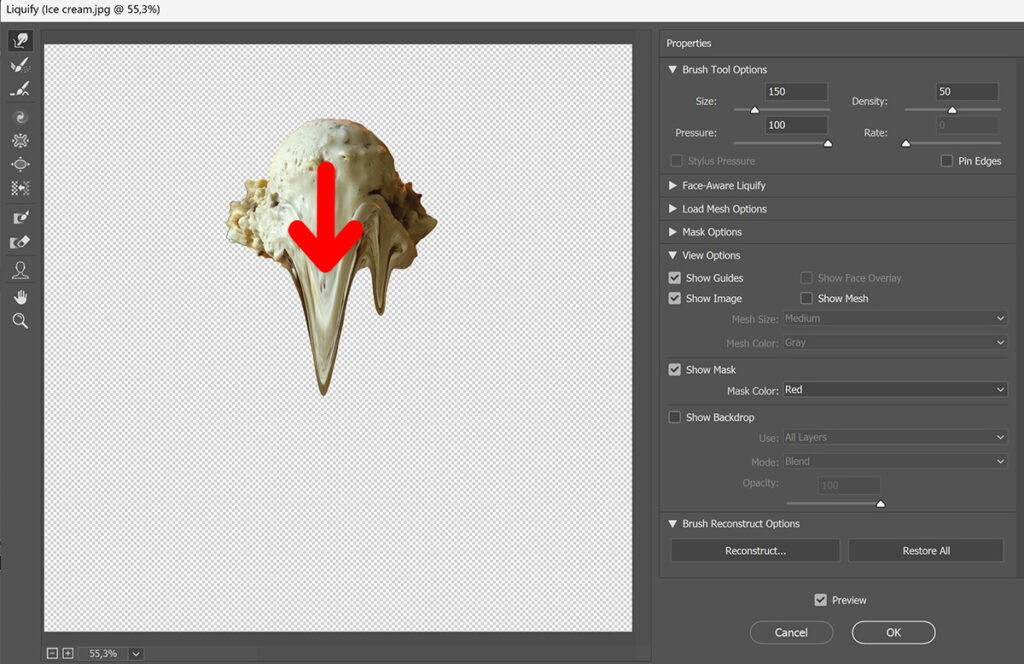
Continue creating drips until the object looks like it’s melted and you’re happy with the effect. Then click OK.
If you want to adjust the effect, select the layer with the liquified object and navigate to ‘Filter > Liquify’ again to make changes.
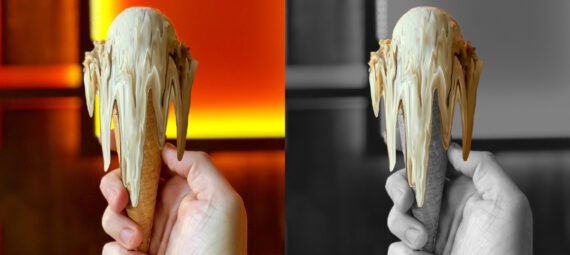
Step 3: Black & white background
You can make the background black & white to make the melted object even more striking. If you like the effect with a colored background, you can skip this step.
If you do want to make the background black & white, select the background layer. Then navigate to ‘Image > Adjustments > Desaturate‘ (shortcut: SHIFT+CTRL+U). The background is now black & white.
And that’s how you liquify something to create a melted effect in Adobe Photoshop!

Learn more about editing in Photoshop
If you want to learn more about editing in Adobe Photoshop, also check out my other blogs or take a look at my YouTube channel.
To stay updated, follow me on Facebook! You can find the YouTube video with instructions below.
Photoshop
Basics
Photo editing
Creative editing
Camera Raw
Neural filters
Text effects