Published on January 21, 2022
How to create a sphere effect in Photoshop?
In this blog I’ll show you a simple and fast method to create a (glass) sphere effect in Adobe Photoshop.
If you want to download the image I’m using, click here. Now, let’s begin!
Step 1: Selection
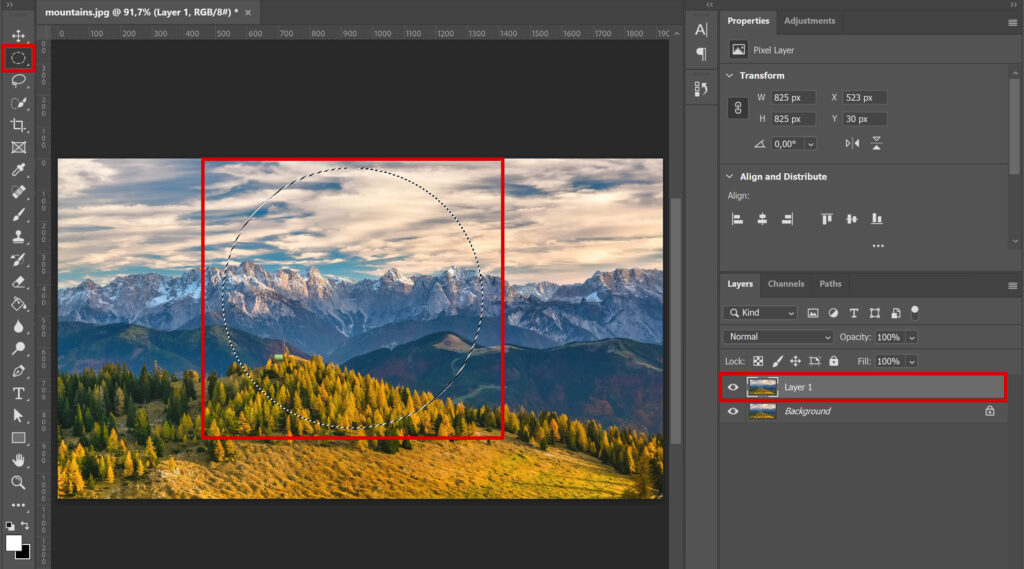
Open the image you want to edit and press CTRL+J to duplicate the background layer. Then select the layer copy and select the elliptical marquee tool.
Make a round selection. To make it perfectly round, hold your SHIFT key while making the selection. Use your arrow keys to move the selection and pick the correct placement.

The sphere effect will be inside of this selection. If your selection isn’t good in size or shape, simply press CTRL+D to remove the selection and make a new selection.
Step 2: Sphere effect
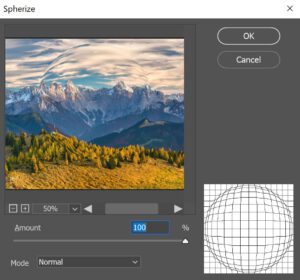
Once your selection is done, navigate to ‘Filter > Distort > Spherize‘. The window shown in the image below will open. Increase the amount all the way to 100% for the best effect. You can see a preview of what it looks like in this spherize window. Then press OK.

You can enhance the effect by repeating this process. You can even repeat it multiple times if you want. Navigate to ‘Filter > Distort > Spherize’ again. You don’t have to use an amount of 100% again, look at the preview to determine the right amount.
Make sure the selection you made with the elliptical marquee tool is still active when you do this. If it’s no longer active, open your history panel and go back one step before ‘deselect’. The selection should now be back. Otherwise the entire image will be spherized.
If you’re happy with the effect, press CTRL+D to deselect.
And that’s how you create a (glass) sphere effect in Adobe Photoshop. You can see the result below!

Want to learn more about Adobe Photoshop? Check out my other blogs or take a look at my YouTube channel.
Follow me on Facebook to stay updated about new blogs and tutorials!
Photoshop
Basics
Photo editing
Creative editing
Camera Raw
Neural filters
Text effects

